") |
The Interactive Drafting workbench enables you to create 2D
geometry.
As 2D geometry commands work exactly as in the Sketcher
workbench, this section of the documentation actually points to the
Sketcher User's Guide. As such, the information detailed in this
section is presented in a Sketcher context. You should note that the
Sketcher User's Guide contains images that correspond to the
Sketcher workbench and therefore illustrate geometry in an
environment that is different from the Interactive Drafting environment
(symbols, background color, for example). |
| |
Before you begin creating 2D geometry
Before you begin creating 2D geometry, make sure you are familiar with
such concepts as:
|
| |
Remember the following points:
|
|
 |
Create
a point: Use the Tools Palette or click the point horizontal and
vertical coordinates. |
|
 |
Create
a point using coordinates: Enter in the Point Definition dialog box
cartesian or polar coordinates. |
|
 |
Create
an equidistant point: Enter in the Equidistant Point Definition dialog
box the number and spacing of the points to be equidistantly created on a
line or a curve-type element. |
|

|
Create
a point using intersection: Create one or more points by intersecting
curve type elements via selection. |
|

|
Create
a point using projection: Create one or more points by projecting
points onto curve type elements. |
|
 |
Create
a line: Use the Tools Palette or click the line first and second
points. |
|
")
|
Create
an infinite line: Use the Profile toolbar or click the infinite line
first and second points. |
|
 |
Create
a bi-tangent line: Click two elements one after the other to create a
line that is tangent to these two elements. |
|
")
|
Create
a bisecting line: Click two lines. |
 |
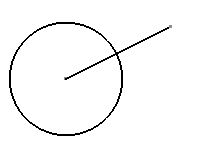
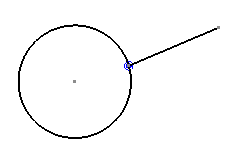
Create
a line normal to a curve: Click a point and then the curve. |
|
") |
Create
a circle: Use the Tools Palette or click to define the circle center
and then one point on the circle. |
|
 |
Create
a three point circle: Use the Tools Palette or click to define the
circle start point, second point and end point one after the other. |
|
 |
Create
a circle using coordinates: Use the Circle Definition dialog box to
define the circle center point and radius. |
|
 |
Create
a tri-tangent circle: Click three elements one after the other to
create a circle made of three tangent constraints. |
|
 |
Create
an arc: Use the Tools Palette or click to define the arc center and
then the arc start point and end point. |
|
 |
Create
a three point arc: Use the Tools Palette or click to define the arc
start point, end point and second point one after the other. |
|
 |
Create
a three point arc with limits: Use the Tools Palette or click to define
the arc start point, end point and second point one after the other. |
|
 |
Create
an ellipse: Use the Tools Palette or click to define the ellipse
center, major semi-axis and minor semi-axis endpoints one after the other. |
|
 |
Create
a profile: Use the Tools Palette or click to define lines and arcs
which the profile may be made of. |
|
 |
Create
a rectangle: Use the Tools Palette or click the rectangle extremity
points one after the other. |
|
 |
Create
an oriented rectangle: Use the Tools Palette or click to define a first
side for the rectangle and then a point corresponding to the rectangle
length. |
|
 |
Create
a parallelogram: Use the Tools Palette or click to define a first side
for the parallelogram and then a point corresponding to the parallelogram
length. |
|
 |
Create
an elongated hole: Use the Tools Palette or click to define the center
to center axis and then a point corresponding to the curved oblong profile
length and angle. |
|
 |
Create
a cylindrical elongated hole: Use the Tools Palette or click to define
the center to center circular axis and then a point corresponding to the
curved oblong profile length and angle. |
|
 |
Create
a keyhole profile: Use the Tools Palette or click to define the center
to center axis and then both points corresponding to both radii. |
|
 |
Create
an hexagon: Use the Tools Palette or click to define the hexagon center
and dimension. |
 |
Create
centered rectangles: Use the Tools palette to define the rectangle
center and dimensions. |
 |
Create
centered parallelograms: Use the Tools palette to define a first side
for the parallelogram and then a point corresponding to its length. |
|
 |
Create
a spline: Click the points through which the spline will go. |
|
 |
Connect
elements: Click the points through which the spline will go. |
|
 |
Create
a parabola by focus: Click the focus, apex and then the parabola two
extremity points. |
|
 |
Create
a hyperbola by focus: Click the focus, center and apex, and then the
hyperbola two extremity points. |
|
 |
Create
a conic: Click the desired points and eccentricity for creating an
ellipse, a circle, a parabola or a hyperbola, using tangents, if needed. |
") in the Tools toolbar.
in the Tools toolbar.