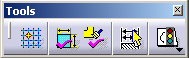
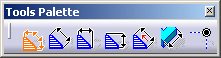
Tools Toolbar
The Tools toolbar displays a number of options. This toolbar is situated at the bottom right of screen. If you cannot see it properly, just undock it.
 |
-
") Snap to Point
Snap to Point -
") Create Detected Constraints (See chapter on
Constraints)
Create Detected Constraints (See chapter on
Constraints) -
") Create Associative Dress-up
Create Associative Dress-up -
 Dimension system selection mode (See
Creating
Chained Dimension Systems,
Creating
Cumulated Dimension Systems,
Creating
Stacked Dimension Systems)
Dimension system selection mode (See
Creating
Chained Dimension Systems,
Creating
Cumulated Dimension Systems,
Creating
Stacked Dimension Systems)
-
") Sketch Solving Status (See
Analyzing
Sketches)
Sketch Solving Status (See
Analyzing
Sketches)
Snap to Point
When activated, this option makes your geometry (as well as 2D components) begin or end on the points of the grid. As you create geometry, points are forced to the intersection points of the grid. Note that this option is also available via Tools > Options > Mechanical Design > Drafting > General tab (Snap to point check box).
In this example, the black spline was created with the Snap to Point option activated. The points are on the grid.
Conversely, the highlighted spline was created with the option deactivated. The points are not necessarily on the grid.
")
|
|
You can use autodetection even if this option is activated |
|
|
From V5 R15 onwards, the Snap to Point option no longer
applies to annotations. |
Create Associative Dress-up
|
|
This command is active provided you installed a Generative Drafting license. |
To restore 3D graphical dress-up in a view, right-click on the view frame to open the contextual menu then select View object > Restore Properties. For more information, read the Restoring Overloaded Properties/Deleted Elements user task in the Generative Drafting User Guide.
By default, the Create Associative Dress-up icon is activated.
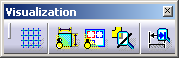
Visualization Toolbar
 |
-
 Grid
Grid -
") Show Constraints (See chapter on Constraints)
Show Constraints (See chapter on Constraints) -
 Display View Frame as Specified for Each View
 -
") Filter Generated Elements
Filter Generated Elements -
 Analysis Display Mode
Grid
Display View Frame as Specified for Each View
When activated, this option lets you display the view frame which is available for each view, as specified in each view's properties (Edit > Properties, View tab, Display View Frame check box). In this case:
-
the view frame will be displayed for all views for which the Display View Frame check box is selected.
-
the view frame will be hidden for all views for which the Display View Frame check box is cleared.
Deactivating this option hides the view frame for all
views.
Filter Generated Elements
This option lets you differentiate 2D elements (Interactive Drafting workbench) from the geometrical elements generated from the 3D (Generative Drafting workbench) within the same view. This can prove very helpful when you need to add purely interactive elements onto generated views.
Open the GenDrafting_part.CATDrawing document.
This command is active provided you installed a Generative Drafting license.
-
Click Filter Generated Elements
.
The generated geometrical elements appear in gray (all other elements
including generated dress-up elements remain black).
-
Create 2D elements in the front view. For instance, create a diameter dimension and a datum feature.
The 2D elements appear in black.")
Analysis Display Mode
This option lets you visualize the colors assigned to the different types of dimensions.
These displayed colors correspond to the colors customized in the Options dialog box. To modify these colors, go to Tools > Options > Mechanical Design > Drafting (Dimension tab). Then select the Activate analysis display mode check box and, if needed, click the Types and colors switch button to assign the desired color(s) to the desired dimension types.
|
|
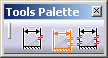
Tools Palette
The Tools Palette appears whenever you select a command for which specific options or value fields are available. This enables you to know immediately when tools are available for a command.
|
|
|
|
|
|
|
|
 |

|
|
The options or fields available in the Tools Palette depend on the command you selected. Only a few examples are provided here. |
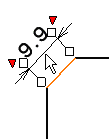
Example when creating dimensions
For example, if you select the Dimensions command, the Tools Palette may provide the following options:

")


 Projected/Forced/True Length Dimension
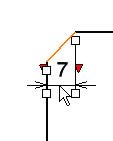


Example when creating geometry
Another example would be when creating a line. The values of the elements you are sketching appear in the Tools Palette as you move the cursor. In other words, as you are moving the cursor, the Length (L) and Angle (A) fields display the coordinates corresponding to the cursor position.
|
|
The Horizontal (H) and Vertical (V) fields are optionally displayed, depending on whether the Show H and V fields in the Tools Palette option is selected in Tools > Options > Mechanical Design > Drafting > Geometry tab. |

You can also use these fields for entering the values of your choice. In the following scenario, you are going to sketch a line by entering values in the appropriate fields.
-
Click the Line
 icon from the Geometry Creation toolbar.
The Tools Palette displays information on value fields.
-
Enter the length (L) of the line and press enter.
-
Enter the value of the angle (A) between the line to be created and the horizontal axis and press enter. The line is created.
Make the Most of Multi-selection
-
Multi-select 2D elements. For example, four circles.
")
-
Click the desired command, Threads
") for example.
for example. Four threads are automatically applied to the selected circles.
")
![]()