In this task you will learn how to fill the space between three or more surfaces.
You can fill the space between three or more elements (up to nine). The elements can be either curves (only one intersection between the curves is allowed) or any surface type element. These elements must be contiguous in only one point.
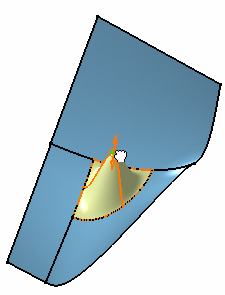
Open the Fill2.CATPart document.
-
Click the FreeStyle Fill icon

The Fill dialog box displays:
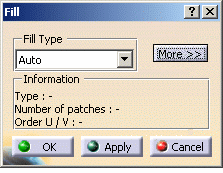
-
Choose the Fill Type:
Analytic: one or more filling surfaces will be created, depending on the number of elements.
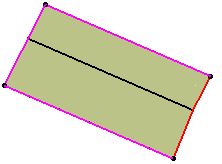
If there are four elements, one surface will be created with supporting edges as borders
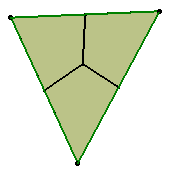
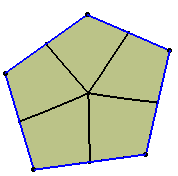
If there are three, five or more elements, two cases can occur:
several surfaces (four-side surfaces) with a barycenter point will be created: there will be as many surfaces as there are continuity changes:
- one or n surface(s) (four-side surfaces) will be created if a continuous continuity between the elements is respected.
- Power: one filling surface is created. All continuity
types are available using the contextual menu
- Auto: the best orders and number of patches will be chosen by the application depending on the inputs
-
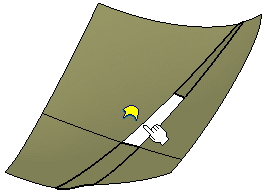
Select the boundary of the first surface.
-
Select the boundary of an adjacent surface.
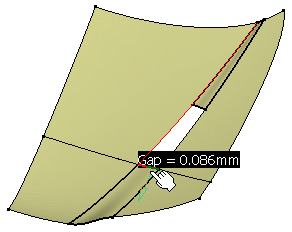
Information on existing gaps between supporting edges is displayed in the 3D geometry.
The maximum gap value allowed is 0.1mm.
-
Select the boundary of all other surfaces, still going from one surface to its direct neighbor.
Please refer to Selecting a Support for further information.

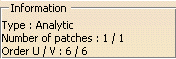
Here the most appropriate type for this fill is the Analytic type.
-
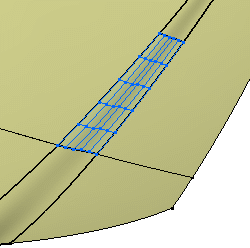
Check the Furtive Display option from the Dashboard to display the control points and visualize the number of orders.
-
Click More>> to display further options:
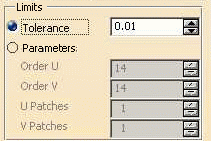
- Limits, that is constraints to be taken into account when
computing the fill surface. You can specify whether it should comply with
a given tolerance, or it should have a maximum order
in U and V. The resulting surface will lie within these constraints.
- U/V Orders: number of control
points by patch
The minimum orders 2 / 2 for all fill types - U/V Patches
- Tolerance: the maximum tolerance is 0.1. The smaller the tolerance is, the more precise the created fill surface is.
- U/V Orders: number of control
points by patch
Please refer to the Customizing section.
However, if you create a new fill, the maximum order value will be the one defined in Tools > Options > Shape > FreeStyle.
The tolerance value is comprised between 0.001 mm and 0.1 mm. May you define a higher value, the maximum value would still be 0.1 mm.
Options in the Limits frame are grayed in the case of an Analytic type with three, five, or more input elements.
-
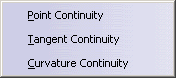
Right-click the displayed text to edit and modify the continuities.
You can choose from Point, Tangent or Curvature continuity, depending on the geometry configuration. Tangent continuity is available only when filling a closed contour.
-
Click OK to create the filling surfaces.
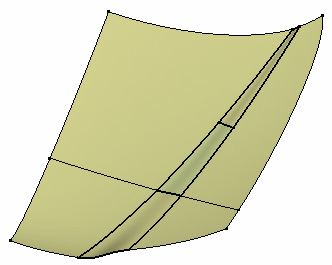
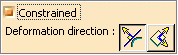
Use the manipulators at the center point (the barycenter point) to deform the generated surfaces. The deformation depends on the chosen icon: Normal to the Surface Direction, or according to the Compass Direction.
While deforming, set continuities are retained.
- Please refer to the Creating Filling Surfaces chapter to have further information on the deformation direction.
- Available capabilities from the Dashboard, and/or specified through the FreeStyle Settings, are: datum creation, temporary analysis, auto detection (Snap On Edge option only), attenuation, continuities and furtive display.
![]()