Platform confusion
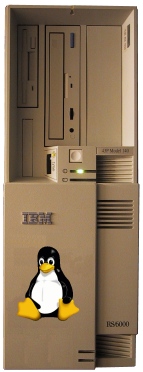
The first thing to note is that the 7043-140 is a PReP machine.
Some confusion has arisen because there was a patch some time ago that
frigged the kernel to bring the machine up in CHRP mode. This never really
worked very well (although I was overjoyed at the time because it was the
first time I got Linux going on my machine). So, when following any
instructions provided by your chosen distribution, remember your machine
is a PReP machine.
Limitations
The PReP boot loader only works on the serial console. The boot loader
displays a boot prompt that allows you to enter the kernel command line
arguments. Any errors early in the boot process will also be displayed
there. Because of this, at least when you are starting
out, you should use a dumb terminal or PC with NULL-modem cable connected
to the serial port. Once everything is working you can then disconnect
this, if required.
When more the 512MiB of memory is installed in the 7043-140, the system
changes to a different memory map, which the PReP kernel does not
handle, so you if you have more than 512MiB you will have to take some
out, sorry!
Update your firmware
You machine needs to be running firmware version TIG99292 or above. You
can get the latest firmware from IBM
here.
Make sure you read the instructions carefully before updating your
firmware!
Getting a firmware prompt
In order to configure the firmware, or manually load a boot image, you
must get to a firmware prompt. To do this, power on or reboot the
machine. After a few moments the firmware will display a series of
icons (graphics console) or the words "memory", "keyboard", "network",
"speaker", "ok" (serial console). After the keyboard icon or text
appears, press F8 (graphics console) or 8 (serial console), and when
all the icons or text have been displayed, you will be presented with
the firmware prompt "0 >".
Configuring the firmware
The firmware has a number of configuration variables that control the
behaviour of the machine. A couple of these are critical to ensuring
that the PReP kernel can be loaded correctly. They are:
- load-base - the address the boot image is loaded at
- real-base - the address of the firmware's private storage
These are the settings that I recommend:
| load-base | 1000000 |
| real-base | c00000 |
This is another combination that I have seen recommended:
| load-base | 200000 |
| real-base | c00000 |
Use the setenv command to set a firmware variable, and the
printenv command to display the current value. It may be
worth making a note of the current values in case you want to restore
their values at a later time. Here is an example:
0 > setenv load-base 1000000  ok
0 > setenv real-base c00000  ok
0 > printenv load-base
load-base                1000000             600000
 ok
0 > printenv real-base
real-base                c00000              -1
 ok
0 >
Loading a boot image
The boot command is used to load a PReP boot image. The boot image
can be stored directly on a floppy, as a file on a floppy (DOS 8.3 format
only), on a PReP boot partition (type 0x41), or on a CD-ROM. The commands
to use for each of these cases are shown below:
| Raw floppy | boot floppy: |
| File on a floppy | boot floppy:,\dosfilen.ame |
| PReP boot partition | boot disk: |
| CD-ROM | boot cdrom: |
Please note that CD-ROMs need to be specially prepared with a PReP boot
partition in order to boot on these machines. The manual page for
cdrecord
has some information on this if you are interested.
Next steps
You should be ready to install Linux on your machine at this point. You
must decide which distribution you wish to install. I have a few pointers
on this on my distributions page.
Also see my walkthroughs (listed on the left).
More to come...
|


