It can be quite daunting the first time you install Linux on a 7043-140 (or any RS/6000 for that matter). This is a walkthrough showing what to expect on your very first boot.
Note: this walkthrough uses a terminal to connect to the RS/6000. Using the graphics card is similar (but different :-)
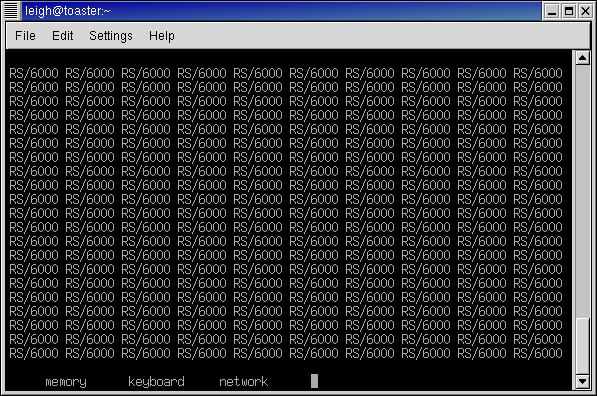
When you power on the machine it performs a self-test and after some time
displays the following screen:
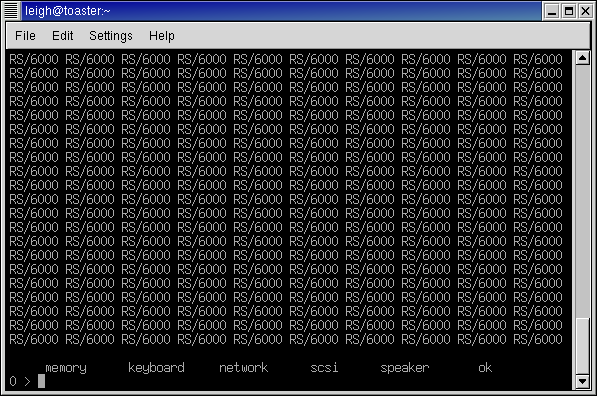
When the keyboard word appears, press the 8 key on your
terminal to make the machine boot to the Open Firmware prompt, as shown
below:
You use the boot Open Firmware command to load and execute a
kernel. My kernels have a patch that enable them to process any
command line arguments specified in the boot command. The following
screenshot shows a typical command used to boot a kernel that will
load an initial ramdisk to start a distribution installation:
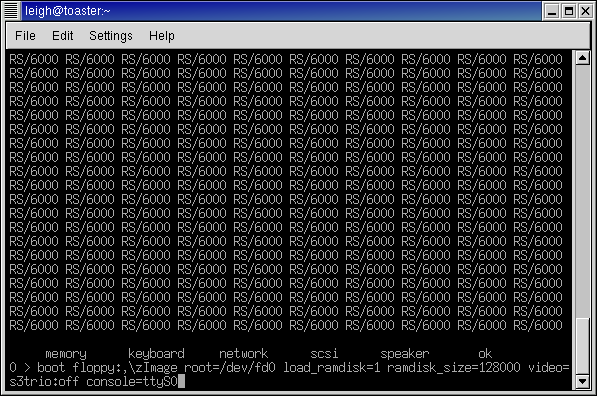
Note the console=ttyS0 option: this is vital when using a terminal because otherwise you won't see any boot messages nor the prompt to insert the ramdisk image.
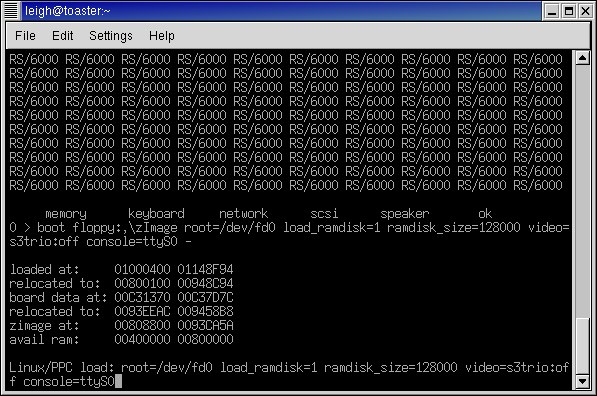
The 7043-140 uses a PReP kernel that includes a PReP boot loader.
The boot loader will first display some diagnostic information and
then prompt for kernel arguments, as shown below:
The reason for prompting for kernel arguments is that most PReP machines cannot pass arguments to the kernel when it boots. This prompt is only displayed on the serial console of the '140, which means that you won't see the prompt if you use a graphics terminal. This is one of the reasons I created the patch to allow parameters to be passed via the Open Firmware boot command.
Because you specified the kernel arguments on the OF boot command line, you don't need to do anything at this point. I suppose if you noticed a spelling mistake in your command you could fix it here :-) You can either press enter or wait 5 seconds for the prompt to timeout.
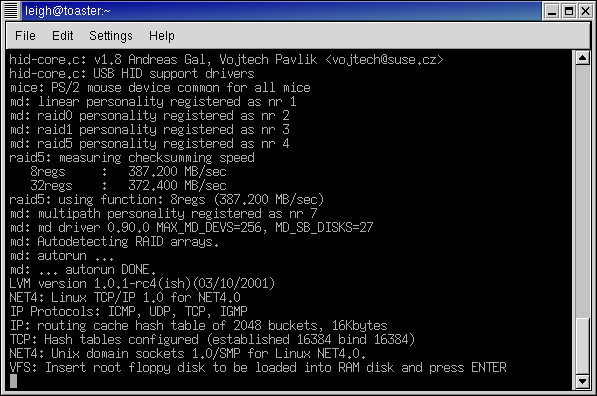
The boot loader will initialise and start the kernel, which will then
display a number of messages before prompting for the initial ramdisk,
as shown below:
After loading the ramdisk what is displayed on the screen will vary depending on the contents of the ramdisk. Good Luck!