- objects with a specific name, or of a specific type or color
- visible or hidden objects, or lines with specific linetypes or thicknesses
- product properties
- elements through the value of a specific attribute (material name, dimensions, etc.)
- objects created using a specific workbench, in the current document or throughout the whole document, in the selection list, visible on screen
- model documents created using CATIA Version 4.
Before You Start
Note that:
- Multiple Search dialog boxes can be open at the same time
- If the Select command was active before selecting Edit > Search, it remains active.
Run a Quick Search for a Named Object
-
Select Edit > Search (or press Ctrl+F).
The Search dialog box appears. -
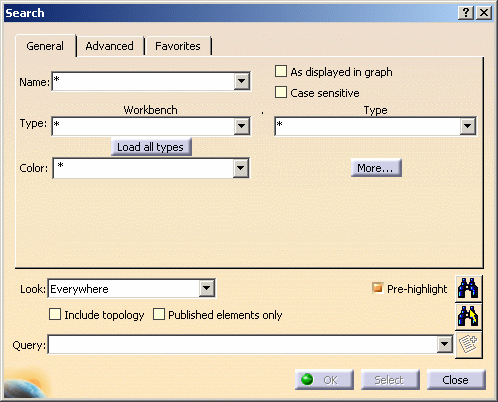
The Search command does not prevent you from running other commands on the search results (once selected). Therefore, you can work with other commands while the Search dialog box remains open. This means that you can:
- run commands using menus and icons
- and also apply commands in contextual menus to selected
search results using the power input box: for example, you can
manipulate selected specification tree elements using the
c:center on,c:center graphorc:cutcommand.
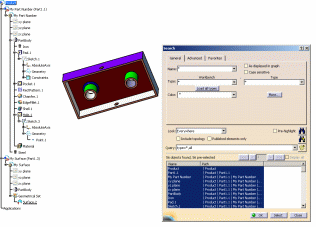
- the Search
 button now, all items in the specification tree are found
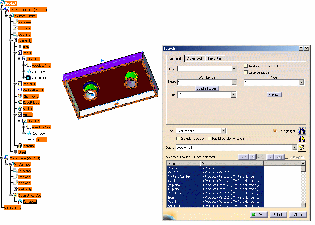
 - the Search and Select
 button now, all items in the specification tree are found and
selected. This means that you do not need to click the
Select button anymore, objects that have been found are
automatically selected after the search and the Search
dialog box is closed.
Include topology
When searching for topological objects (by selecting Topology in the Workbench list), the search criterion Topology can be combined only with an object type. You cannot combine it with a color or a name, for instance.
Another method to search for topological objects is to select the Include topology check box This option includes topological objects (faces, edges, vertices), whatever the query, when performing a search and it also lets you search for objects with a color, contrary to the search criterion Topology.
The other difference between selecting Topology in the Workbench list and the Include topology check box is that Include topology also searches for objects other than topological objects.
When the Include topology check box is selected, there is no need to select Topology in the Workbench list.
However, bear in mind that when using this option, the search takes more time.Published elements only
If you select the Published elements only check box, this restricts the number of loaded elements and therefore, the number of elements on which the search is performed.
In that case, you only see the elements that have been published (i.e. elements that have been made available to different users).
For detailed information on how to publish elements, refer to "Publishing Elements" in the Version 5 - Part Design User's Guide.Deep search
When working in Visualization mode (i.e. when Work with the cache system is activated in Tools > Options > Infrastructure > Product Structure > Cache Management tab), the Deep search check box appears in the Search dialog box:
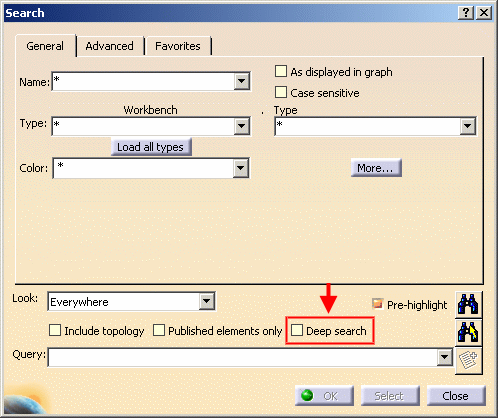
Selecting this check box lets you take advantage of the geometry selective loading: all the geometry is loaded before performing the search then when the search is over, the elements that are not required anymore are unloaded. Note that when working in Visualization mode and with the Deep search activation check box selected in Tools > Options > General > Search, the Deep search check box is automatically selected in the Search dialog box.
For detailed information on the cache system, refer to About Working with a Cache System.
-
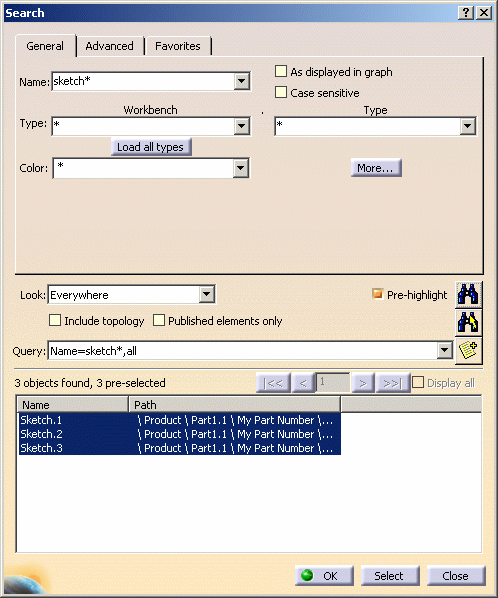
Enter the name
sketch*in the Name list.Searching using the object name is particularly useful if you renamed objects in the Feature Properties tab using Edit > Properties, or the Properties contextual command. The list below Name stores the names you entered during previous searches so that you can select them. The names are stored only as long as the session is active: closing the session clears the list.
-
Click the Search
 button:
 -
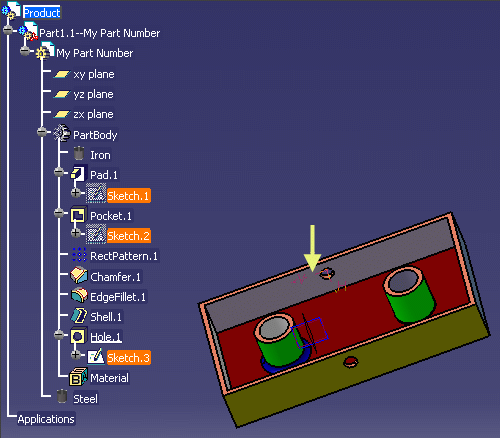
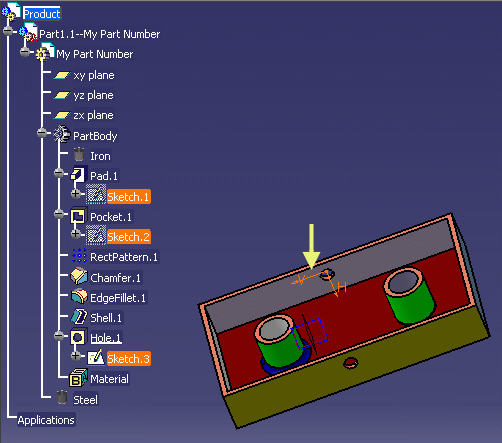
Click Select. The sketch is selected:
-
Click OK to exit search mode.

Clicking OK has the same effect as clicking both the Select and Close buttons. -
Run the Search command once again by pressing Ctrl+F.
-
Display the Query list by clicking the black arrow.
The Query list displays the search query formulated in the search language. This helps you to become familiar with the search language, which can be used for searching without using the Search command. For a complete description of the search language, refer to Using the Search Language. When you click the down arrow at the end of the Query list, this displays previous search queries. Selecting a search query executes the search (with the same criteria and the same scope).
Queries are also stored across sessions because they are stored with your settings. This enables you to recover queries from one session to another.
You can also use this language in power input mode. The object found is then directly selected. -
Enter the following names in the Name box then click the Search button each time to compare the results:
-
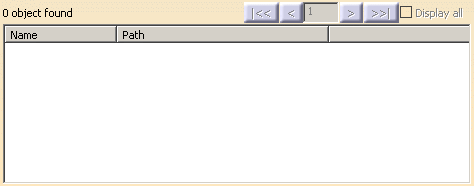
*sketchgives the following result:
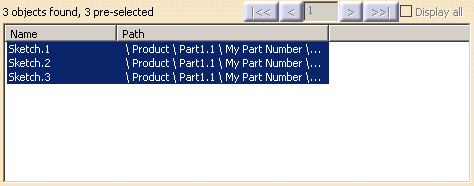
*sketch*gives the following result:
sketch*with the Case sensitive check box selected gives the following result:

Sketch*with the Case sensitive check box selected gives the following result:

As shown in the above examples, you can use the asterisk (*) as a wildcard. For example, entering: *and using the default settings for the other options in the Search dialog box searches for and select all objects in the document. Similarly, entering:
Sketch*selects all objects whose names begin with the character string "Sketch". Select the Case sensitive check box if you want the search to be case sensitive.
Note, however, that the other options allow you to filter your searches progressively.
To search for a name as it is displayed in the specification tree, select the As displayed in graph check box.
To illustrate this, suppose you have a part named "My_Part_Number"...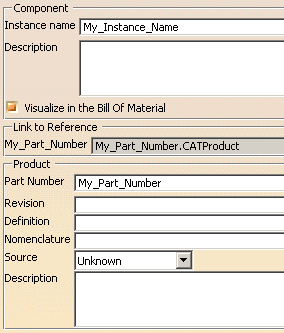
... whose name usually appears the following way in the specification tree: 
Let's suppose you customize the display in Tools > Options > Infrastructure > Product Structure > Nodes Customization tab by entering the following data: 
The name displayed in the specification tree now look like this: 
Searching for the name *part*gives no result...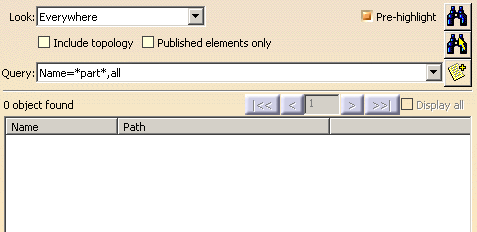
... because the search is based on the name displayed in the Instance Name box. Whereas searching for the name *part*with As displayed in graph selected gives the following result: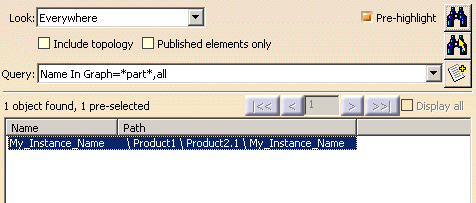
-
You can also sort the results alphabetically by Name and Path in the Search dialog box by clicking the corresponding column header.
Double-clicking an element from the search result list enables you to edit this element. For instance, double-clicking an element of type "Pad" opens the Pad Definition dialog box to let you modify its parameters.
Use the Navigation Options
Run a Quick Search for a Color
-
Run the Search command by pressing Ctrl+F.
-
In the geometry area, click the object whose color you want to search: the Search dialog box reappears and you can then click the Search
 button.
Clicking in the geometry area means that the pixel color is used to perform the search, whereas clicking in the specification tree means that the search uses the color displayed in the object's graphic properties.
Whichever method you choose, note that the Search functionality always uses the color defined the graphic properties. Therefore, if you click an object in the geometry, the search result might not be as expected.
- Inheritance is not taken into account by the Search functionality and therefore, when searching for a product with a specific color, the search might return a result which seems to have a color different from the one you specified. The reason is that, for Assembly objects, the color you see is not always the color that has been applied. For detailed information, refer to Displaying and Editing Graphic Properties
- The color of containers (i.e. bodies, geometrical sets, etc.) is only used to set a default color for the elements they contain. This color is not taken into account when running a search, which means that containers cannot be found by a query based on the color.
-
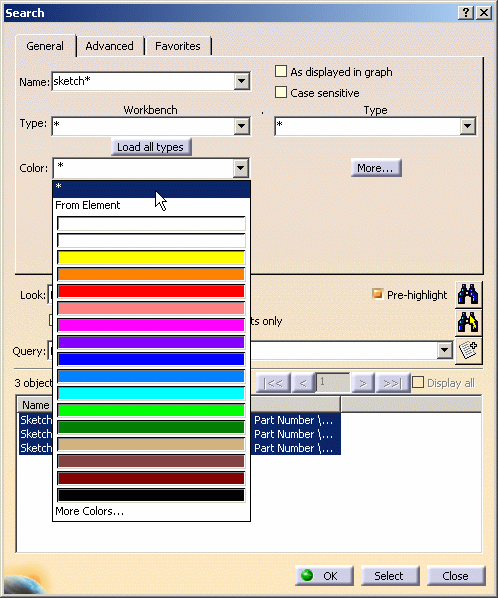
Optionally, instead of selecting a color in the geometry, you can select the color to be searched for in the color list.
Note that the first color in the list corresponds to the last selected color. When you access the list for the first time, there is no last selected color and the first color in the list is "white". Therefore, you see two "white" colors in the list but the first color corresponds to *. In that case, selecting the first white color amounts to selecting*. -
Click OK to exit search mode.
Run a Quick Search for a Type
-
Run the Search command by pressing Ctrl+F.
-
Enter the workbench
Sketcherin the Workbench list and the typeLinein the Type list.
- If you type only the first few
characters of an object type, then press Enter, the
system automatically displays the full name of the type. If several
types contain the same characters, the first name containing these
characters is displayed.
Note that the object type is NOT necessarily the name you see in the specification tree. - If you select a constituent element of an object (face, vertex, edge, plane or axis), the type returned is the type of the object itself.
- If an object has several types, a random type is returned.
If you select From Element in the Type list, the Search dialog box disappears and an acquisition agent is activated: 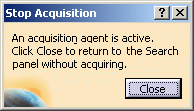
Select the type in the geometry area: the Search dialog box reappears.
If you do not want to select an object, click Close to stop the agent. - If you type only the first few
characters of an object type, then press Enter, the
system automatically displays the full name of the type. If several
types contain the same characters, the first name containing these
characters is displayed.
-
In the Color list, select From Element then select a line from the geometry area before clicking the Search button. In our example, we are searching for lines having the same color than line 2 (i.e. "Dark Grey Green"):
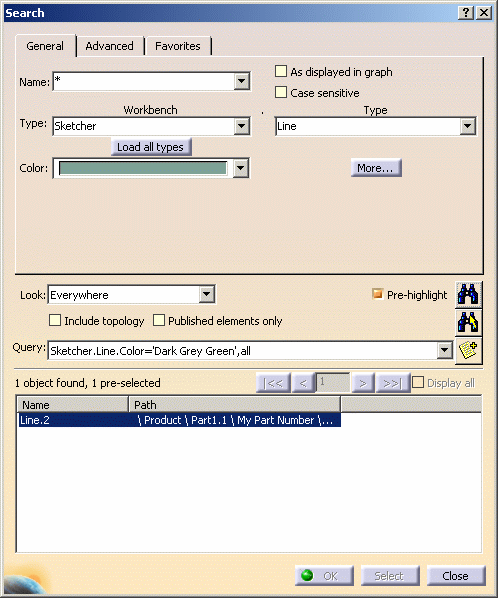
The result shows that Line.2 is the only line with "Dark Grey Green" color. -
Click the Add to favorites...
 button to add this query to your favorites. The
Favorites mode is detailed in another task.
-
Click OK to validate.
Selecting a workbench filters the list of types in the Type list: for example, if you select the workbench Part Design, the Type box is filtered to contain only the element types available in Part documents and if you select a type, the corresponding workbench is displayed. The same principle applies to the other document or workbench types.
If the type belongs to several workbenches, a warning message is displayed.When you leave
*in the Workbench box, the Type list displays all the types corresponding to the workbenches that had been previously selected.
If you want the Type list to display all the types available, you can click the Load all types button. This button provides an exhaustive list of all the types available to you without having to select all workbenches one by one. Note that this button is also available in Advanced mode.
When you select a new workbench, by default
*remains in the Type list. This means that the search will be performed on all types of elements created by all workbenches.
Whichever workbench is selected in the Workbench list, you can search for element types belonging to any other workbench by typing the name of the type in the Type list. If the element type belongs to only one workbench, the correct workbench name is displayed in the Workbench list.
Run More Advanced Searching Using More.....
-
Run the Search command by pressing Ctrl+F.
-
In the General tab, click More...:
The button changes to Less... and the Search dialog box looks like this: 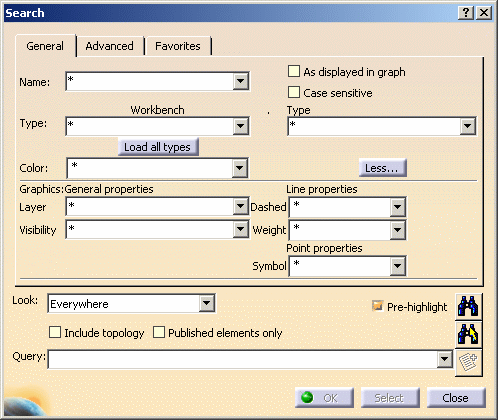
-
In the Line properties area, define the line properties to be searched for:
- Dashed (lets you choose the type of line to be searched for): choose "4"
- Weight (lets you choose the line thickness): choose "48"
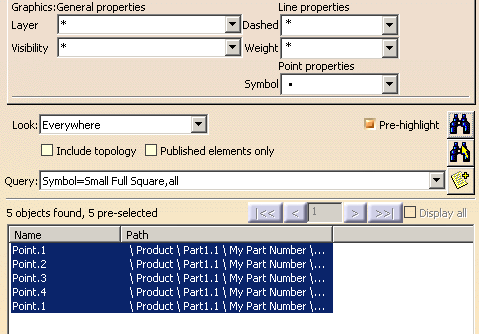
or if you want to search for a specific point symbol, use the Symbol list in the Point properties area to select the symbol to be searched for.
For instance, searching for the symbol in our sample
document gives the following result:
These lists of general graphic properties are identical to those available in the Graphic Properties toolbar. For detailed information, refer to Displaying and Editing Graphic Properties. You can also specify the layer and visibility in the Layer and Visibility boxes:
- in the Layer box, select the layer number in which you want to perform the search
- in the Visibility box, choose either
- Visible (searches for visible elements for which Shown check box is selected in the Graphic tab of the Properties dialog box. One parent of the searched element can be invisible)
- Hidden (searches for objects for which the Shown check box is cleared in the Graphic tab of the Properties dialog box)
- Shown (searches for elements in the visible space. These elements, as well as each of their ancestors, has the Visible status and is in the visible space)
- Invisible (searches for elements hidden in the No Show space, i.e. these elements or at least one of their ancestors have the Invisible status).
For more information about visible and hidden elements, refer to Hiding and Showing Objects.
-
Click the Search
 button to start the search.
The result shows that only one line matches these criteria: 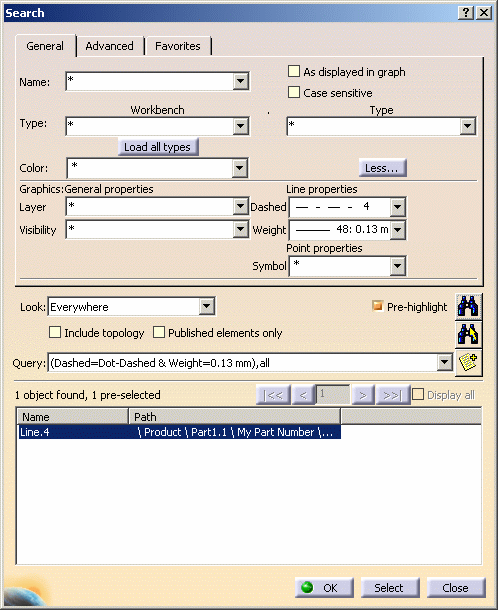
-
Click Less... to return to the original Search dialog box.
-
Click OK to exit search mode.
Use a Specific Search Scope
-
Run the Search command by pressing Ctrl+F or by selecting Edit > Search.
The Search dialog box appears. -
Click the General tab:

-
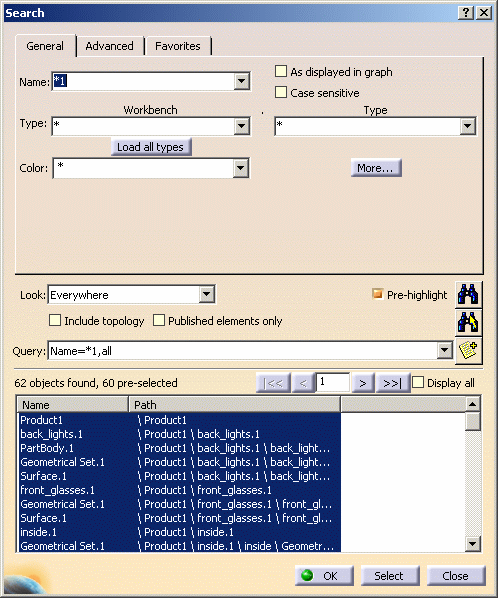
Enter
*1in the Name list. -
Set the search scope in the Look list.
The search scopes are:
-
Everywhere: searches the whole specification tree from top to bottom, to find objects created using all workbenches ; if you are performing the search in a product structure document (in design mode), the search is performed throughout the whole product structure, inside all the documents integrated in the product structure (if these documents are accessible in design mode)
For example, to understand how this option works in our document:
- activate "Product" in the specification tree by double-clicking it
- press CTRL+F
- select Everywhere
- enter the name of what you are searching for,
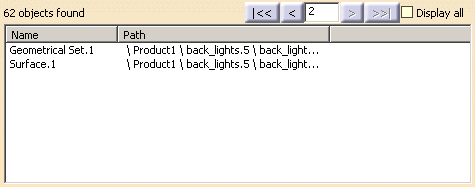
*1in our example to search for all objects whose names end with "1" - click the Search button:
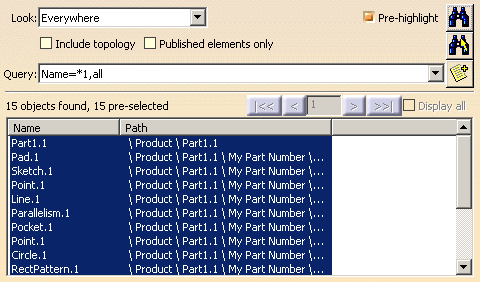
- Now activate "My Part Number"
- keep the same scope and name options
- click the Search button:

- In "Element": the scope only
locates objects belonging to "Element", and those that can be
created using the current workbench, where "Element" is the name
of the active object.
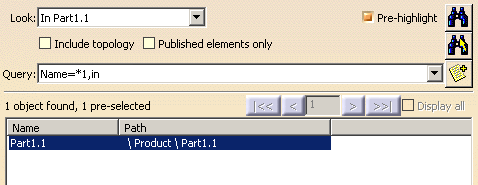
For example, if you are using a part document, objects created using the Part Design workbench are searched, but NOT objects created using the Sketcher workbench.
For example, to understand how this option works in our document:
- activate "My Part Number" in the specification tree
- press CTRL+F
- select In "Element"
- enter the name of what you are searching for,
*1in our example to search for all objects whose names end with "1" - click the Search button:
- now activate "Sketch.1" in the specification tree
- keep the same scope and name options
- click the Search button:
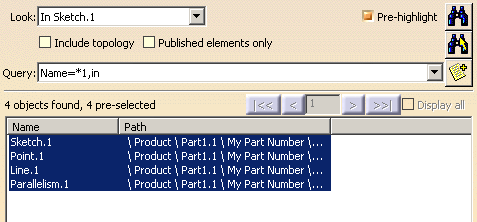
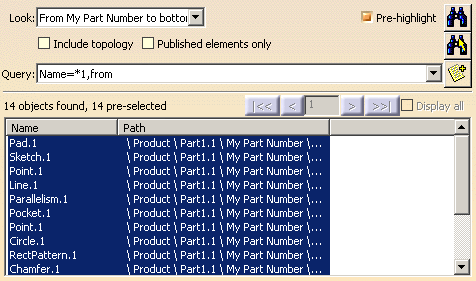
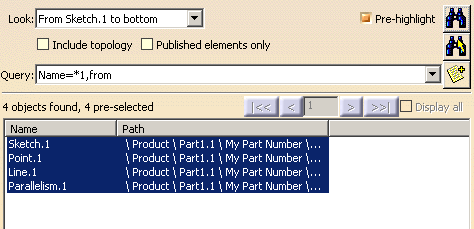
Selecting this scope enables you to locate only the objects that can be created in the Part Design workbench and that belong to "Product". The search does not reach the lower levels in the tree: the individual elements that make up the different parts are not searched. - From "Element" to bottom: searches the elements in the active "Element", to the bottom of the tree, regardless of the workbench used to create them.
For example:
- activate "My Part Number" in the specification tree
- press CTRL+F
- select From "Element" to bottom (From My Part Number to bottom in our example)
- enter the name of what you are searching for,
*1in our example to search for all objects whose names end with "1" - click the Search button:
- now activate "Sketch.1" in the specification tree
- keep the same scope and name options
- click the Search button:
-
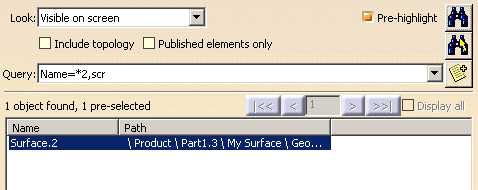
Visible on screen: searches for objects visible in the
current window. Selecting this search scope means that elements
that are not activated or not represented in the geometry area
are not taken into account.
Elements that are not represented in the geometry area are, for instance, elements transferred to the No Show space, elements that are not in the current filter or not in the current mask, features used to build other features that appear in the specification tree but not in the geometry area (use of the Define in Work Object capability), etc.
When working in 2D mode, elements that are not in the active plane are excluded as well.The scope is exactly defined by drawing a virtual trap on the whole visible screen, thus only first-level objects are searched for (as you can see if you draw such a trap by yourself: only first-level objects are highlighted in the specification tree). Elements which cannot be trapped cannot be searched for using this scope.
This scope applied to topological elements does not search for visible vertice, edges or faces but for vertice, edges or faces which are part of a visible element as described above.
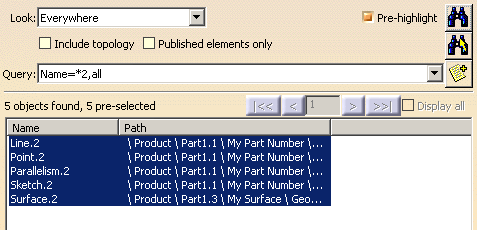
For example:
- activate "Product" in the specification tree by double-clicking it
- press CTRL+F
- select Everywhere
- enter the name of what you are searching for,
*2in our example to search for all objects whose names end with "2" - click the Search button:
- now select Visible on screen and keep
*2to search for all objects whose names end with "2" - click the Search button:
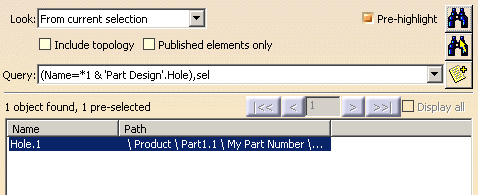
- From current selection: this scope is only available if you already selected objects before running the Search command, and searches inside the selected objects to the bottom of the tree. This is particularly useful when you know the object in which you want to search: you simply select the object, then search inside the object.
For example:
- press CTRL+F
- select Everywhere
- enter the name of what you are searching for,
*1in our example - click the Search button:

- now, in the result list, select Pad.1 and Hole.1 then click Select: Pad.1 and Hole.1 are selected in the specification tree
- select From current selection
- enter the workbench
Part Designand the typeHole - click the Search button:
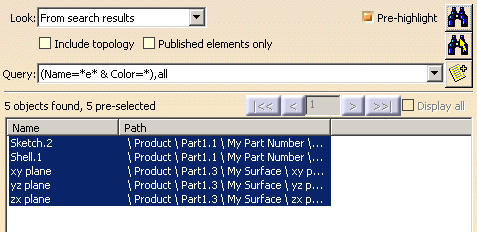
- From search results: the search is performed on the list of objects preselected in the list at the bottom of the Search dialog box.
To illustrate this, let's have a look at the following example:
- activate "Product" in the specification tree
- press CTRL+F
- select Everywhere
- enter the name
*e* - click the Search button:
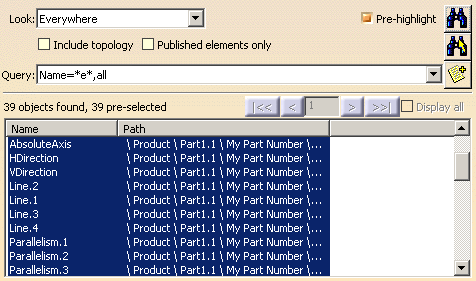
- now erase the name
*e* - select White color
- select From search results
- click the Search button:
By default, *appears in the Color list. This means that the search is performed on elements of any color.Select the desired color, or click More Colors... at the bottom of the Color list to access the color chooser and select basic or previously custom colors, or add new custom colors.
The scope From Element lets you use the color of an existing element. To do so, select the element whose color you want to use in your search. The selected color is displayed in the Color box.
Refer to Displaying and Editing Graphic Properties for a full description of how to use the color chooser.
When you apply basic and custom colors to elements, and search for elements using these colors, a search query is generated. However, the RGB code is used instead of the color name for custom colors. This is useful, for example, if you modify your color palette (for example, by deleting the custom color, or deleting the color settings file in your settings folder) then retrieve a search query. Because the query references the RGB values of the color and not the color name, changes made to the color palette do not affect the search: the search always finds elements referencing a color expressed using RGB values. The names of basic colors, however, remain the same. -
-
Click OK to exit search mode.
When the object is selected in the search result list, you can also right-click and select Center graph or Center view.
![]()
