The Shellable Feature command also adds material volume to the outside of another material volume that it intersects within the same body, thus extending the boundaries of the volume, as well as increasing the internal spatial volume of a shelled volume. The added volume inherits the shell properties (wall thickness) of the body.
This task shows you how to create a shellable prism.
-
Click the Shellable Feature icon
 .
.
Shellable features can have different shapes. The Shellable Feature dialog box that appears displays the Prism icon as the default shape to be created.
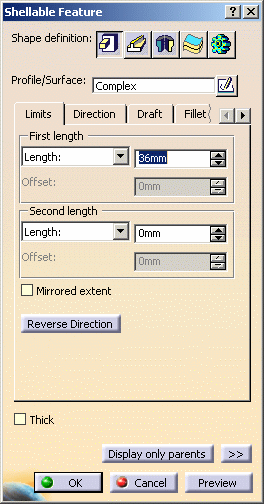
-
If you prefer a different shape, click any of the other four shapes available. To know how to create any of them, refer to the Sweep, Revolve or Thick Surface or External Shape tasks. For the purposes of our scenario, keep the default option
-
Select the profile you wish to extrude. If no profile is defined, clicking the Sketcher
 icon enables you to sketch the profile you need.
 -
Create a basic prism as explained in the Prism task.
-
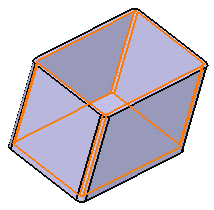
Click OK to confirm and create the shellable feature. Shellable Prism.X is added to the specification tree in the Solid Functional Set.X node. By customizing the view (use the Hidden edges points option), you can notice that the prism is hollow. By default, the shellable feature has no opening.

-
To open it, just double-click the Shell Properties node in the Specification tree or click the Shell Properties command
 .
. -
For example, select the top face as the face to be removed and enter the value of your choice to define the wall thickness.
-
Click OK to confirm the operation. One face has been removed.
-
For more information, refer to Setting Shell Properties.
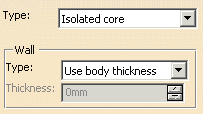
Core
-
Click the Core tab.
The Core capability enables you to define a core body (offset) for a shellable feature. This sometimes becomes necessary if the geometrical complexity of the shellable feature is such that standard offsets fail. -
Isolated core
Automatically generates the core at feature level through an offset of only this shellable features geometry (i.e. the feature is independently shelled). Note that faces of features that have an isolated core cannot be later selected in Shell Properties command as Face to remove or Face with special thickness. -
Interconnected core
Automatically generates the core at functional body level through an offset of the union of all shellable features contained within the same functional body. -
Select core
You can select any body to represent the core for the shellable feature. Note that faces of features that have a "selected core" cannot be later selected in Shell Properties command as Face to remove or Face with special thickness.
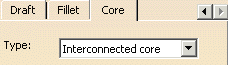 |
If your part contains two or more shellable features, you need to choose between three methods:
 |