|
|
This task describes the Vision function and how to set and edit manikin vision attributes. Using this function, you will see a scene through the manikin's eyes, displayed in a separate window. | ||||||||
|
|
Please note: this feature is available in the DPM Review workbench if the workbench DPM Human Review is purchased. | ||||||||
|
|
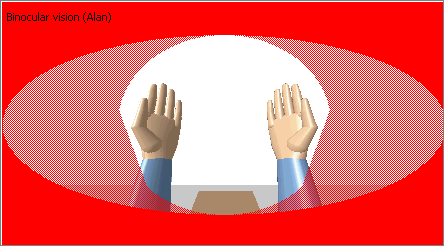
Just like humans, a manikin can see its environment.
Manikin vision can be with both eyes or limited to only one eye. Even the
blind spot is simulated.
The Manikin eyes follow the 3D compass with Reach and IK ModeThis proposes a more natural behavior for the manikin's vision when it is performing a reach or IK on an object. The vision of the manikin is directed to the object the manikin is trying to pick up, which would be more like human behavior. Line of Sight
In
order to reproduce the human vision with more accuracy, in this new vision model,
the camera doesn't follow the line of sight orientation anymore. In
other words, the central spot (which corresponds to the line of sight)
moves inside the Vision Window following the eyes motion. The
vision window no longer readjusts to the motion of the line of sight.
Only when the head is moved, the vision window updates itself. |
||||||||
|
|
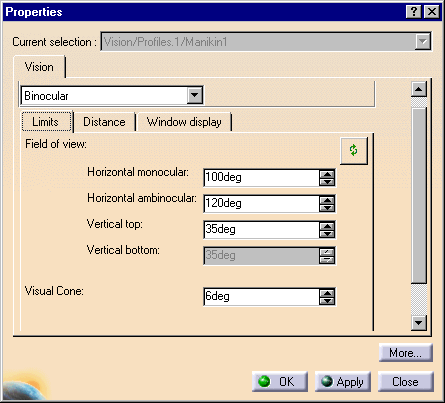
The Vision tab contains the following fields: |
||||||||
|
|
For more information, please read
Changing Manikin Display Attributes. See also The Vision Window's Behaviors |