Before you begin creating dimensions, you should be familiar with the concepts described in this section.
First of all, bear in mind that dimension creation in Drafting follows the general rules which apply to geometry creation in V5: the geometry to dimension must be contained within a "box" whose dimensions are 2.e+6mm (the coordinates can vary from -1,000,000 mm to +1,000,000 mm). Therefore, it is impossible to create dimensions for elements exceeding these dimensions.
Creating Dimensions
You can create (and therefore modify) the following types of dimensions:
Dimensions created on one element:
Dimensions created on two elements:
Note that you can create half-dimensions on distance, angle, diameter cylinder, diameter edge and diameter tangent dimensions but not on cumulate dimensions.
Modifying the Dimension Attributes
You can modify the following attributes at any time before you click to validate the dimension creation:
Modify while creating:
- Type
- Measure direction. Refer to Using Tools for more information.
- Angle sector
- One symbol
- Diameter/Radius center
Modify while or just after creating:
- Value position
- Extension line overrun/blanking (either one or both)
- Text before/after
- Properties (see further down)
- Swap to diameter/radius
Manipulating Dimensions
By default, when manipulating dimensions, you will use the following functionalities:
- dimension following the cursor: go to Tools > Options > Mechanical Design > Drafting > Dimension tab, to use automatic positioning
- global move: go to Tools > Options > Mechanical Design > Drafting > Dimension tab, to move precisely dimension line, dimension value, secondary part of a dimension line.
- blanking manipulators (available when modifying a dimension): go to Tools > Options > Mechanical Design > Drafting > Manipulators tab, not to visualize blanking manipulators or to visualize other manipulators either when creating or when modifying a dimension (Modify Overrun, Modify Blanking, Insert text before, Insert text after, Move value, Move dimension line, Move dimension line secondary part, Move dimension leader).
- value snapped between the dimension lines symbols: go to Tools > Options > Mechanical Design > Drafting > Dimension tab, if you do not want to have the possibility to snap the dimension value between both symbols of the dimension line and/or you want to snap the dimension position on the grid.
- during creation: to switch temporarily the Dimension following the cursor option, hold on the ctrl key.
- during creation and edition: to switch temporarily the Snap by default option, hold on the shift key. Clicking on the dimension symbols will invert them.
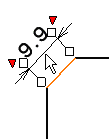
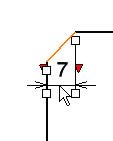
- during angle dimension creation: if the Dimension following the cursor option is activated, you can swap the angle sector according to the mouse position holding on the ctrl and shift keys. If the Dimension following the cursor option is not activated, you can swap to the complementary angle sector holding on the ctrl key and clicking on the dimension line.
Dimension Tools
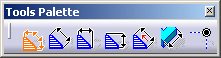
The Tools palette appears whenever you select a command for which specific options or value fields are available. This enables you to know immediately when specific tools are available for a command. The options or fields available in the Tools Palette depend on the command you selected. Only a few examples are provided here.
For example, if you select the Dimensions command, the Tools Palette may provide the following options:

")


 Projected/Forced/True Length Dimension


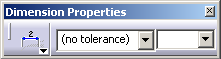
Dimension Properties
You can apply given properties to all the dimensions you are going to create.
Dimension Properties toolbar
- Line type (regular, two parts, one part leader, or two parts leader)
- Tolerance type
- Tolerance value
- For the ISOCOMB combined tolerance, use the following type of syntax in the tolerance value field: H6 (+0.5 / -0.3)
- When editing an existing drawing, if you change your default unit choice in Tools > Options > General > Parameters and Measure > Units tab, then the numerical display format which best corresponds to the selected unit is automatically selected in the toolbar instead of the current default value.
- The last five tolerance values typed in the Dimension properties toolbar are saved in a settings file and proposed in the list.
Numerical Properties toolbar

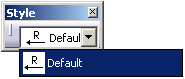
Using Styles
You can use styles (i.e. a set of default values for each kind of element) when creating dimensions in drawings created with version V5 R11 and later (or pre-R11 drawings whose standard has been updated or changed in V5 R11 and later). Styles are defined in the standard used by the drawing and managed by the administrator.
When creating a dimension, the Style toolbar displays the styles available for this type of dimension. (By default, the Style toolbar is situated at the top left of screen.) If only one style is available, it will be used by default.
Refer to Using Styles for more information.
![]()