In this section is provided detailed information on
capabilities common to all the 3D textures provided with Photo Studio
Optimizer. These common capabilities deal with the methods you can use to
apply your texture onto the object and with the parameters used to add
noise effects to your texture.
Each 3D texture is also described with its specific parameters further in
this guide and you can click the desired hyperlink below to display the
related documentation:
Mapping Types
When accessing the Texture tab in the selected 3D texture properties, you can choose among 5 mapping types by clicking the Change Mapping Type and Preview button:


- Planar Mapping is similar to a slide projector (a picture on a wall, for instance). You can use it for textures with two privileged directions such as Chessboard or Wall of Bricks
- Spherical Mapping is similar to a painted light bulb. You can use it for textures that do not have a privileged direction such as stone or raw metal
- Cylindrical Mapping is similar to placing a label on a can of food. You can use it for textures having a privileged direction such as shiny metal or marble
- Cubical Mapping is similar to wrapping a box
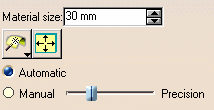
- Adaptive Mapping lets you choose between two mapping types: Automatic or Manual.
Automatic adaptive mapping automatically creates a planar mapping on each object face.
This mapping type is especially relevant for materials with no specific orientation such as leather or wood for example.
Noise Parameters
Each point is associated to a color map. When you define a noise value (
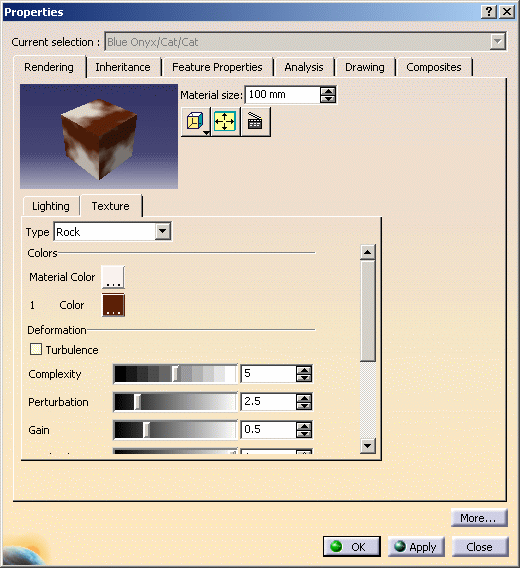
These parameters are defined in the texture properties and, more specifically, in the Deformation area.
When applying a Marble, Vein, Alternate Vein or Rock texture, the following parameters are available:
-
Turbulence
-
Amplitude (for Vein and Alternate Vein textures only)
-
Complexity
-
Perturbation
-
Gain
-
Attenuation.
Let's look more carefully at each of the above-mentioned noise parameters:
-
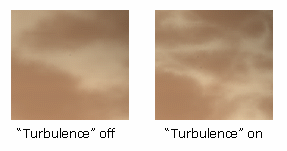
Turbulence: enhances the effect of the second color. Below are two pictures using the Rock texture as an example:
- Amplitude: coefficient applied to the values defined for
Complexity, Perturbation and Gain. The
greater the coefficient value, the more irregular the veins.
This enables to give realism by increasing the number of details of textures. If set to 0, the veins are linear.
Note that this parameter is available only when applying a Vein or Alternate Vein texture.
-
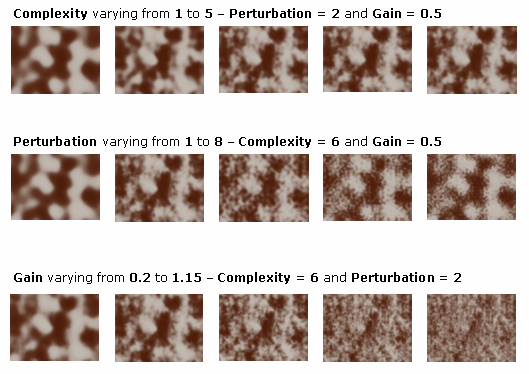
Complexity: sum of the perturbations applied by the application. Setting this parameter to "1" means that the perturbation effect is applied once
-
Perturbation: applies a kind of "pixellisation" to the texture. This parameter is relevant only when used in combination with Complexity (i.e. Complexity value must be other than "0"). Perturbation parameter has a minor impact on final result
-
Gain: applies a grainy effect to the texture. This parameter must be used in combination with Complexity and Perturbation. You can choose values comprised between 0 and 1
-
Attenuation: makes the color look more or less dark.


