 |
 |
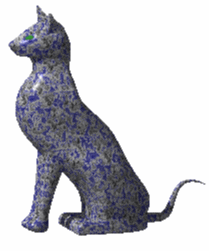
| Rendered image with Blue Onyx | Rendered image with Chessboard |
-
Right-click the Blue Onyx material in the specification tree then select Properties (or press Alt+Enter).
-
Access the Texture tab then select Chessboard in the Type list. You can also click the Ray Traced Preview
 button to display a preview of the material texture:
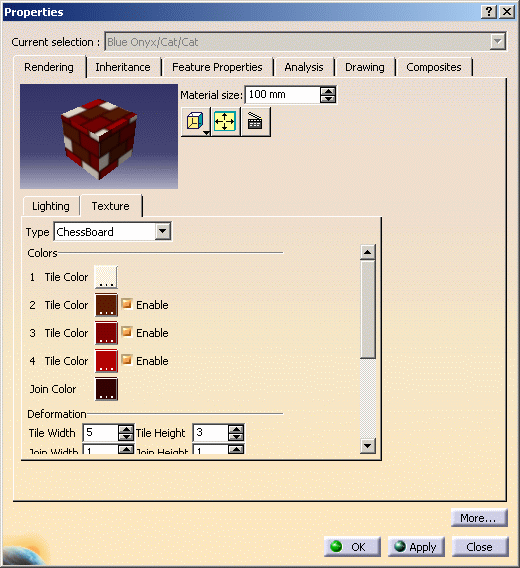
When a 3D texture is selected, the corresponding texture image is projected onto the object in the geometry area so that you can get a better idea of the final result: 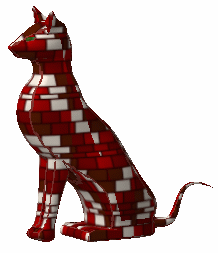
However, note that: - the projected image does not reflect exactly what you get when rendering the image
- the texture has a low resolution in order not to deteriorate performance and as a consequence, the image projected onto the object may sometimes be pixellised.

You can also choose a mapping type but do not forget that this mapping is relevant for real time display only, it has no impact when computing the rendered image.
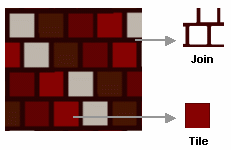
Refer to Mapping Types for detailed information.The Colors area lets you define tile and join colors: - Tile Color represents the colored bricks and corresponds to a color sequence. You can create a pattern with squares in up to 4 alternating colors
- Join Color represents the color of the grid pattern.
-
Click the color square to select the desired color from the Color chooser. You can also deactivate a color by clearing the Enable option.
-
The Deformation area lets you define:
- Tile Width and Height: sets the width and height of the tile
- Join Width and Height: sets the width and height of the join. This parameter allows you to simulate a brick wall
- Offset: translates the join lines horizontally. You can enter values comprised between 0 and 0.5, "0" meaning that the join lines are in perfect adjustment. This parameter allows you to simulate a brick wall, for instance.
The following are samples of deformation with different tile, join and offset values: 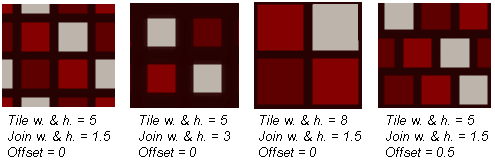
-
The Bump area lets you define an Amplitude value to add a lighting surface effect to the object.
You can use the slider or enter a coefficient value comprised between -10 and 10:
- 0 means no bump effect
- 10 means that bright colors appear above dark colors
- -10 means that dark colors appear above bright colors.
-
Use the Transformation area to adjust the mapped texture:
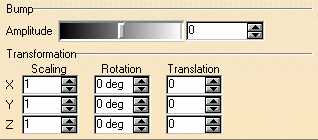
- Scaling: stretches the texture along X, Y, and Z axes
- Rotation: rotates the texture around X, Y and Z axes
- Translation: translates the texture along X, Y and Z axes.
-
Click OK to validate.