|
This task shows how to insert a 'Between 2 curves'
Multi-Axis Curve Machining operation in the
program.
In this scenario the tool axis will be guided in Tangent Axis
mode along the isoparametrics of the selected drive surfaces.
To create the operation you must define:
- the Curve Machining mode as Between 2 curves and the
Curve Machining type as Side
- the tool that will be used

|
 |
|
 |
Open the
MultiAxisMilling03.CATPart document, then select Machining > Advanced Machining from the Start menu.
Make the Manufacturing Program current in the specification
tree. |
 |
-
Select the Multi-Axis Curve Machining icon
 . .
The Multi-Axis Curve Machining dialog box appears directly at
the Geometry tab page
 . .
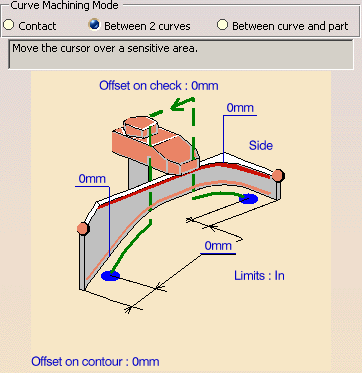
This page includes a sensitive icon to help you specify the geometry to
be machined.
Set the Curve Machining mode to Between 2 curves.
-
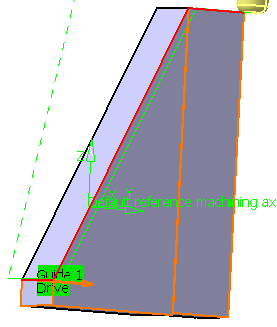
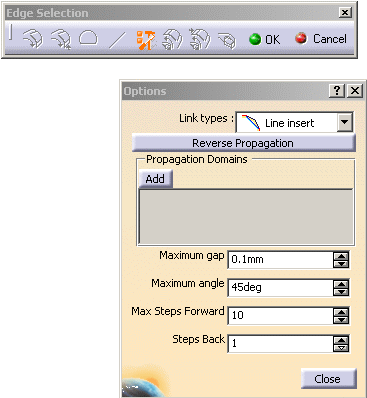
Click the top guiding curve in the icon.
In the Edge Selection toolbar that appears, set Link
types to Insert line
then select the three edges on the part as shown in the figure below.
Note that any gaps between the edges are filled thanks to the Insert
link option.
-
Set the Curve Machining type to Side
to drive the flank of the tool.
-
Select the Strategy tab
page  . .
This page includes a sensitive icon to help you specify the drive
surfaces and reference tool axis.
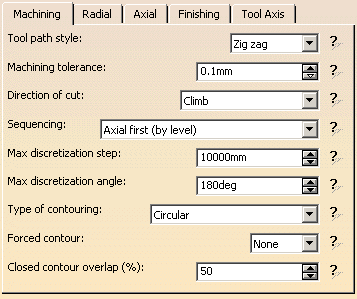
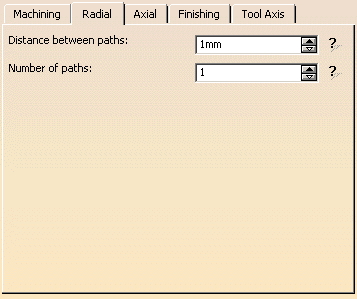
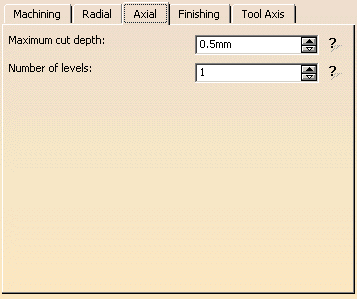
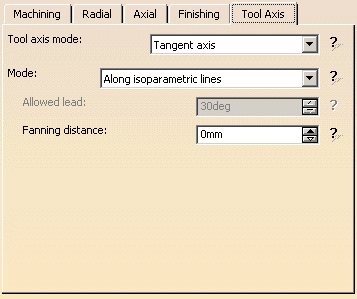
You can use the tab pages to set parameters for:
|
|
|
|
|
|
-
Tool Axis (set to Tangent Axis - Along isoparametric
lines).
|
-
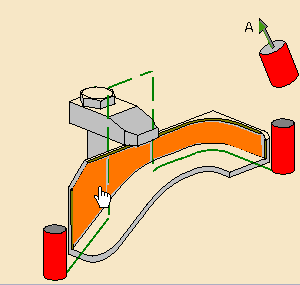
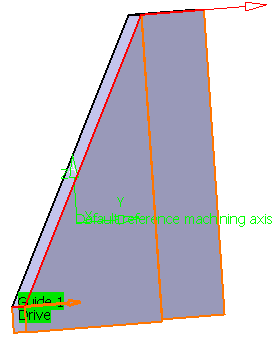
Click the sensitive drive element in the icon,
then select the three drive surfaces in the 3D window as shown in the
figure.
|
| |
 |
A default reference tool axis is displayed in the 3D view.
If needed, you can modify it by clicking the tool axis arrow (A)
in the sensitive icon, then specifying a different tool axis direction.
You can do this by selecting a surface. In this case the surface normal is
used.When machining a strip (or band) for faces, the tool axis is
deduced from the isoparametrics of the faces
in order to ensure continuity of the trajectory. See
Tangent Axis - Along
isoparametric lines for more information. |
| |
-
A tool is proposed by default when you want to create a
machining operation.
If the proposed tool is not suitable, just select the
Tool tab page
to specify the tool you want to use.
This is described in
Edit the
Tool of an Operation.
-
Select the Feeds and Speeds
tab page  to
specify the feedrates and spindle speeds for the operation. to
specify the feedrates and spindle speeds for the operation.
-
Check the validity of the operation by
replaying
the tool path.
|
| |
|
|
You can add approach and retract motions to the operation
in the Macros tab page
 . .
This is described in
Define Macros
of an Operation. |
|
-
Click OK to create the operation.
|
|
 |