-
Select the Isoparametric Machining icon
 .
.
An Isoparametric Machining entity along with a default tool
is added to the program.
The Isoparametric Machining dialog box appears directly at
the Geometry tab page
 .
.
The part surface and corner points of the sensitive icon are colored red
indicating that this geometry is required.
All other geometry is optional.
-
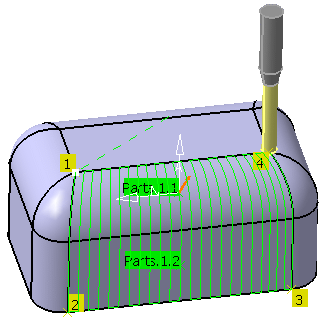
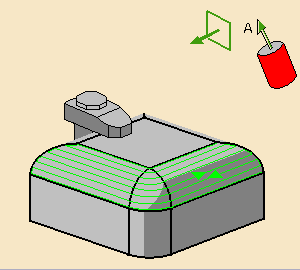
Click the red part surface in the icon then select the
desired surfaces in the 3D window.
The Face Selection toolbar appears to help you select faces
or belts of faces.
These can be adjacent or non-adjacent. For more information please refer
to Non-Adjacent Belts of
Faces.
-
Click a red point in the icon then select the four
corner points of the selected surfaces.
Machining starts from point 1 to point 2, and finishes either from point
3 to 4 or 4 to 3
(depending on the One way or Zig zag tool path
style).
The part surface and corner points of the icon are now colored green
indicating that this geometry is now defined.
-
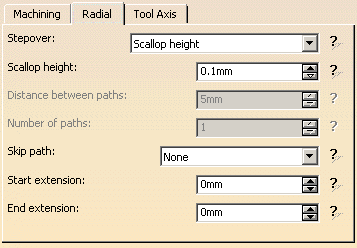
Select the Strategy tab
page  to
specify parameters for:
to
specify parameters for:
|
|
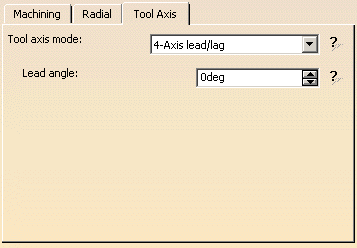
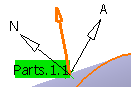
A default reference tool axis (A) and 4-Axis
Constraint arrow (N) are displayed.
You can double click these axes to modify them.
|
Click the 4-Axis Constraint arrow (N).
This is the normal to the plane in which the tool axis is
constrained.
A dialog box appears
showing the default direction. You can modify this direction, if
needed.
|
|
|
|
|
-
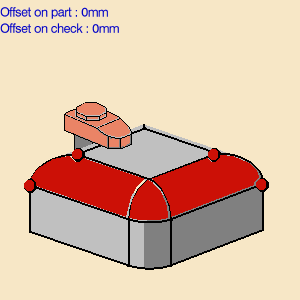
Click Preview in the dialog box
to verify the parameters that you have specified.
A message box appears giving feedback about this verification.
-
A tool is proposed by default when you want to create a
machining operation.
If the proposed tool is not suitable, just select the
Tool tab page
 to specify the tool you want to use.
Please refer to
Edit the
Tool of an Operation.
-
Select the Feeds and Speeds
tab page  to
specify the
feedrates and spindle speeds for the operation.
to
specify the
feedrates and spindle speeds for the operation.
-
Select the Macros tab
page  to
specify the operation's transition paths (approach and retract motion,
for example).
to
specify the operation's transition paths (approach and retract motion,
for example).
See Define
Macros of an Operation for an example of specifying transition paths
on a multi-axis machining operation.
-
Before accepting the operation, you should check its
validity by
replaying the tool path.
-
Click OK to create the operation.