- Creating a Handle_Shuttle
- Performing clash detection
- Resetting products
- Hiding handle
- Creating a Handle_Shuttle track
-
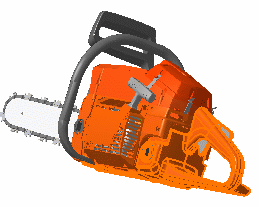
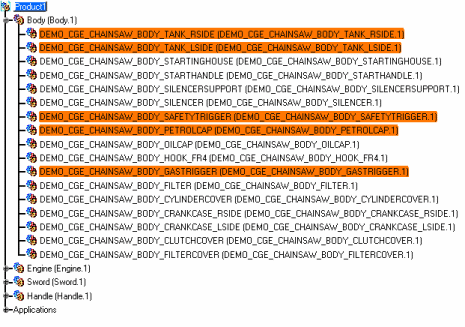
Expand the Body node, and select the following in the specification tree or in the geometry area:
- CHAINSAW_BODY_TANK_RSIDE.1
- CHAINSAW_BODY_TANK_LSIDE.1
- CHAINSAW_BODY_SAFETYTRIGGER.1
- CHAINSAW_BODY_PETROLCAP.1
- CHAINSAW_BODY_GASTRIGGER.1
-
Click Shuttle
 from the DMU Simulation toolbar.
The Preview window gives the shuttle content. 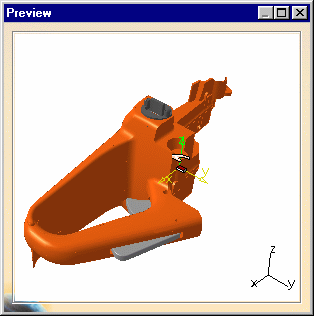
-
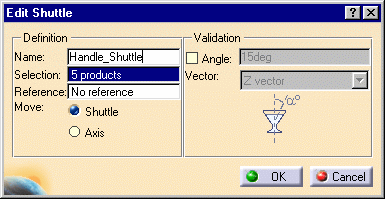
Give the shuttle a meaningful name (Handle_Shuttle, for instance).
The following steps enable you to move the shuttle, while still in the Edit Shuttle command, and perform a rough clash detection to prepare your dismounting path. -
Select the arrow within Clash Detection
 from the DMU Check toolbar.
You may need to undock the Clash Mode toolbar. Clash Mode
-
Click Clash Detection (On).

-
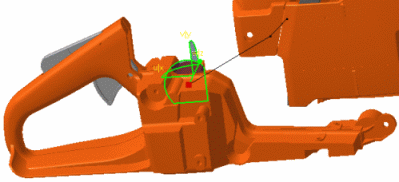
Move the shuttle using the 3D compass.
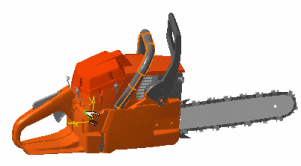
There is a collision among the Handle_Shuttle, the clutch cover, and the object BODY_HANDLE that makes the dismounting operation impossible. In addition, there is a collision between the Handle_Shuttle and the clutch cover that makes the dismounting operation impossible. You are going to hide it, but validate the shuttle creation first.
(To better show the areas of clash, the graphic properties of the chainsaw have been changed to blue, the clash areas appear highlighted in red, and green arrows point to the clash areas.)

-
Click OK .
The modified position is kept when exiting the command. In this case, you need to restore the initial position. -
Click Reset
 .
.
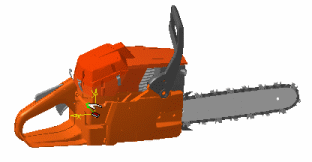
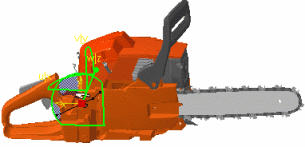
To hide the chainsaw handle, do the following: -
Select the CHAINSAW_BODY_HANDLE.1 either in the specification tree or in the geometry area.
-
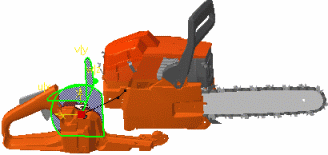
Click Hide/Show
 ,
or select View > Hide/Show > Swap Hide/Show.
,
or select View > Hide/Show > Swap Hide/Show.The object is no longer displayed: it has been transferred into the No Show space. In our example, the CHAINSAW_BODY_HANDLE.1 is no longer displayed.
The next steps describe how to define a track for the created Handle_Shuttle object. -
Select Handle_Shuttle in the specification tree and click Track
 from the DMU Simulation toolbar.
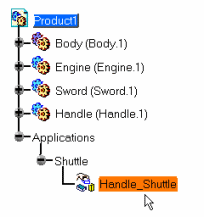
The Track dialog box along with the Recorder and Player toolbars are displayed: 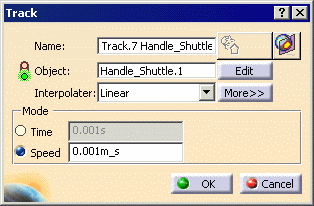
Recorder
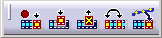
Player

-
Record your track shuttle: move the 3D compass, and select Record at each time position of your choice.
If you double-click on the Record  ,
the automatic insert mode is activated.
,
the automatic insert mode is activated.You can also use the Insert key instead of Record .
Please refer to Recording a Track. -
When satisfied, select the OK button.
-
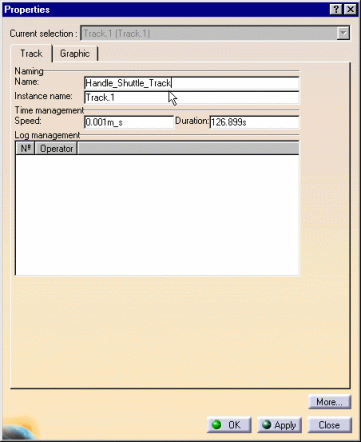
Rename your track with a meaningful name (in the example, Handle_Shuttle_Track was used).
-
Right-click Track.1 object in the specification tree and select Properties.
-
Select the Track tab.
-
Replay your Handle_Shuttle_Track using the buttons from the Player toolbar.
See About Player. 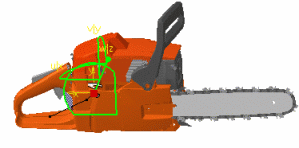
You created a shuttle and a track using this shuttle: 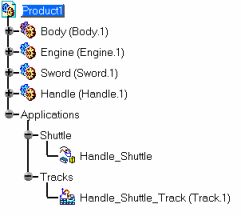
Next, you are going to illustrate this dismounting operation. If you are unable to complete the next task at this time, you may wish to save your work in a unique file, using the File > Save As option, and open that file, instead of CHAINSAW.CATProduct when you begin the Illustrating the Dismounting Operation task.