Open CHAINSAW.CATProduct document.
-
Click the Track
 from the DMU Simulation toolbar.
The Track dialog box along with the Recorder and Player pop-up toolbars are displayed: 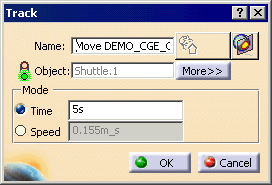

You can alter the name of the track by entering one in the Name field, or you can accept the default name provided. You can also set a Speed for the movement or input a Time by which the movement should be complete. Recorder Pop-up Toolbar
Player Pop-up Toolbar

-
You are ready to record your track: select the product to move. In our example, select DEMO_CGE_CHAINSAW_BODY_FILTERCOVER.1 either in the specification or in the geometry.
Player becomes active and the Manipulation toolbar appears. Manipulation Pop-up Toolbar
-
Select the required interpolator. In our example, keep the default (Linear).
You can change the interpolator type at any time during your track recording. 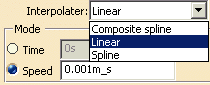
-
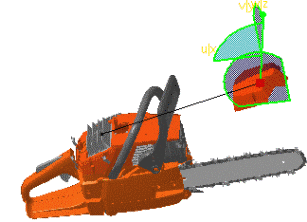
Move the 3D compass and click Record
 on the Recorder toolbar at each time position of your choice.
If you double-click Record ,
the automatic insert mode is activated. You can also use the
Insert key instead of clicking Record
.You can modify or delete a position (referred to a shot) at any time. -
Select the shot in the geometry:
-
Perform the deletion or modification:
-
To delete, use the Delete key or click Delete Track

-
To modify, use Modify Track
 .
.
-
The track is automatically updated.
You can also modify the track by using the Reorder Shots  ,
which calls up the Reorder Shots dialog box.
,
which calls up the Reorder Shots dialog box. - To move a shot up one place in the list, select the shot, and press the Up button.
- To move a shot down one place in the list, select the shot, and press the Down button.
- To insert a selected shot after next clicked shot, select the shot, click on the shot you wish it to follow and push the After button.
When editing a track, you can multi-select shots to be deleted by using LMB + Ctrl key or LMB + Shift key. This is an example of what you can get: 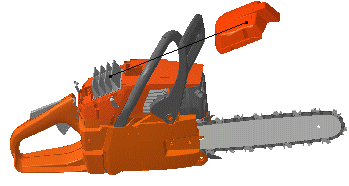
The track is created and identified in the specification tree (it appears under Tracks node and under the part's node). 

For more detailed information, please read Track Editor and Recorder and About Player sections -
-
Click OK to exit Track
.
The modified position is kept. -
Click Reset
 to go back to the initial position.
You can delete the track at any time if you are not satisfied. -
Right-click Track.1 and select Track.1 object to access the track contextual menu and various operators.
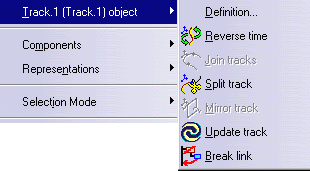
For more detailed information about these menu items (referred to as track operators), see About Track Capabilities and About Track Operators. -
Double-click Track.3 if you need to:
-
Replay your track simulation (use the Player)
-
Edit the track (modify a position or delete a position)
For instance, play your track using the Play forward button. The time is specified in seconds in the Player (corresponds to the current time). 
-
-
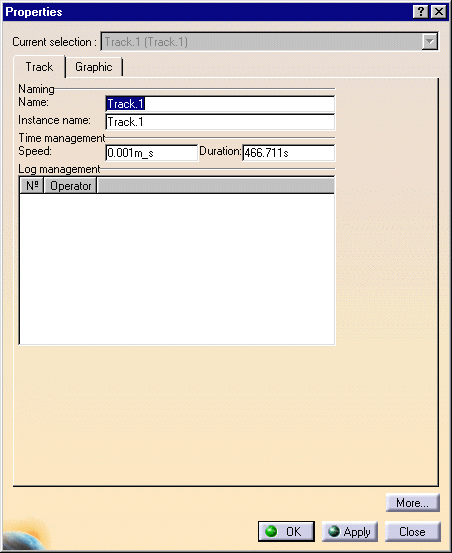
Check the speed and duration of your track simulation and modify it if necessary.
To do this, right-click on Track.1 in the specification tree and select Properties. Then, enter a new speed value. The duration is recalculated. You can also modify the track name as desired. -
Click OK.
The default speed is 0.001m_s (see: Customizing DMU Fitting). When you modify the speed and/or duration, the default value is automatically overwritten with the new speed value. For instance, you might need to reduce the track speed because your object is too heavy (Note: a track comprises the trajectory itself plus the object), the duration is automatically recalculated (longer duration) and the Default speed has been updated in Tools > Options > Digital Mockup > DMU Fitting > DMU Fitting tab.