|
 |
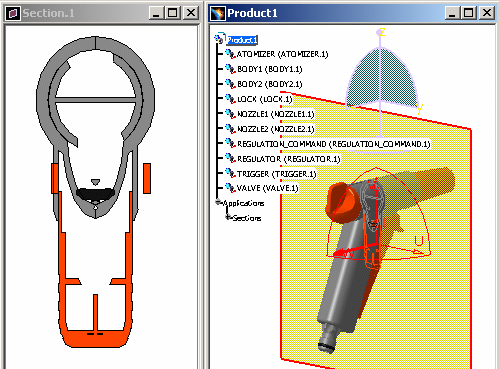
Insert the following cgr files: ATOMIZER.cgr, BODY1.cgr,
BODY2.cgr, LOCK.cgr, NOZZLE1.cgr, NOZZLE2.cgr, REGULATION_COMMAND.cgr,
REGULATOR.cgr, TRIGGER.cgr and VALVE.cgr.
They are to be found in the online documentation filetree
in the common functionalities sample folder cfysm/samples. |
|
 |
Before you begin
When dealing with CATProducts containing a large amount of
sections, for gain performances purposes, read carefully the
Customization
recommendations (follow the described procedure).
-
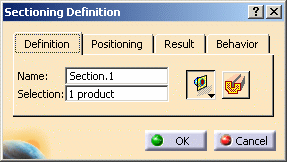
Select Insert > Sectioning from the menu bar,
or click Sectioning
 in the DMU Space Analysis toolbar to create a section plane.
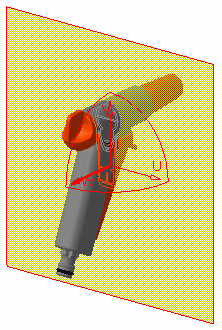
The section plane is
automatically created. If no selection is made, the plane sections all
products. If products are selected, the plane sections selected products.
in the DMU Space Analysis toolbar to create a section plane.
The section plane is
automatically created. If no selection is made, the plane sections all
products. If products are selected, the plane sections selected products.
-
In the Definition tab of the Sectioning
Definition dialog box, click the
Section Slice drop-down
 to create a section slice:
|
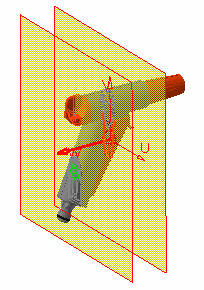
A second plane, parallel to the first, is created.
Together both planes define a section slice through your products.
The contours of both planes are red.
The Section viewer is automatically updated. |
|
|
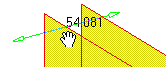
-
Adjust the thickness of the section slice: position the
cursor over one of the slave plane edges, click then drag to translate
the plane in the desired direction.
|
 |
Note: As you move the cursor over plane
edges, the cursor changes appearance and arrows identifying
directions along which slice thickness can be defined appear. The
thickness of the slice is also indicated as you drag. |
|
|
-
Click OK when done.
 |
Note: When sectioning solids which are intersecting,
the result displayed is not correct. The intersection between the
two solids is not retrieved nor displayed properly, i.e. an empty
cavity appears instead.
Refer to About
Sectioning solids which are intersecting |
|