You can position section planes, section slices and section boxes with respect to a geometrical target (a face, edge, reference plane or cylinder axis). In the case of section slices and boxes, it is the master plane that controls how the slice or box will be positioned.
![]()
This task illustrates how to position a section plane with respect to a geometrical target.
![]()
Insert the following cgr files: ATOMIZER.cgr, BODY1.cgr, BODY2.cgr, LOCK.cgr, NOZZLE1.cgr, NOZZLE2.cgr, REGULATION_COMMAND.cgr, REGULATOR.cgr, TRIGGER.cgr and VALVE.cgr.
They are to be found in the online documentation file tree
in the common functionalities sample folder cfysm/samples.
-
Select Insert > Sectioning from the menu bar, or click Sectioning
 in the DMU Space Analysis toolbar and
create a section plane. The
Sectioning Definition dialog box appears.
 A Section result window showing the generated section appears alongside the document window.
The generated section is automatically updated to reflect any changes made to the section plane.
-
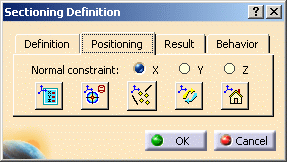
Click the Positioning tab in the Sectioning Definition dialog box.
-
Click Geometrical Target
 to position the plane with respect to a geometrical target.
 -
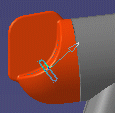
Point to the target of interest:
A rectangle and vector representing the plane and the normal vector of the plane appear in the geometry area to assist you position the section plane. It moves as you move the cursor.
-
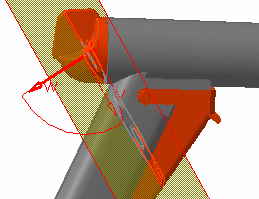
When satisfied, click to position the section plane on the target.

Notes: -
To position planes orthogonal to edges, simply click the desired edge.
-
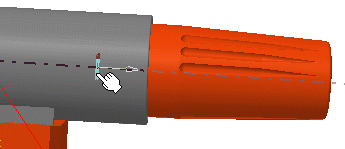
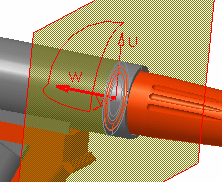
A smart mode recognizes cylinders and snaps the plane directly to the cylinder axis. This lets you, for example, make a section cut normal to a hole centerline. To de-activate this mode, use the Ctrl key.
-
Selecting the Automatically reframe option in the DMU Sectioning tab (Tools > Options > Digital Mockup > DMU Space Analysis), reframes the Section result window and locates the point at the center of the target at the center of the Section viewer.
Zooming in lets you
pinpoint the selected point.
This is particularly useful when using snap capabilities in a complex DMU session containing a large number of objects.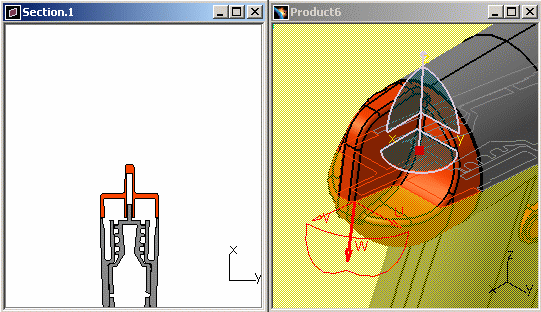
-
-
(Optional) Click Reset Position
 to restore the center of the plane to its original position.
 -
Click OK in the Sectioning Definition dialog box when done.
P2 Functionality
In DMU-P2, you can move the plane along a curve, edge or surface:
-
Point to the target of interest
-
Press and hold down the Ctrl key
-
Still holding down the Ctrl key, move the cursor along the target. The plane is positioned tangent to the small target plane
-
As you move the cursor, the plane moves along the curve or edge.
![]()