This task shows you how to use the Downward Compatibility batch. This batch provides downward compatibility between the most recent release (including service packs) down to V5R6, which means that Version 5 data can be reused from one release to another.
You can process file documents,
CATIA-type documents stored in ENOVIA LCA and, only when working on UNIX,
CATIA-type documents stored in ENOVIAVPM.
However, bear in mind that appropriate licenses are required to be
able to access documents in ENOVIA LCA and ENOVIAVPM.
For instance, if you do not have the license required for using VPM
Navigator, you will not be able to select the ENOVIA LCA type.
- If you select a CATPart document, the PartBody is
copied and pasted
AsResultWithLink to the target document.
Open Bodies are not converted as a whole. Only the feature defined as an external view in the Generative Shape Design workbench is copied and pasted AsResultWithLink to the target document. This also means that even if a Generative Shape Design feature is created directly under a part body, the feature will not be converted - When working with a document generated with the Downward Compatibility batch, it is recommended to deactivate Folder of the pointing document in the Linked Document Localization area of the Tools > Options > General > Document tab to avoid conflicts with the original document.
Accessing the Downward Compatibility interface from the command line
-
Open an MS-DOS Window.
-
Change to the default folder in which you installed the product.
The default folder is: C:\Program Files\Dassault Systemes\Bn\intel_a\code\bin(on Windows)or
/usr/DassaultSystemes/Bn/OS_a/code/command/(on UNIX)(where
nis the current release number)Before running the batch, make sure that your environment is correctly set up:
- on Windows, the batch environment is installed during Version 5 installation
- on UNIX, you have to set up this environment before running a session. For more information, refer to Starting a Session on UNIX.
-
Enter the following command:
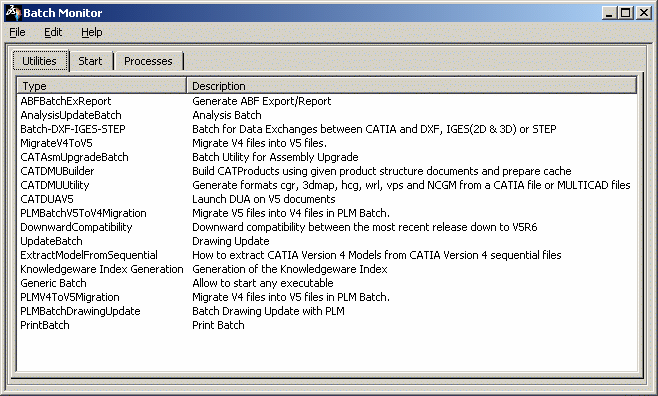
Accessing the batch interface from the Batch Monitor
-
Access the Batch Monitor interface, either from the command line, or from a Version 5 session.
The Batch Monitor opens:
-
Double-click DownwardCompatibility from the list.
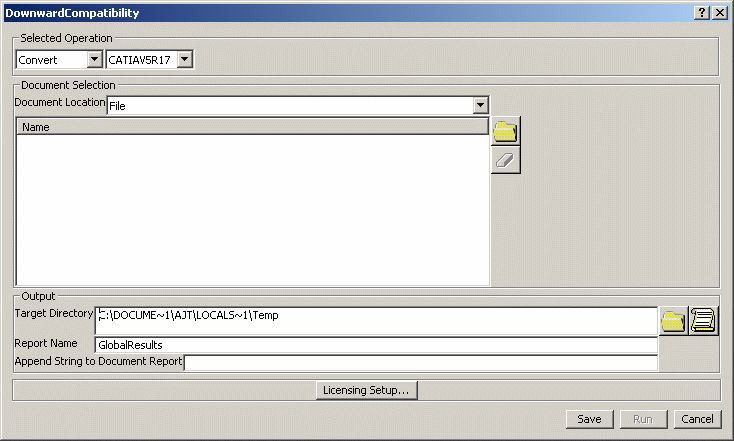
The DownwardCompatibility window opens (click the thumbnail to enlarge the picture): 
When running the DownwardCompatibility batch from the Batch Monitor, some additional options are available: Remote mode
You can choose to run the batch locally, or on a remote computer by selecting the appropriate option:
-
Run Local: default option. When selected, the batch is run in local on your local computer
-
Run Remote: select this option then indicate the name of the remote computer on which the batch will be run. The remote computer uses the printers set up on your local computer.
Note that:-
when using Windows printers, you can run the batch in remote mode on Windows computers only
-
when using 3DPLM printers, you can run the batch in remote mode either on UNIX or on Windows computers.
-
For more information, refer to Running Batches in Remote Mode.
Licensing
You also have the ability to select a license by clicking Licensing Setup....
Getting contextual help
The batch-specific online documentation can be accessed directly from the batch interface by clicking
 in the top-right corner (on
Windows) or Help (on UNIX).
in the top-right corner (on
Windows) or Help (on UNIX). -
![]()
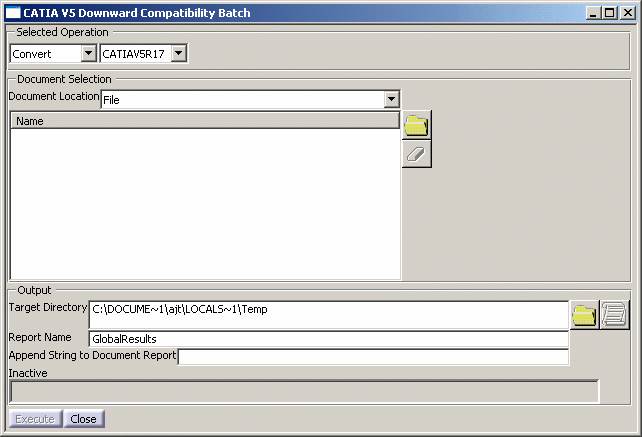
Defining the batch parameters
Selected Operation
-
Select the action to be performed from the list (where you see "Convert" right now):
Convert
Converts a document into a format which can be read on the target release.
For each selected document, the Report informs you about the process (i.e. converted or not) and the result (i.e. success or failure).Note that there are particular cases when selecting the documents to be converted:
Case 1 The document to be converted is already a conversion of another document. In that case, it is recommended to select rather the father document than the converted document to avoid the conversion of a converted document:
- if the father document is accessible and readable, the selection of the child document cannot be performed. A pop-up warning is displayed to prompt you to select the father document instead.
You cannot force the conversion of the child document, unless the father document is removed or renamed.
- if the father document can be neither accessed nor read (release posterior to the execution release), a pop-up warning informs you that the document is already a converted document.
However, the selection is accepted and the document will be considered as any other document. The converted document will then point to the father document and not to the original document.
In the Report window, you will be informed that the document is already a converted document and the status of the father document (name, availability and minimum release to be read) will be indicated.Case 2
- If the pointed document cannot be found (or has been
removed), it is displayed as being selected.
The Report window informs you that the document cannot be accessed - If a selected or pointed document is not readable in the execution release, it is selected. The Report window informs you that the document is unreadable and gives you the minimum release to read the document.
In case a selected document cannot be converted, a pop-up warning is displayed to explain why the conversion cannot be performed. You just have to re-select the document in the Document Selection area then click  .
The selected document and all its related files will be removed
from the list, provided that these related files are not linked to
another document.
.
The selected document and all its related files will be removed
from the list, provided that these related files are not linked to
another document. Synchronize
Synchronizes a document. This action is relevant for converted documents whose original documents have been modified.
Selecting this option deactivates the incompatible fields which are Target Directory (since documents are written in the same location after synchronization) and the field indicating the target version.
For each selected document, the Report window gives you information about the process (i.e. synchronized or not) and the result (i.e. success or failure).Note that there are particular cases when selecting documents to be synchronized:
Case 1 The document to be synchronized is not a converted image of another document: in that case, a pop-up warning is displayed to indicate that the selection cannot be performed.
Case 2 The document to be converted is already a converted image:
- if the father document is accessible and readable, the selection can be performed. The father document is not displayed in the list of pointed documents
- if the father document is not accessible, the selection
cannot be performed and a pop-up
warning is displayed.
All pointed documents (except the father document) are displayed in the list of documents to be synchronized, whether they are converted images, accessible, readable in the execution release or not. The Report window indicates the status of each document.
Info
Provides general information about the document.
Selecting this option deactivates the incompatible boxes which are Target Directory (no document is written when the Info check box is selected) and the box indicating the target version.For each document to be converted, the report indicates - the minimum release version enabling the document to be read without any conversion
- if the document is already a converted image:
- the name of the father document along with its availability
- the minimum release version for reading the father document without conversion.

When swapping from one action to another, do not forget that the selected documents must comply to the selection rules of the new action. -
Select the CATIA V5 release to which the documents will be converted: CATIAV5R6, CATIAV5R7, CATIAV5R8, and so on.
This list can be accessed in Convert action only, otherwise it is grayed out. Document Selection
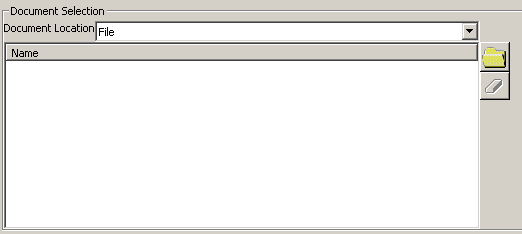
-
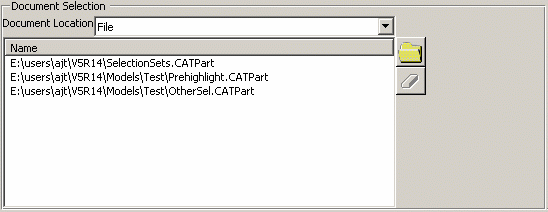
Use the Document Location list to select the type of documents to be processed: either File, ENOVIAVPM or ENOVIA LCA.
-
Still in the Document Selection area, click
 to
select the documents to be converted. Each document type is associated to
a specific search interface (click the thumbnails to enlarge the
pictures):
to
select the documents to be converted. Each document type is associated to
a specific search interface (click the thumbnails to enlarge the
pictures):File
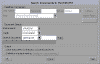
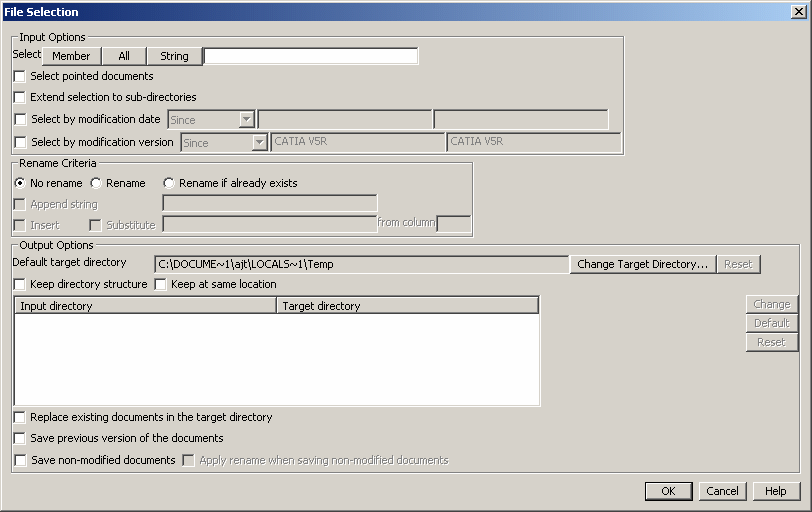
When searching for File documents with the Convert or Synchronize action selected, the search is performed via the File Selection dialog box:
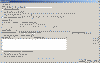
If the Info action is selected, the File Selection dialog box slightly differs because this action does not require as many data as the Convert action: 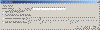
For detailed information on this dialog box, refer to Searching for File Documents. ENOVIA V5
When searching for ENOVIA V5 documents, the search is performed via the Search Documents in ENOVIA LCA dialog box:
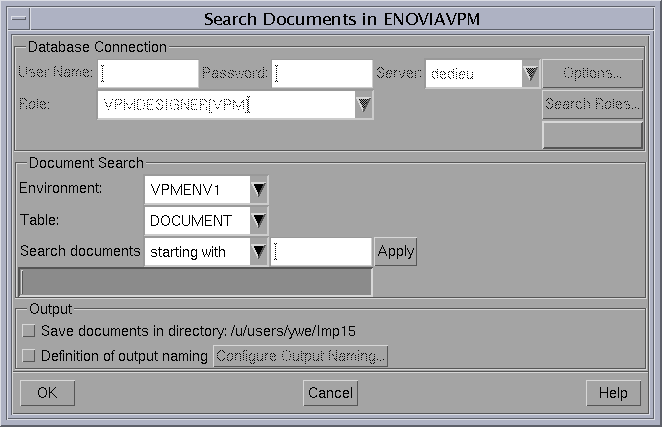
For detailed information on this dialog box, refer to Searching for Documents in ENOVIA LCA. ENOVIAVPM (UNIX only)
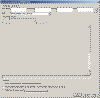
When searching for ENOVIAVPM documents, the search is performed via the Search Documents in ENOVIAVPM dialog box:
For detailed information on this dialog box, refer to Searching for Documents in ENOVIAVPM. This scenario takes the File document location as an example. -
Enter your search criteria in the search dialog box.
-
In the Target Directory box, key in the output directory or DLName or, click
to
navigate through the file tree to the desired directory.
This field is mandatory and is initialized with the current or temporary directory by default.If you set the DLName environment as "Current" in Tools > Options > General > Document tab, the usual File Selection dialog box is replaced by the following one: 
The DLName document environment lets you restrict the access to specific folders referenced by logical names referred to as "DLNames" (each folder is assigned a logical name).
In this mode, the different file opening and saving commands only allow end users to access documents in directories referenced by DLNames.DLNames are identified by the string
CATDLN://, for instance "CATDLN://DLNAME3".Use the Look in: list to select the root DLName in which you want to navigate. The sub-folders (if any) stored in the selected root DLName are then displayed in the DLName list below and you can choose a DLName in list: the selected DLName is displayed in the "Selected DLName" field and will be set as the target directory.
Note that once you are in a sub-folder, you can re-access the upper level by clicking .
.You can also click
 to access the
Search Results dialog box which lets you search for DLNames
using a specific interface.
to access the
Search Results dialog box which lets you search for DLNames
using a specific interface.Once you have found the desired DLName, click OK to validate.
-
Enter the name of report in the Report Name box. By default, the report is named "GlobalResults":
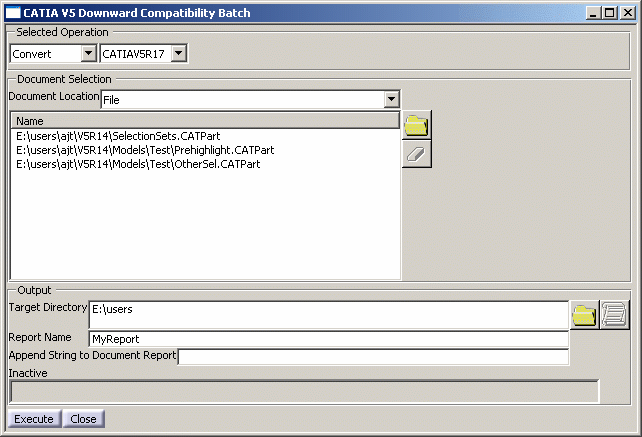
For each processed document, the batch creates a document report in the target directory. By default, the name of the report is the name of the document suffixed with ".htm". You can change this default name by suffixing the document report name with the string of your choice. To do so, enter the string to be added at the end of the name in the Append String to Document Report box. -
Click Execute to run the batch. In case one of the above boxes is not correctly filled, the command is grayed out.
The completion is indicated by the progress bar at the bottom of the dialog box (when no batch is running, the prograss bar is identified as "Inactive"): 
Note that when you access the Downward Compatibility Batch interface via the Batch Monitor, there is no progress bar. Once the conversion is over, the Report window opens.
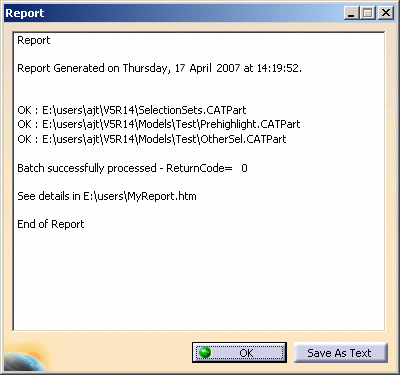
The report indicates if each of the selected documents has been processed or not along with the result (success or failure).
The report contains only text and cannot reference images, URL links, etc.At the end of the report, one of the following return codes will be displayed:
- ReturnCode = 0
 the batch ended successfully
 - ReturnCode = 4
at least one
document could not be processed
- ReturnCode = 8
the batch
aborted.
To save the report, click the Save As Text button.
In case you want to modify your conversion parameters, you must close the Report window first then run the batch once again.
- ReturnCode = 0
-
Exit the Report window by clicking the cross in the top right corner or OK.
-
To display an HTML version of the report, click Open HTML Report
 . This button is activated
only once a report has been generated, otherwise it is grayed out.
. This button is activated
only once a report has been generated, otherwise it is grayed out.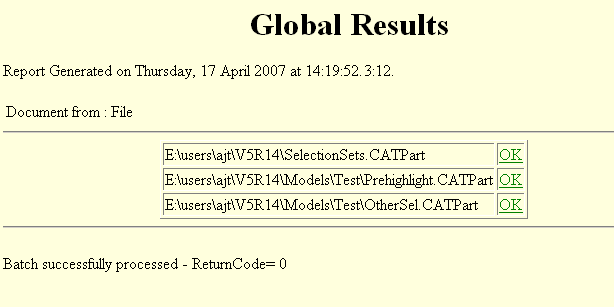
However, you can still use the former method to visualize the report, i.e. open the HTML file from the directory in which it has been saved.


![]()
Running the batch from the command line
Using CATDownwardCompatibility
-
Open an MS-DOS Window.
-
Change to the default folder in which you installed the product.
The default folder is: C:\Program Files\Dassault Systemes\Bn\intel_a\code\bin(on Windows)or
/usr/DassaultSystemes/Bn/OS_a/code/command/(on UNIX)(where "n" is the current release number)
Before running the batch, make sure that your environment is correctly set up:
- on Windows, the batch environment is installed during Version 5 installation
- on UNIX, you have to set up this environment before running a session. For more information, refer to Starting a Session on UNIX.
-
Enter the following command:
![]()