- virtual reality configuration
- cluster options
- virtual reality options
- maximum frequency for event sending
- automatically started daemons
This task explains how to set up peripheral devices.
The peripheral devices concerned are primarily:
- the joystick
- the spaceball/space mouse.
The joystick is supported on all product brands and on all supported Windows platforms.
The spaceball and space mouse are supported on all P2 products on all supported platforms.
Virtual Reality Configuration

Prior to activating a configuration, you need to generate the corresponding configuration file in the Immersive System Assistant workbench.
Each configuration is saved in a .xml file and contains all the necessary MPK display configuration, including those related to the supported drivers and brokers which are now threaded.
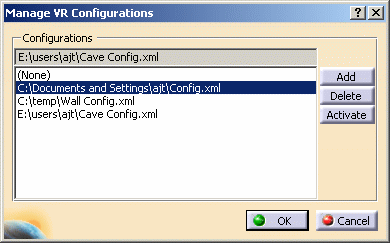
To set a configuration as active, click the Manage button to open the following dialog box:

Select the desired configuration in the list and click Activate then OK to validate: the selected configuration now appears in the Active Configuration box. You need to restart your Version 5 session to take the new active configuration into account.
You can also:
- remove a configuration from the list by selecting it then clicking the Delete button
- add a configuration to the list by clicking the Add button. This opens the Select VR Configuration dialog box that lets you browse your file tree to select the configuration file to be added to the list. Once a file is selected, click the Open button to add it to the list.
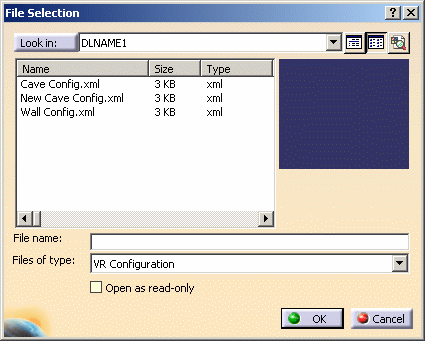
The DLName document environment lets you restrict the access to specific folders referenced by logical names referred to as "DLNames". Each folder is assigned a logical name. In this mode, the different file opening and saving commands only allow end users to access documents in directories referenced by DLNames.
When working in a DLName environment, the following dialog box opens:

If you want to search for a
configuration file stored in another DLName, click the black arrow next to
"DLNAME1" then select the desired DLName from the list. This list contains
all the DLNames that have already been
defined via the Document tab. You can also search for a DLName or for a configuration file stored
in a DLName by clicking the
![]() button.The File Selection dialog box is identical to the
Open document dialog box displayed when selecting File > Open
in a DLName context. For detailed information on how to use this dialog
box, refer to the
DLName Integration section.
button.The File Selection dialog box is identical to the
Open document dialog box displayed when selecting File > Open
in a DLName context. For detailed information on how to use this dialog
box, refer to the
DLName Integration section.
When the configuration file has been selected, click OK to validate and close the File Selection dialog box.
Cluster Options

Frustum Culling
Algorithm discarding objects outside the viewing pyramid (called "frustum"). This option is especially useful when zooming several times in succession.
The values you can set are:
- As Default: the value displayed in Configuration default value is used. It is chosen according to the current active VR configuration (generated in the XML file)
- Frustum Culling activated: slave screens that are not totally inside the viewing pyramid defined by the main screen are excluded
- No Frustum Culling: slave screens that are not totally inside the viewing pyramid defined by the main screen are included.
Pixel Culling
Algorithm discarding objects smaller than a given pixel size on screen.
The values you can set are:
- As Default: the value displayed in Configuration default value is used. It is chosen according to the current active VR configuration (generated in the XML file)
- Flat Pixel Culling activated: small objects are discarded by slave windows
- No Pixel Culling: pixel culling is deactivated
- Spherical Pixel Culling activated: gives the same result on two adjacent non-coplanar screens for a same object half-displayed on both screens. This prevents visualization discontinuities on screen borders. This means that a small object half-displayed on both screens will be discarded either by both slave windows or by none of them.
LOD Mode
LOD stands for the "Level of Detail" used to view geometry. An object can have several LODs. The LOD used to render objects depends on how small the object is on screen.
The values you can set are:
- As Default: the value displayed in Configuration default value is used. It is chosen according to the current active VR configuration (generated in the XML file)
- Standard LOD activated: the standard LOD algorithm is used
- Fixed less detailed LOD: the level used is less detailed than the standard level
- Fixed mid-detailed LOD: the level used is half-detailed compared to the standard level
- Fixed most detailed LOD: the level used is the most detailed one
- Spherical LOD activated: gives the same result on two adjacent non-coplanar screens for a same object half-displayed on both screens. This prevents visualization discontinuities on screen borders. This means that an object half-displayed on both screens will be displayed using the same LOD by both slave screens.
Note that using a high level of detail has an impact on performance.
Master Rendering
Version 5 sends OpenGL calls to the OpenGL Fakespace "Conduit" driver. Then, this driver sends them to the master genuine OpenGL driver (i.e. the master graphics board) to display an image in the Version 5 application and also sends them to the slave computers.
The values you can set are:
- As Default: the value displayed in Configuration default value is used. It is chosen according to the current active VR configuration (generated in the XML file)
- Master Rendering activated: the OpenGL stream is sent to the master graphics board. More precisely, all the additional overlay information is sent but not the geometry OpenGL calls. This value enables to increase performance
- No Master Rendering: the OpenGL stream is not sent to the master graphics board.
Startup slave mouse mode
Especially if Master Rendering is deactivated, you may want to see the mouse cursor in both the cluster window and on the large screen. To do so, you can activate the save mouse mode.
The values you can set are:
- As Default: the value displayed in Configuration default value is used. It is chosen according to the current active VR configuration (generated in the XML file)
- Slave mouse activated at startup: the immersive
mouse can only move within the "overlay space", i.e. the main window,
it cannot move on the slave screens.
When activated, you can toggle the immersive mouse off or on by enteringc:ToggleClusterMousein the power input box - Slave mouse disabled at startup: the immersive mouse can move anywhere.
Startup slave overlay mode
The overlay space is the rectangle corresponding to the virtual
main screen created by the slave windows.
Therefore on the screens, the surface of the overlay space is filled with
exactly the same image as the one displayed in the main window. This
surface can be defined in the Immersive System Assistant
workbench.
The overlay space can intersect several slave screens all coplanar with the
main screen. It can overlap a slave screen only partially.
To be able to pick anywhere in the facing screens and to have the specification tree naturally positioned on the slave screens, it is recommended to define the main window screen as the union of the facing slave screens.
The values you can set are:
- As Default: the value displayed in Configuration default value is used. It is chosen according to the current active VR configuration (generated in the XML file)
- Slave overlays activated at startup: additional
information such as the specification tree, the docked compass, the
bottom right axis system, immersive review toolbars or immersive mouse
cursor is not displayed on the slave screens in the overlay space. Any
information outside the overlay space is clipped.
When activated, you can toggle the overlay space off or on by enteringc:ToggleClusterOverlaysin the power input box - Slave overlays disabled at startup: additional information is displayed on the slave screens (immersive mouse cursor included). This information remains in the main window.
Virtual Reality Options

Move compass with 3D devices
Lets you move the compass using 3D devices, i.e. a Space Mouse or a SpaceBall for instance when put into the 3D scene. This means that when compass is docked in the top right corner of the screen, the space mouse moves the viewpoint and when the compass is in the 3D scene, then the space mouse moves the compass.
![]() By default, this option is activated.
By default, this option is activated.
Line immersive cursor
You can customize the 3D picking device (laser beam) representation to obtain a better precision in picking and a better visualization in dark environments, all you need to do is:
Select the Line immersive cursor check box.
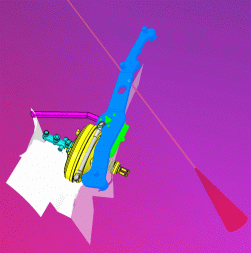
The 3D picking device representation becomes a white and thin line (see
images below):


Standard representation
New representation
Maximum frequency for event sending

Max Frequency (event/sec)
Maximum frequency (number of events per second) at which events are sent
by peripheral devices. This value aims at limiting the frequency of emitted
events for some devices. Polhemus, for instance, is not impacted by this
value.
We recommend that you use the default value, unless the peripheral device
you are using has special requirements.
A process filters the mass of events generated when using I/O devices and relays only the useful events to Version 5.
The c:VR Monitor command activates a diagnostic window
(named VRMonitor) displaying any drivers declared to the broker as well as
any events those drivers are able to send.
Automatically Started Daemons

- Lighted Programmable Function Keys: lets you activate a daemon for using a client-specific device
- Space Daemon: SpaceBall/SpaceMouse. It is an automatic, i.e. threaded, driver which means that it can be managed by an automatic broker. This driver manages the orientation as well as button information
- Joystick
Select the appropriate option to ensure that the peripheral device will be activated and recognized the next time you start a session. This setting requires the use of a peripheral broker. If you are using the peripheral devices for which native support is provided by Version 5 (joystick, SpaceBall/SpaceMouse): the peripheral broker process is started automatically when you start a session. Otherwise, you must run it manually.