THE SOLUTION
Modifying the P90 complex to run a P200 requires two steps, the first of which isn't really
for the faint of heart since it requires that the 60MHz oscillator on the precious P90 complex
be desoldered and replaced with a 66MHz unit. I must admit that I shed some sweat
the first time I did this, but rest assured that it's not *all* that difficult to do if you have
the appropriate tools and a steady hand.
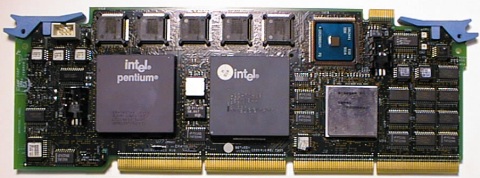
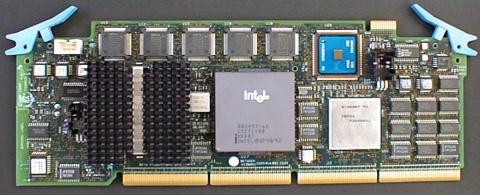
Here's how a stock P90 card looks without the heatsink:
Between the processor and the cache controller is the oscillator, which gets replaced by this faster unit:
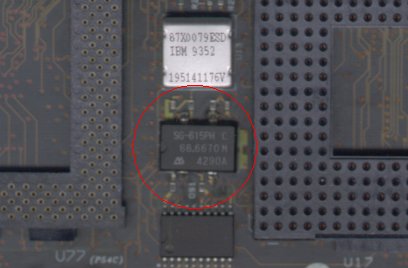
(Note: I've used both the 66MHz and 66.667MHz oscillators successfully.
However, if you feel the need for maximum compatibility and stability,
the 66MHz unit as used on the type-4 P66 complex might be the better choice)
Once the oscillator is replaced, the complex operates at 66MHz, much like the Type-4 P66 complex.
The next thing that must be done is to adjust the clocking-multiplier to be 3X. On the current
crop of clone motherboards this task is trivial, but since IBM's P90 complex doesn't have any
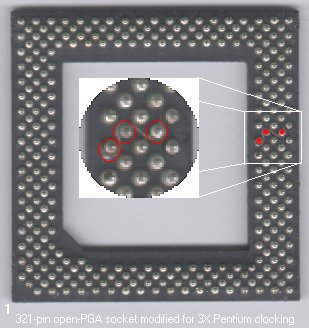
provision for adjusting such things, a workaround must be made. I did so by using an
"open" PGA 321-pin socket that has the appropriate pins connected via tiny wires soldered in place.
Louis has coined this item as the Terminauter, and I will refer to it as such hereafter.
Here are some shots of how the socket looks:
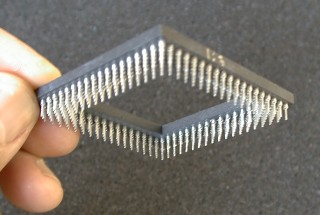
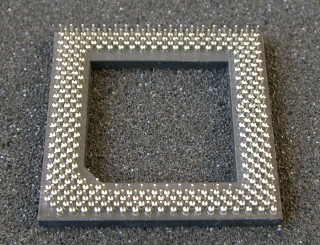
Here are the pins that need to be connected on the bottom of the socket:
The way the Terminauter works is by sitting in between the processor and the
processor complex itself. Since the appropriate pins have been hardwired to 3X on the Terminauter,
any Pentium processor that is mounted on it gets clocked at 3 times the base clock (in this case 66MHz)
which yields 200MHz.
Here's how the complex looks with a P200 processor mounted on the Terminauter:

As you might guess, the Terminauter unit incurs a slight height penalty on the processor, which
will cause a bit of difficulty when you try to mount the stock heatsink back in place. I bypassed
this problem by using a nice heatsink unit from a spare processor card off my Server 720 machine.
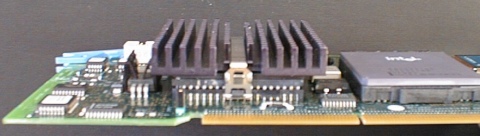
Here's a full view of the completed P200 Type-4 complex:
Here's a close look at the mounted Terminauter:
That's about it! This particular setup has been running Windows NT-4 (with RAID) flawlessly for me.
Disclaimer: As with all other contents on this site describing modifications that may
boost the performance of your hardware, the author(s) are only describing methods that
are for the most part "experimental" in nature. Some of these modifications will void
your manufacturers' warrantee, and at worst may also permanently damage your hardware.
If you choose to perform any of these modifications, please do so understanding these
risks, as the author(s) cannot be held liable for any loss or damage that may result.
|