![]()
This task shows you how to customize Catia settings.
![]()
|
|
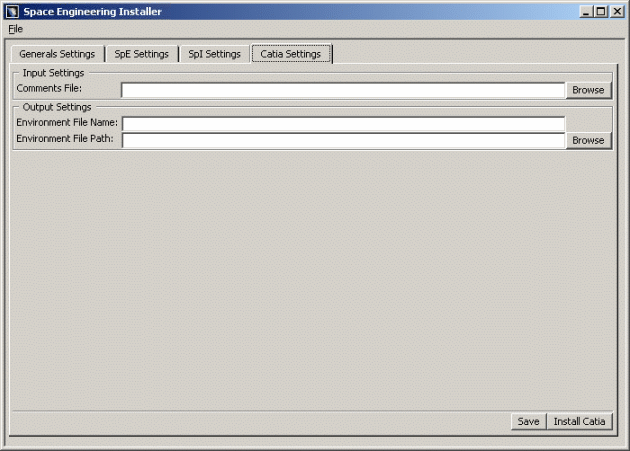
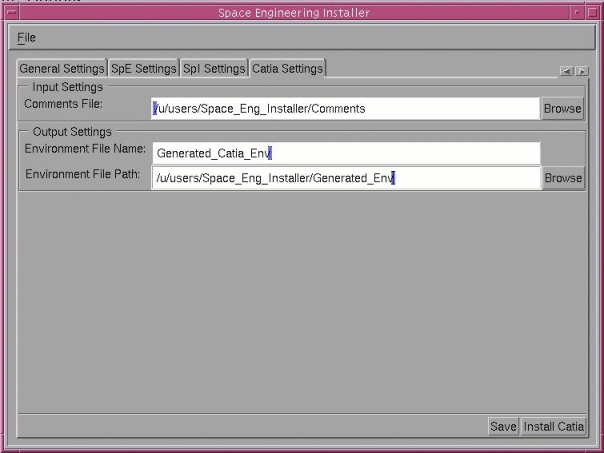
Input Settings
In the area, customize the various paths and files as follows:
-
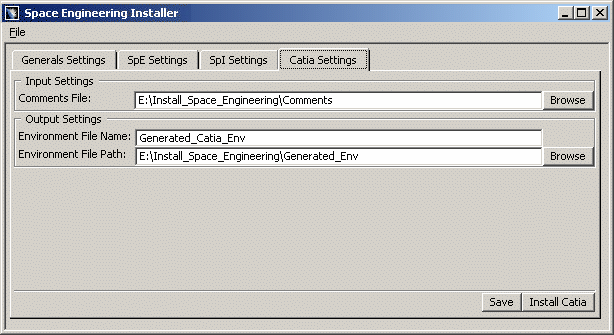
In the Comments File field, select the full path Comments file. CATIA client comments are stored in this file.
In our example: E:\Install_Space_Engineering\CommentsFor this, click Browse and select the path accordingly in the File Browser-Choose Comments file dialog box displayed. Click Ok when done.

Note: This pointed file must exist or must have been created before having launched Space Engineering Assistant in a CATIA session.
Output Settings
In the Output Settings area, customize the various paths and files as follows:
-
In the Environment File Name field, specify the name of your choice for the CATIA environment file
(i.e. Generated_Catia_Env). -
In the Environment File Path field, specify the path to the directory in which the environment file will be created.
In our example: E:\Install_Space_Engineering\Generated_Env
For this, click Browse and select the path accordingly in the Path Browser-Choose Catia Environment Directory dialog box displayed. Click Ok when done. -
Check your result, you should obtain something like this:
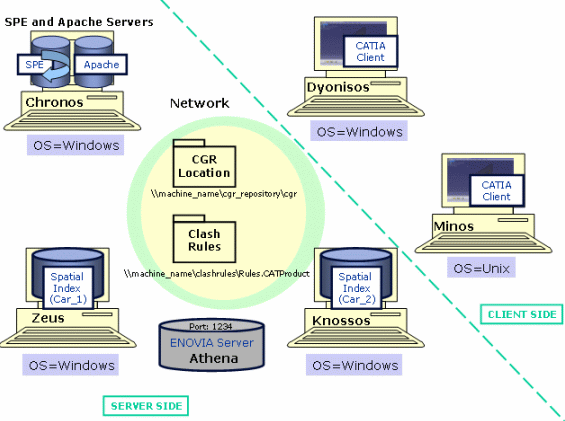
Now, let's have a look at our architecture example

If we zoom in on the various components
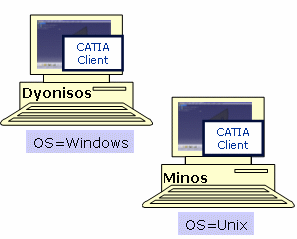
Example of what you can obtain with a Unix interface:
-
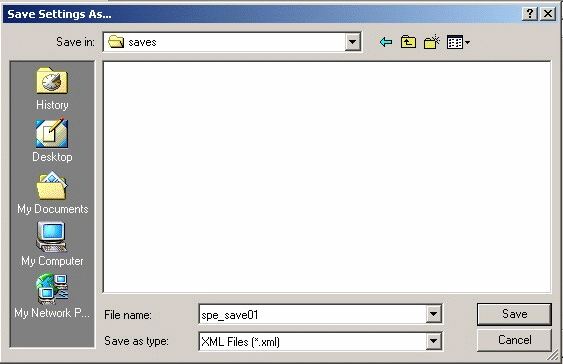
Click Save when satisfied. The Save Settings As dialog box is displayed:
-
Enter a meaningful name (in our example spe_save01) to save your xml settings file.
-
Click Save button
-
-
Click Install Catia.
-
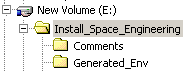
A new CATIA environment file is generated (Generated_Catia_Env). Now, you need to replace the contents of the original CATIA environment file with the contents of this generated CATIA environment file (i.e. the file you have just created). For this:
Duplicate the original CATIA environment file and rename this copy.
For instance in: CATIA.V5R17.B17_backup.txtReplace the contents of the original CATIA Environment file (CATIA.V5R17.B17.txt) with the contents of the generated CATIA environment file (Generated_Catia_Env).
Note: If you have already set personal variables in the CATIA.V5R17.B17.txt file, make sure you do no lose any of them.
For detailed information about CATIA environment file, also read About the Environment Created on Your Computer on Windows section in the Infrastructure Installation Guide
![]()