Note that some of the adjustments detailed in this scenario can also be performed using the Light Commands toolbar.
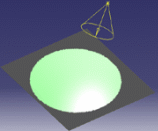
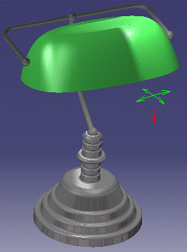
This scenario assumes that a light source has been created as explained in Defining a Light Source.
-
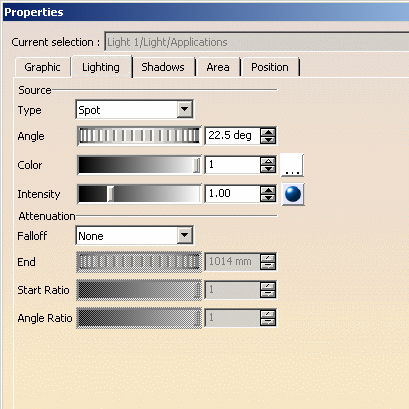
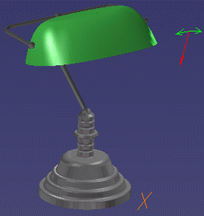
Select the light then Edit > Properties (or press Alt+Enter) to access the Lighting tab in order to edit the lighting parameters.
-
Use the slider to modify the color intensity, then click the
 button if you want to choose another color (the default color is white):
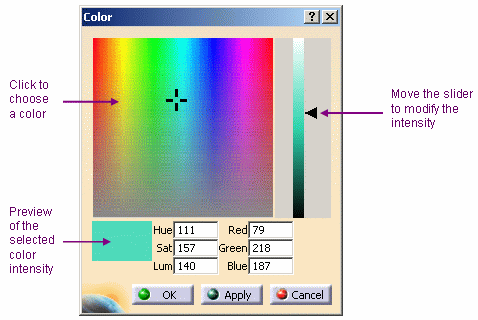
You can enter a value comprised between 0 and 255 for any of these fields. The overall color of a light source is composed of three independent colors: diffuse, ambient an specular. The values of these colors are given in RGB mode or in HLS mode by three real positive values:
- HLS (Hue, Saturation, Luminance) model is an
intuitive, easy to use tool for describing or
modifying a color.
Hue is the "color" of the color. It is the name by which the color is designated and is used to
define the desired color.
Saturation is the intensity of the color. The higher the number, the more intense the color.
It is used to tune the purity of the color.
Luminance is the brightness of the color, i.e. the degree to which the pure color is diluted by
white or black. The larger the number, the lighter the color. It is used to adjust intensity - RGB (Red, Green, Blue) model is a more physical model.
It is based on the tri-stimulus theory
of the human perception system. This model is usually used to define, with a high precision, the
three primary components of the color.
- HLS (Hue, Saturation, Luminance) model is an
intuitive, easy to use tool for describing or
-
Click OK to confirm and close the Color dialog box.
-
Define the light intensity using the slider or by entering a value directly in the box.
The intensity of a light source is the maximal lightness value of three colors (ambient, diffuse and specular).
The light color will be computed by multiplying the Red, Green and Blue values you defined in previous step by the intensity value. Therefore, this parameter allows you to adjust the luminosity of the light source, while preserving its chrominance ("color") component.
You can enter values comprised between 0 and 4: the higher the value, the more saturated (i.e. the whiter) the light. More precisely, as soon as the intensity value exceeds 1, the color starts saturating.
Here are two examples comparing 2 different sets of RGB values with 3 different intensities. In the first example, all color components (R, G and B) are multiplied by intensity:


R,G,B = 10,100,10
Intensity = 0.5R,G,B = 10,100,10
Intensity = 1R,G,B = 10,100,10
Intensity = 3Result = 5,50,5 Result = 10,100,10 Result = 30,255,30 In the second example, when the intensity is greater than 1, R and B are the only components to be multiplied since G is already saturated: 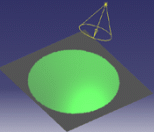
R,G,B = 40,255,40
Intensity = 0.5R,G,B = 40,255,40
Intensity = 1R,G,B = 40,255,40
Intensity = 3Result = 20,128,20 Result = 40,255,40 Result = 120,255,120 -
To define more precisely the light intensity, click the
 button which opens the
Intensity dialog box:
button which opens the
Intensity dialog box: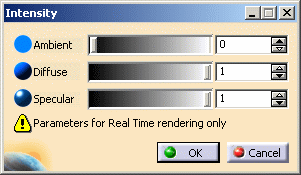
This dialog box lets you define three coefficients using the slider or by entering a value directly in the corresponding box: - Ambient: defines the intensity of light emitted in any direction by the object, even if not lit by any light source
- Diffuse: defines the intensity of light diffused by the object when lit by a light source
- Specular: defines the intensity and color of light reflected in one particular direction. This coefficient affects the highlight on shiny surfaces.
These three coefficients only impact the material aspect. They are identical to those used to define material lighting properties (and are used in combination with them) but have no influence on the material definition.
Example of use: when visualizing a model on screens with different characteristics (e.g. LRT screen versus LCD screen), you can recalibrate the screen simply by modifying the light intensity using these three coefficients. You do not need to modify all the materials.
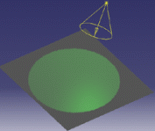
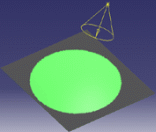
The following images show how Ambient, Diffuse and Specular coefficients impact the material aspect: 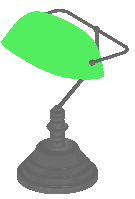
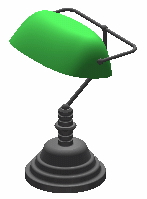
Ambient only:
- no relief
- no highlightDiffuse only:
- relief
- no highlightSpecular only:
- no relief
- highlight -
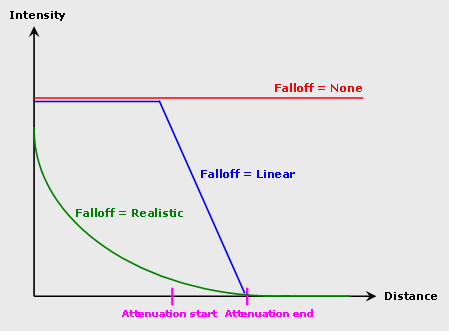
The Falloff box lets you define the light energy attenuation (which is set to None by default):
- None: no lighting end which means that the light energy will be constant and infinite. The cone limits, however, are kept
- Linear: light energy decreases linearly with a 1/r ratio ("r" = distance to light origin) and stops at attenuation end. For instance, if the energy received at a distance of 10 mm from the light origin will be equal to 1/10th of the light energy at light origin
- Realistic: light energy decreases with a 1/r2 ratio and becomes negligible at attenuation end. A realistic falloff requires a high value when distant objects are to be illuminated.
Note: directional lights do not disperse and therefore have no falloff.
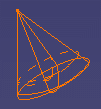
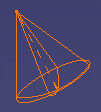
The following picture illustrates the three different types of light energy attenuation:
-
The Lighting tab also lets you define:
-
Click the Position tab to define the light source anchoring point and the point to which the source is directed, respectively in the Origin and Target areas.
You can define this position in millimeters along the X, Y and Z axes.
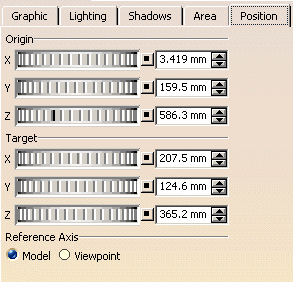
Note that you can click the Reset value  button at anytime to reset the light source to the default
position.
button at anytime to reset the light source to the default
position. -
The Reference Axis area lets you define the light source position relative to the Model axis or to the Viewpoint according to the option you select:
- Model
By default, any light source you create is positioned relative to the model and thus, moving the viewpoint moves the light source along the model. - Viewpoint
Attaching a light source to the viewpoint means that moving the viewpoint only moves the model; the light source keeps the same position in the window.When a light source is attached to the viewpoint, it is identified by an anchor symbol in the specification tree as shown below for Light 1:
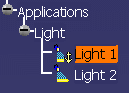

You can also attach a light source to the viewpoint by right-clicking it in the specification then selecting Attach to View. Inversely, once a light source is attached to the viewpoint, you can re-attach it to the model by clearing Attach to View. The Feature Properties tab provides general information on the currently selected light source, e.g. its name, its creation date, etc.
- Model
-
Click OK to validate the parameters.
-
If you want to display the light source viewpoint (to visualize the object as if you were positioned behind the light source), right-click the light item in the specification tree then select Light View:
To go back to the original view, select View > Modify > Previous View or click Previous View
 in the Viewpoint toolbar. Then, you can switch again to
the light view by clicking
Next
View
in the Viewpoint toolbar. Then, you can switch again to
the light view by clicking
Next
View
 .
.Right-clicking the light item in the specification tree also lets you select Update from View to adjust (i.e. center) the light source when the viewpoint is modified as shown below:
Update from View --> 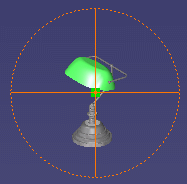
-
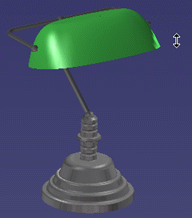
If you want to position the light source along a perpendicular to the point you click on the object.
To do so:
-
right-click the light source item in the specification tree (or the light symbol in the geometry area) and select Position along Normal
then -
place your pointer over any point of the object and click: the light source is positioned along the normal to the selected point.
As long as the Position along Normal command is active, you can hold down the left-mouse button and keep on moving the cursor to find the best position: when satisfied, release the mouse button to position the light source.When satisfied with the result, deactivate Position along Normal by selecting any other command in the workbench or by pressing Esc. -
-
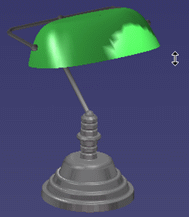
You can also adjust the specular effect of your light source.
To do so:
-
right-click the light source item in the specification tree (or the light symbol in the geometry area) and select Position Specular
then -
place your pointer over any point of the object and click: the specular spot is positioned at the selected point.
As long as the Position Specular command is active, you can hold down the left-mouse button and keep on moving the cursor to find the best position for the specular spot: when satisfied, release the mouse button to position the specular effect.
When satisfied with the result, deactivate Position Specular by selecting any other command in the workbench or by pressing Esc.
-
-
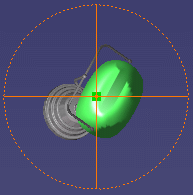
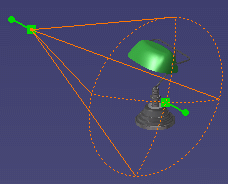
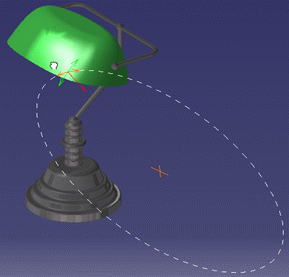
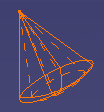
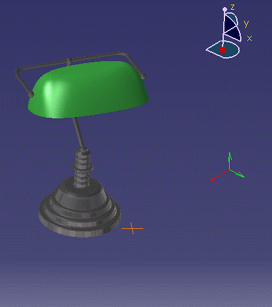
You can position the direction of the light source by right-clicking the light source in the specification tree (or in the geometry area) then selecting Position Direction.
This command lets you manipulate in a very precise way your light source along predefined circles that are centered on the light target.
When you click the icon, the light symbol is replaced with the following symbol representing the light manipulator in 3D, the red arrow representing the light direction (i.e. the target):

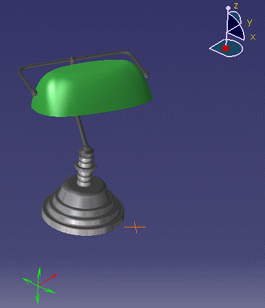
When you point at an arrow, a predefined dotted circle is displayed like this: 
If you drag your mouse along that circle, the light source is rotated along its axis. Now if you position your mouse over an arc, a predefined dotted circle also appears.
If you drag your mouse along that circle, this changes the position of the light origin along the selected arc: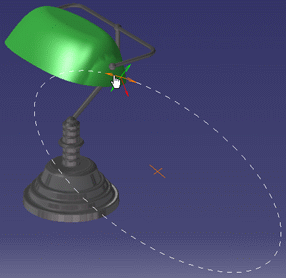
Note that you can move the light position step-by-step by pressing Ctrl then dragging your mouse simultaneously. By default, the light source is rotated 10 degrees by 10 degrees but you can modify this value if needed via the Direction dialog box.


You can also perform the following actions when right-clicking then selecting one of these contextual commands:
Edit Light Direction
This dialog box lets you edit the light direction, the rotation step as well as the quick orientation:
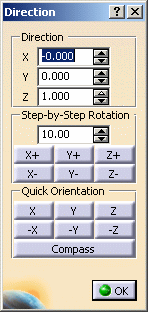
- Direction: the three spin boxes displayed let you define the position of the direction vector along the X, Y and Z directions. The direction vector represents the privileged direction of illumination of the source and is visualized by the red arrow whose origin is the light source origin.
As soon as you modify a value, the light source is updated simultaneously in the geometry area.
- Step-by-Step Rotation: this area lets you define the rotation angle in degrees. The default value is 10.00 but you can enter your own value if needed using the spin box.
When the rotation angle has been defined, click the desired button to start rotating your light source around the corresponding axis by the angle you specified.
For instance, clicking X+ means that the light source is rotated by the specified angle positive (i.e. clockwise) around the X axis whereas clicking -X rotates the light source by the specified angle negative (i.e. anticlockwise) around the X axis:
Starting position: X New position: -X
Rotation = 45 degrees
Note that using these buttons amounts to manipulating the light source directly in the geometry area by pressing the Ctrl key.
- Quick Orientation: this area lets you position the light source parallel to the absolute axis system.
For instance, clicking Y modifies the light origin in order to position the light source parallel to the Y axis.
Inversely, clicking -Y inverts the position of the light source along the Y axis:
Quick Orientation = Y Quick Orientation = -Y
- Compass: this button lets you position the light source according to the compass orientation.
When satisfied, click OK to validate your parameters.
Edit Light Parameters
Selecting this command opens the Properties dialog box (detailed above in this scenario) which lets you modify the light source parameters as needed.
Save Light Direction
Selecting this command opens the following dialog box:
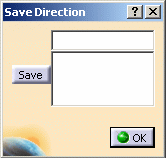
Once you are satisfied with the position of your light source, click Save to store the light position.
Each light position is saved under the following name: Direction.n, for instance "Direction.1" for the first position, "n" being incremented by one for each new position you save.
You can save as many positions as necessary but keep in mind that you are not allowed to modify the position name.When finished, click OK to validate.
If you want to use afterwards one of the light positions you saved, re-select Save Light Direction then double-click the desired position: the light position is updated accordingly in the geometry area.
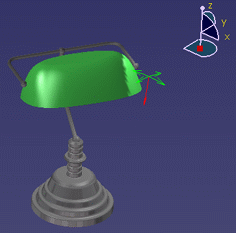
Rotation
The rotation commands let you rotate the light source around the absolute axis system:
- by default, Free Rotation is activated and lets you rotate freely your light source around the X, Y or Z axis using the two green manipulators
- if you activate Rotate around X, you can rotate up or down your light source around the X axis only
- if you activate Rotate around Y, you can rotate up or down your light source around the Y axis only
- if you activate Rotate around Z, you can rotate up or down your light source around the Z axis only.
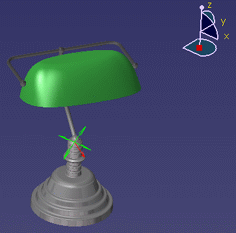
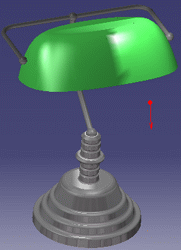
When you select the rotation around the X, Y or Z axis, the green manipulators are hidden and only the light target is displayed:
Lock Manipulator
When you point at one of the two green manipulators then right-click, you can also lock the selected manipulator by selecting Lock Manipulator. This contextual command applies to the local X and Y axes of the light source.
Locking a manipulator means that the rotation in the plane defined by the selected manipulator is locked: the locked manipulator is hidden and you can only move your light source around the unlocked axis of the light source which means that the mouse moves only up or down.
No manipulator is locked One manipulator is locked

To unlock the manipulator, right-click then select Lock Manipulator again.
Once a manipulator is locked, you can also click anywhere in the geometry area then press the space bar to hide the manipulator symbol.
This is especially useful when working with big models because you can still change the light position by pointing at the hidden manipulator (in that case, the cursor shape changes) without being bothered by the display of this manipulator on your model.
This is illustrated by the example below in three steps (from left to right):
- one manipulator is locked
- the cursor shape changes
- you can still drag the hidden manipulator to modify the light direction
To redisplay the manipulator, you just need to press the space bar again.
When satisfied with the direction position, press the Esc key to exit the Position Direction command.
![]()