|
-
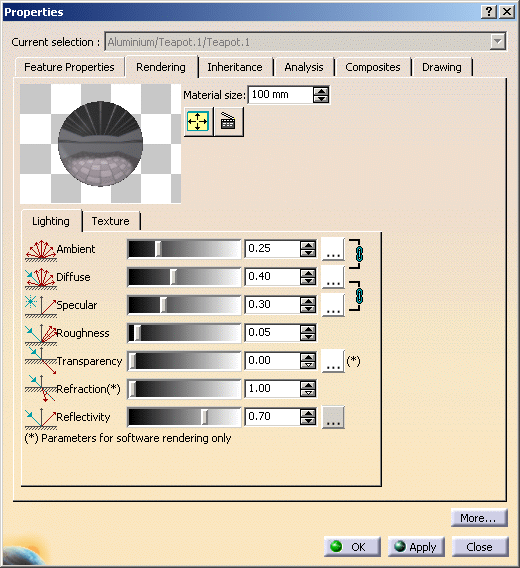
Access the Aluminium material properties
(refer to About Material Properties for
detailed information on the various methods you can use to access
material properties).
| The Properties dialog box is displayed:
|
 |
-
Click the
... button beside the Reflectivity box to
open the Advanced Reflection Settings dialog box:
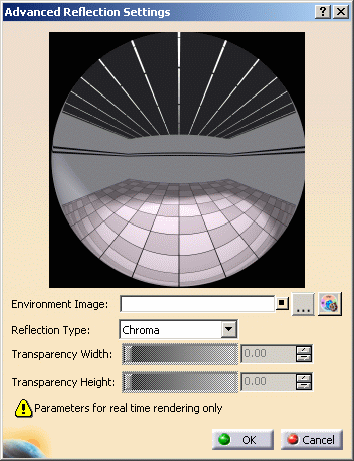 |
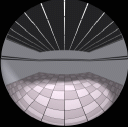
| This displays the default environment provided
which can be seen on the teapot you opened a few steps before.
However, as this image is used for reflection purposes only, you
cannot be able to visualize the environment reflections on the
object unless you set the Reflectivity parameter to a non-zero value (provided that the object itself is reflecting). |
-
Use the Environment Image box to define
another texture image. You can either enter a file name directly in the
box or click ... to navigate to the desired file using
the File Selection dialog box.
|
 |
The Reset Value
 button lets you reset the environment image to the default image.
 |
|
Depending on
the document environments (i.e. the method to be used to access
your documents) you allowed in the
Document settings, an additional window may appear
simultaneously to the File Selection dialog box to let
you access your documents using an alternate method: |
 |
In our
example, four document environments have been allowed among which
the DLName environment. If you want to access your texture files
using DLNames, for instance, just click Logical File System:
this opens a specific dialog box dedicated to the DLName
environment.
For detailed information on this dialog box, refer to
Opening Existing Documents Using the Browse Window. |
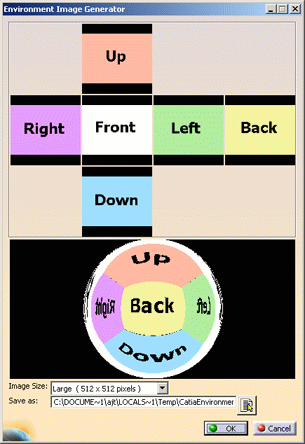
-
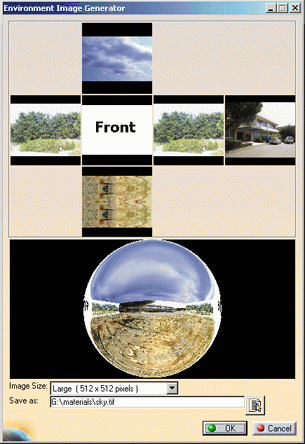
If you wish
to create your own environment image, click the Environment image
generator
 button to open the Environment Image Generator dialog box:
-
In the upper part of the dialog box, click each
environment wall (i.e. "Up", "Back", etc.) then navigate to the desired
image using the File Selection dialog box.
| The resulting environment is displayed on the
environment map as shown below: |
 |
-
The Image Size list lets you choose a small,
medium or large size for your environment image.
-
Enter the name and path of the generated image in the
Save as box or click the Browse Directories
 button to open the File Selection dialog box which lets you
browse your folders to the desired location.
button to open the File Selection dialog box which lets you
browse your folders to the desired location.
-
Click OK to validate and go back to the
Advanced Reflection Settings dialog box.
-
Choose the environment Reflection Type:
Chroma, Paint, Matte Metal, Bright
Plastic or Custom.
-
Click OK.
| The environment image is defined. |
|