 |
To use this command,
point visibility must be ON.
In addition, complete the procedures as described in
Accessing NC Manufacturing Verification
and Comparing the Machined Stock Part and the
Design Part,
including:
- Accessing NC Manufacturing Verification via Replay
Tool Path
 . .
- Clicking Full Video
 within the Replay dialog box.
- Clicking Measure
 within the Replay dialog box.
- Selecting Measure from the Window
menu.
| The Measure dialog box appears: |
 |
|
 |
-
In the Measure dialog box, click Arc
through 3 Points
 . .
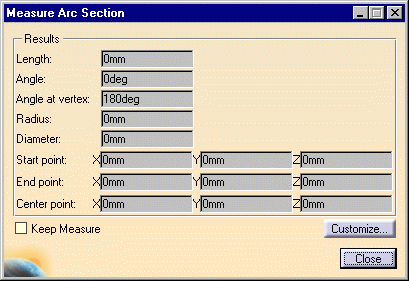
| The Measure Arc Section dialog box appears. |
 |
-
In the 3D view, select three points in the machined part
geometry: the start point, the center point, and the end point.
| An arc is fitted through the three selected points and the
Measure Arc Section dialog box is updated with the length, angle, angle at vertex,
and radius or diameter of the arc. Start, end and center point
coordinates are also shown. |
|

