To create the operation you must define:
- the geometry of the pocket to be machined

- the tool that will be used

- the parameters of the machining strategy
 with the
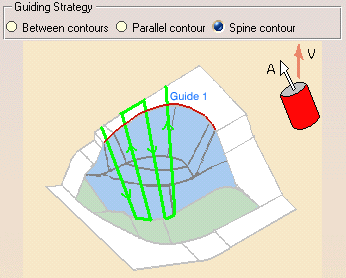
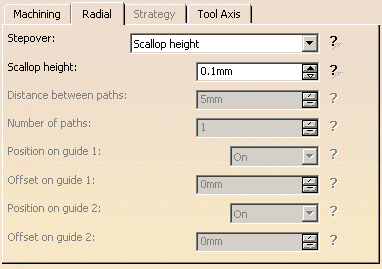
Guiding Strategy set to Spine Contour
with the
Guiding Strategy set to Spine Contour - the feedrates and spindle speeds

- the macros (transition paths)
 .
.
More information can be found in Selecting Geometry.
Make the Manufacturing Program current in the specification tree.
-
Select the Multi-Axis Contour Driven icon
 .
.
A Multi-Axis Contour Driven entity along with a default tool is added to the program.
The Multi-Axis Contour Driven dialog box appears directly at the Geometry tab page .
.
This tab page includes a sensitive icon to help you specify the geometry to be machined.
The part surface of the icon is colored red indicating that this geometry is required. -
Click the red area in the icon then select the desired part surface in the 3D window.
-
Select the Strategy tab page
. Make sure that
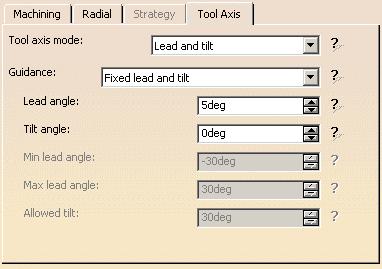
the Guiding Strategy is set to Spine Contour
then specify the parameters for:-
Tool axis: Fixed Lead and Tilt.
-
Tool axis: Fixed Lead and Tilt.
-
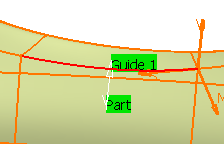
Click the red Guide 1 in the icon then select the desired guide curve in the model.
-
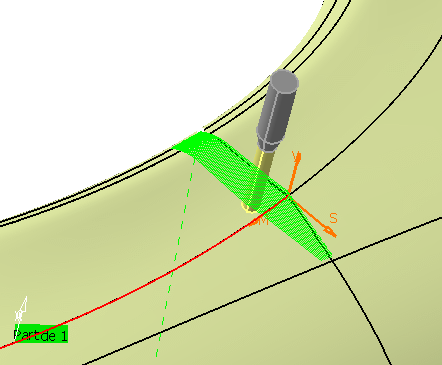
Click the View Direction arrow (V) and select the part surface. The surface normal is used as the view direction.
If the proposed tool is not suitable, just select the Tool tab page
This is described in Edit the Tool of an Operation.
-
Select the Feeds and Speeds tab page
to
specify the
feedrates and spindle speeds for the operation. -
Select the Macros tab page
to specify the
operation's transition paths (approach and retract motion, for example).
See Define Macros of an Operation for an example of specifying transition paths on a machining operation.
-
Click OK to create the operation.
![]()