|
|
This task shows how to generate all necessary
transition paths between operations in a program. This is done by taking
the selected machine's kinematic characteristics and specified transition
planes into account. For more information, please refer to Transition Path Management in the Reference section. |
|
|
|
Select File > Open then select the
Stepped.CATPart document. You may
need to use Fit All In
Select Start > Machining and select the desired workbench (Prismatic Machining, for example). |
|
|
|
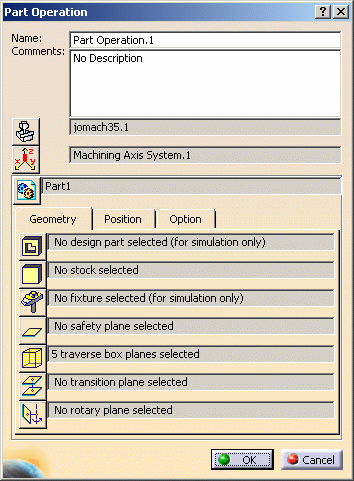
1. | Double-click the Part Operation to display the Part
Operation dialog box.
Click Machine
A suitable machine for this scenario is Click OK to validate the machine selection. |
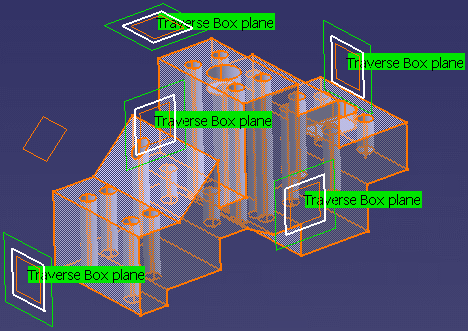
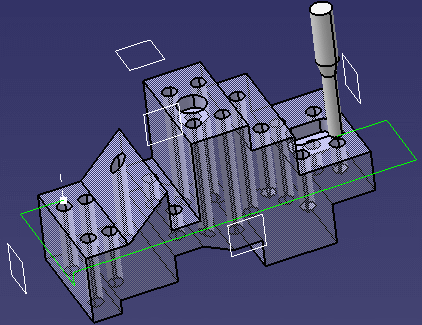
| 2. | In the Part Operation dialog box, click Traverse box
planes
Note that an arrow that represents the external normal vector is
displayed on the top plane of the Traverse Box. |
|
| 3. | Click OK to validate the Part Operation
parameters.
|
|
|
|
You may want to position the part on the machine, although
this is not necessary for the rest of this user scenario. To do this:
|
|
| 4. |
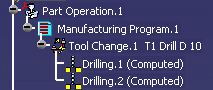
Select the Manufacturing Program node in the tree, then create 2 Drilling operations in the program (on Hole1 and Hole9, for example). |
|
| 5. |
Right-click the program and select Compute Tool Path.
|
|
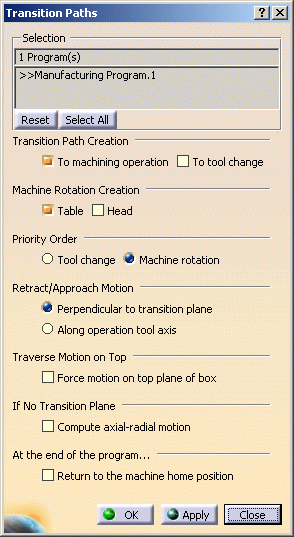
| 6. | Select Generate Transition Paths
Please refer to Transition Path Options in the Reference section for a description of the proposed options. |
|
| Click OK to validate the options and start generating transition paths. | ||
| 7. | The program is updated with the generated transition
paths.
|
|
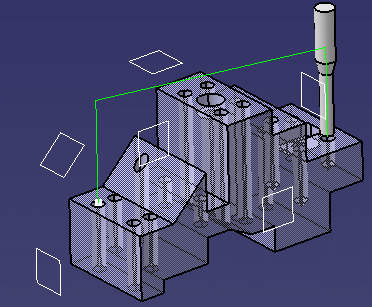
| 8. | Select the program then select Replay
The figure below illustrates that the transition path between the 2 operations respects the traverse box defined on the part operation. Please note that the retract and approach paths are perpendicular to the traverse box planes as specified in the Transition Paths dialog box.
|
|
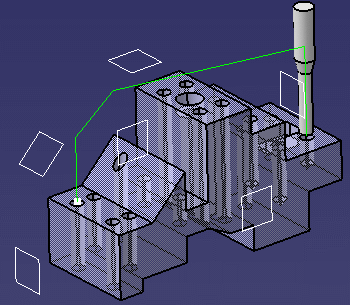
| 9. | To illustrate the effect of the traverse box with retract
and approach paths along the tool axis:
|
|
 |
||
| 10.
|
To obtain the transition path in the figure below:
|
|
 |
||
More About Generating Transition Paths |
||
|
||
|
|
||