|
|
This task shows how to add machine rotations in the program. You can either: | |
Insert a Machine Rotation Manually |
||
|
|
1. | In the specification tree, select the
program entity after which you want to add the machine rotation, then
select Machine Rotation
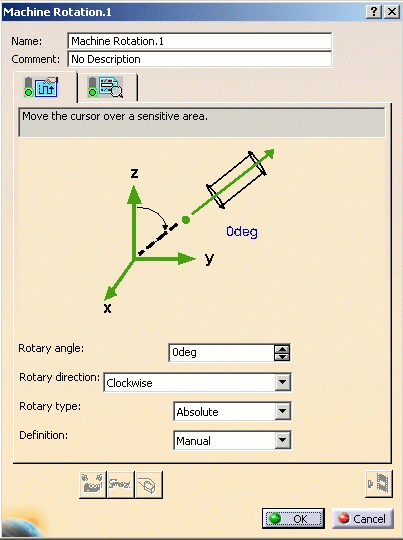
For a default machine (see Machine Editor), the following Machine Rotation dialog box appears.
|
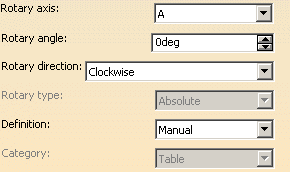
For a generic
machine (that is, a machine created using NC Machine Tool Builder - see
Machine Editor), the dialog
box has two extra attributes:
Note that these attributes are taken into account in tool path computation. This provides the possibility to manually create machine rotations on generic machines and allows transitions to be managed between machining operations. |
||
| 2. | Select the Properties tab
|
|
| 3. | Specify the Rotary angle. If Manual is set in the Definition list, you can enter the angle value directly in the Rotary angle field. If Selected is set the Definition list, you can specify the angle value using the graphic area in the dialog box:
|
|
|
|
The machine table is rotated by this angle about the
rotary axis (A, B or C). The rotary axis is defined:
|
|
| 4. | Select the Rotary direction:
|
|
| The Rotary type is set to Absolute in this version. | ||
| 5. | Select the Syntax tab
|
|
| 6. | Click OK to accept creation of the machine rotation in the program. | |
Generate Machine Rotations AutomaticallyNote: This capability is only available when a default machine (see Machine Editor) is set on the Part Operation. For machines created using NC Machine Tool Builder, automatic generation of machine rotations is not possible. |
||
|
|
1. | Right-click the Manufacturing
Program in the specification tree and select
Generate Machine Rotations. The program is updated with all necessary machine rotations. |
|
|
To delete machine
rotations that were automatically generated, right-click the
Manufacturing Program in the specification tree and select
Delete Generated Machine Rotations. All machine rotations that were automatically generated are removed from the program. |
|
|
|
||

