Generally speaking, sketch positioning is done in three steps:
- defining the import view, in relation to the document view defined using the standard View toolbar (Quick View sub-toolbar).
- positioning the local axis-system (model axis) onto the image
- scaling the image in relation to the geometry within the document using information from the image: the distance between two points along one of the model axis direction, thus setting the cube's size. Then it may be necessary to zoom in or out to get the cube to match these two points, using local manipulators.
An image has been loaded as described in
Creating an Immersive Sketch.
From the samples directory, you can also select the
Phone1.tif image.
-
From the Sketch Parameters dialog box, the conical view (left icon).

You do not need to define a view in the View toolbar to import the sketch. The image size is indicated in the dialog box, for information. 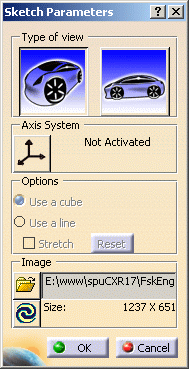
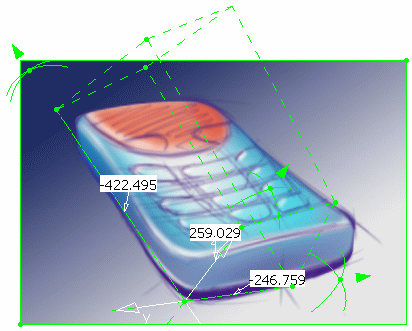
The loaded image looks like this: 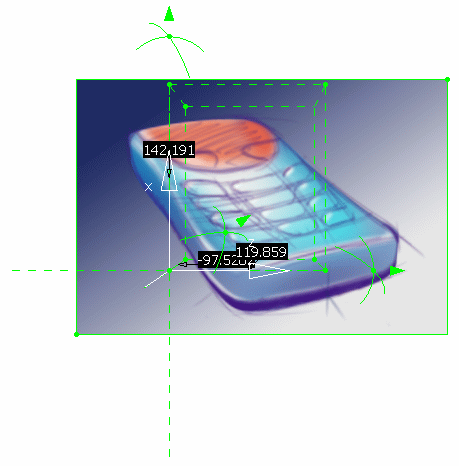
A dashed cubic frame is displayed representing the size of the image, and scale in relation to the document. Several manipulators are available, to help you scale and position the sketch properly: The displayed axis-system allows you to define the document's origin. - to define the document's origin:
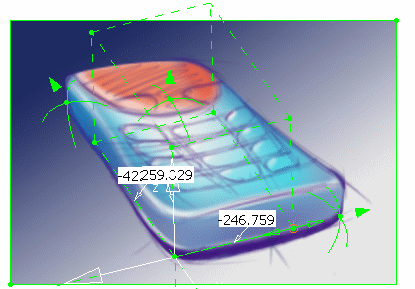
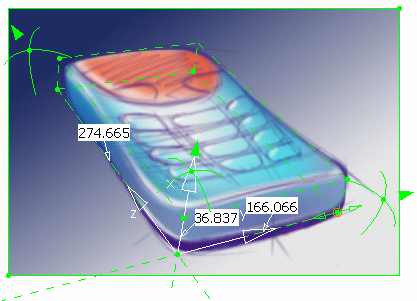
- to set the size: drag the arrow one way or the other, or right-click an arrow, choose the Edit contextual menu and specify a value:
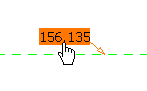
- to set the dimension: click the tag to edit the dimension:
- to rotate the cubic frame around X axis:
- to rotate the cubic frame around Y axis:
- to rotate the cubic frame around Z axis:
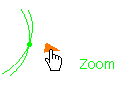
- to zoom in or out the image in relation to the document, thus scaling it. The rectangle's size remains unchanged.:
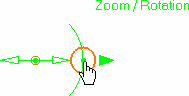
- to perform a scaling and rotation, as described above, at the same time:
- to adjust the cube to the view:
-
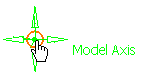
Move the pointer over the axis-system's middle point and position it at the correct location.
-
Release the axis-system's middle point when you are satisfied with its position.

-
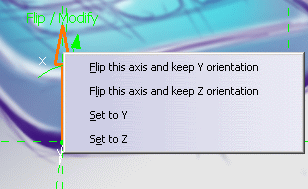
Right-click the the Flip arrow to define the axis orientation. You can either:
-
inverse the orientation using the Flip options, or
-
change the orientation and set another axis using the Set to options
-
-
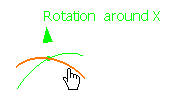
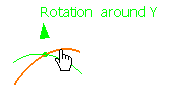
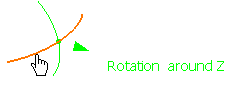
Define the cube rotation around three axes:
-
around X
-
around Y
-
around Z
-
-
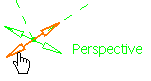
Set the vanishing line using the perspective manipulators to adjust the cube to the view.
-
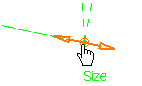
Move the pointer over the Size manipulator, right-click, and choose the Edit contextual menu item.
The Tuner dialog box is displayed, allowing you to enter exact values, in relation to the document's origin to define the model's size. You can also click the value tag to display the Tuner dialog box, or simply drag the Size manipulator to the correct location, provided the scaling already is correct. 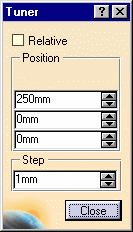
-
Once you are satisfied with both the image size and the cubic frame positioning, click OK in the dialog box.
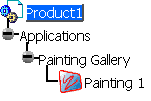
The image has been imported into the .CATProduct document and a Painting feature is added to the specification tree.
You can now manipulate the image as any element into a .CATProduct or .CATPart document.
- You can click the Flip text at any time to invert the axis orientation, and therefore the rectangular frame. (See also Copying/Pasting a Sketch)
- You can also trim the image itself, using the manipulators on the solid green frame.
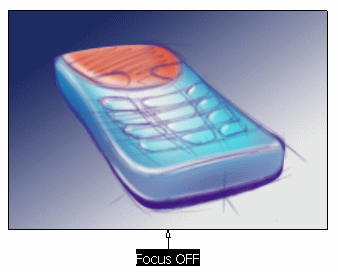
- Click on the Focus Off text at the bottom of the image to reset the image parallel to the screen. You can also choose the Activate Viewpoint contextual menu.
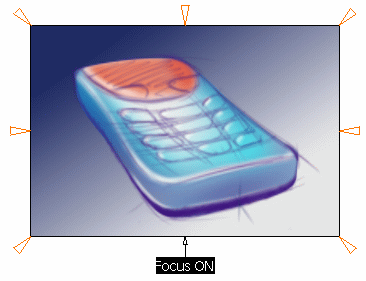
Once you have clicked this text, it changes to Focus On and lets you zoom or move (grabbing the red triangles) the image within the document, independently of the compass. Note that you cannot rotate the image.
To return to standard document manipulations, click the Focus On text, or choose the Deactivate Viewpoint contextual menu.
Selecting the axis system
![]()