Imposing Nodes (Modifications)

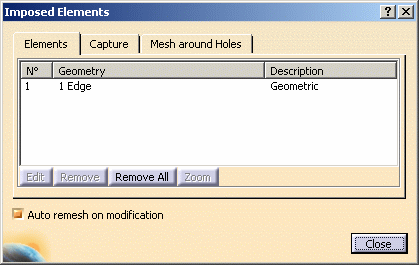
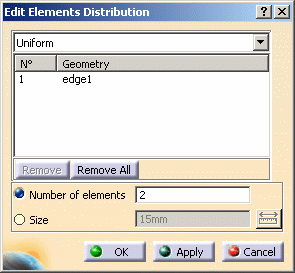
This task shows how to impose node distribution on geometry.

Open the sample08_1.CATAnalysis document from the samples directory.

  1. Click Imposed Elements in the Edition Tools toolbar.

    The Imposed Elements dialog box appears.

    Note that you can now edit the nodes distribution done before the meshing.
    For more information on the Edit Elements Distribution dialog box, refer to Imposing Nodes (Specifications).

    • The Undo command is not available.

    • The user law distribution defined using the Imposed Elements command in the Edition Tools toolbar is not associative. This means that if you remove the geometry simplification after defining the distribution, the distribution will not be kept.

    The last selected tab in which you performed a modification and a validation using the OK button is saved in settings.
    That means that this tab will be displayed next time you will launch the Imposed Elements functionality.

  2. Select the geometry on which you want to modify nodes distribution.

    The Edit Elements Distribution dialog box now appears with default values corresponding to the edge you just selected.

  3.  Modify the number of the nodes. In this case, enter 2 as new value (Number of elements).

    For more information about the Edit Elements Distribution dialog box, refer to Imposing Nodes (Specifications).

  4. Click OK in the Edit Elements Distribution dialog box.

  5.  In the Imposed Elements dialog box, select the Auto remesh on modification option and click OK.

    The new nodes appear on the geometry which is automatically re-meshed.