This task shows how to ignore faces in the geometry.
Open the Sample04.CATAnalysis document from the samples directory.
-
Enter the Advanced Surface Mesher workshop.
For more details, refer to Entering the Advanced Surface Mesher Workshop. -
Mesh the part.
To do this, click Mesh The Part in the Execution toolbar and click OK in the Mesh
The part dialog box.
in the Execution toolbar and click OK in the Mesh
The part dialog box.
-
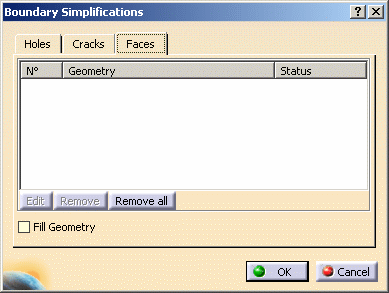
Click Boundary Simplifications
 in the Local Specifications toolbar.
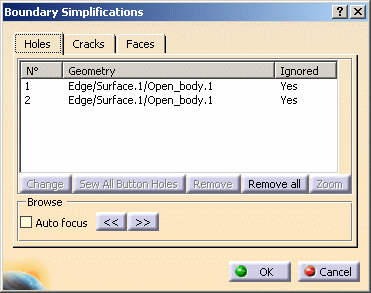
The Boundary Simplifications dialog box appears:
-
Holes: refer to Removing Holes.
- Cracks: refer to Removing Cracks.
- Faces:
- Fill Geometry: if selected, this option allows you to select only filled geometry.

The last selected tab in which you performed a modification and a validation using the OK button is saved in settings.
That means that this tab will be displayed next time you will launch the Boundary Simplifications functionality.You can configure the mesher to ignore faces and holes by simply clicking on these faces and holes.
-
-
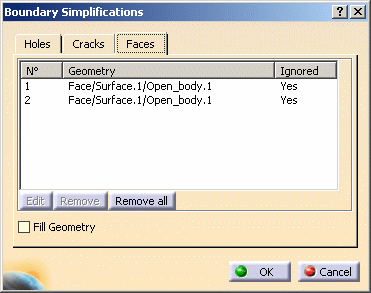
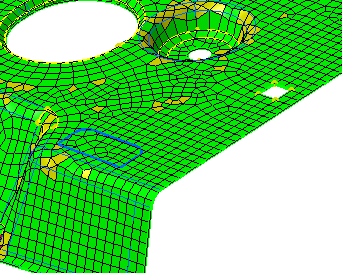
Select the Faces tab in the Boundary Simplifications dialog box and then the faces to be removed from the model.
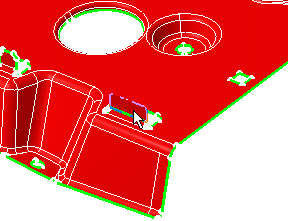
The selected faces automatically appear in the Boundary Simplifications dialog box.
-
If needed, select the Holes tab in the Boundary Simplifications dialog box and then the hole to be removed from the model.
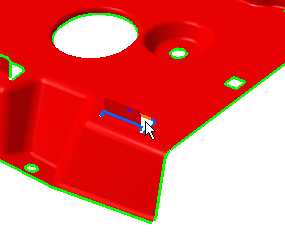
The selected hole automatically appears in the Boundary Simplifications dialog box.
Now, the faces and holes will be ignored by the mesher.
-
Click OK.
You can now launch the mesh operation.
To do this, click Mesh the Part
![]() in the Execution toolbar.
in the Execution toolbar.
![]()