|
Sometimes, you cannot draft faces
by using a constant angle value, even if you set the
Square mode. This task
shows you an another way of drafting: by using different angle values. |
 |
Open the
Draft2.CATPart document. |
 |
-
Click the Variable Angle Draft
icon
 . .
As an alternative, you can use Draft Angle
 , then click the Variable Angle
Draft icon , then click the Variable Angle
Draft icon
 available in the dialog box. For more information, see
Basic Draft. available in the dialog box. For more information, see
Basic Draft.
The Draft Definition dialog box that appears,
displays the variable angle draft option as activated. If you click the
icon to the left, you then access the command for performing basic
drafts.
-
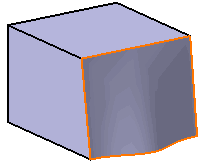
Select the face to be drafted.
Multi-selecting faces that are not continuous in tangency is not allowed
for this command.
|
|
The
 icon now available after the
Faces to draft field lets you edit the list of the faces to be
drafted. For more information about that capability, refer to
Editing a
List of Elements. icon now available after the
Faces to draft field lets you edit the list of the faces to be
drafted. For more information about that capability, refer to
Editing a
List of Elements. |
|
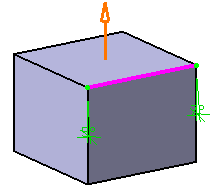
-
Select the upper face as the neutral element.
An arrow appears on the part, indicating the default pulling direction.
The application detects two vertices and displays two identical radius
values.
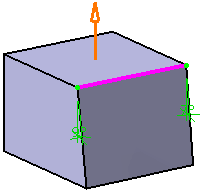
-
Increase the angle value: only one value is modified
accordingly in the geometry.
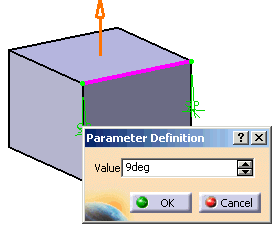
-
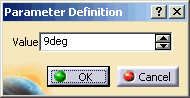
To edit the other angle value, select the value in the
geometry and increase it in the dialog box. For instance, enter 9.
|
 |
Alternatively, double-click this value to
display the Parameter Definition dialog box, then edit the value. |
 |
| |
-
Click Preview to see the draft to be created.
-
To add a point on the edge, click the Points
field.
Point
-
Click a point on the edge.
The application displays the angle value on this point.
- You can add as many points as you wish. You can also add points
by selecting 3D planes or 3D points. In this case, the application
computes the intersections between these planes and the edge to
determine the useful points or the projections onto the edge.
- If after clicking the points of interest, you decide to change
the faces to draft or the neutral element, the application removes
the points and lets you define points again.
- Note that to remove a point from the selection, you just need
to click this point.
|
 |
- Contextual commands creating the points
you need are available from the Points field:
If you create any of these elements, the application then
displays the corresponding icon in front of the Points
field. Clicking this icon enables you to edit the element.
You can use the compass direction when you use the pulling
directions in the contextual menu.
|
-
Enter a new angle value for this point: for example,
enter 17.
The new radius value is displayed.
Clicking the More button displays additional
options. To know how to use the options:
-
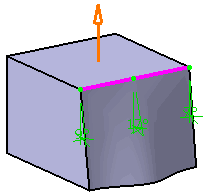
Click OK to confirm.
The final drafted part looks like this:
Closed Edges
The application defines a default vertex on closed edges when applying
the Variable Angle Draft command. To define your draft, first
of all you need to remove this vertex, and then use 3D points or 3D
planes only.
|