This task will show you how to define the load excitation set in a:
Defining a load excitation set allows you to define the force type load you will apply.
![]()
Only available with the Generative Dynamic Response Analysis (GDY) product.
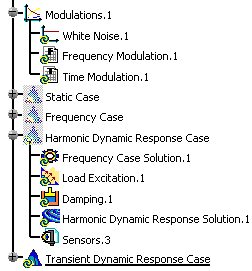
Harmonic Dynamic Response Case
Open the sample57.CATAnalysis document from the samples directory.
- Insert a Harmonic Dynamic Response Analysis Case (and choose a load excitation set).
- Define a white noise modulation or define a frequency modulation.
-
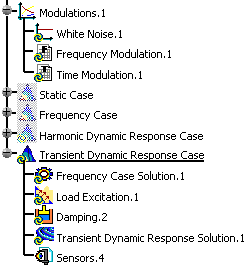
Double-click the load excitation set from the specification tree.
In this particular case, double-click Load Excitation.1 under the Harmonic Dynamic Response Case set.
The Load Excitation Set dialog box appears.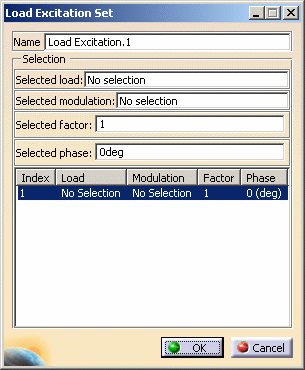
- Name: gives the name of the excitation set. You can modify it.
- Selection:
- Selected load: lets you select the load you want
to excite.

You cannot reference load set belonging to a preprocessing case.
- Selected modulation: lets you select a white noise
modulation or a frequency modulation.
You cannot select a time modulation.
- Selected factor: lets you select the factor that will multiply the modulation.
- Selected phase: lets you associate a phase component of a dynamic load excitation (load, modulation and factor).
- Selected load: lets you select the load you want
to excite.
-
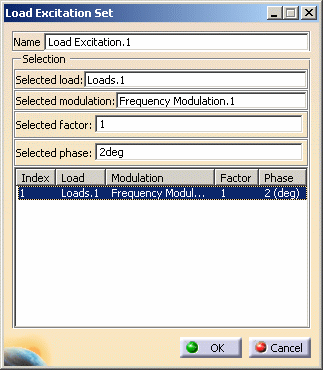
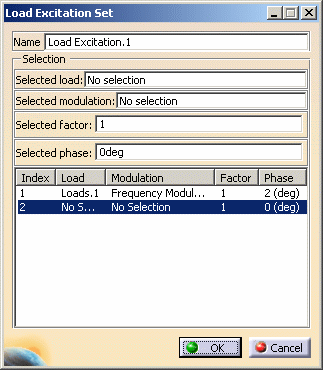
Set the desired parameters in the Load Excitation Set dialog box.
In this particular example:
- Select Pressure.1 as Selected load.
- Select Frequency Modulation.1 as Selected modulation.
- Enter 1 as Selected factor value.
- Enter 2deg as Selected phase value.
-
Press Enter to update the Load Excitation Set dialog box.
The Load Excitation Set dialog box appears as shown below:
You can add or delete load excitation parameters using contextual menus in the Load Excitation Set dialog box.
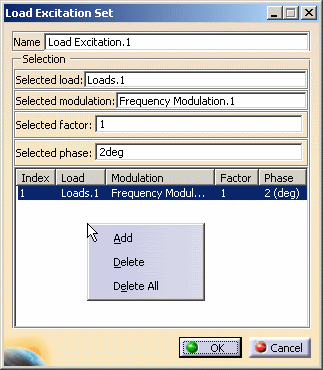
The available contextual menus are:
- Add: lets you add a load excitation.
- Delete: lets you delete a load excitation.
- Delete All: lets you delete all the load excitations you have previously defined.
-
Right-click in the frame and select the Add contextual menu.
-
Select the desired load, modulation, factor and phase.
In this particular example:
- Select the Loads.1 set as Selected load.
- Select the White noise.1 as Selected modulation.
- Enter 2 as Selected factor value.
- Enter 1 as Selected phase value.
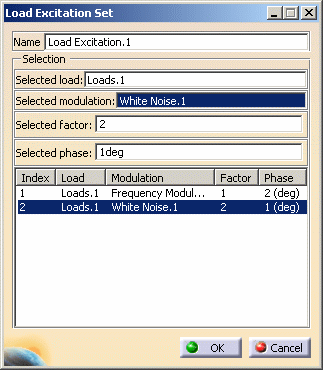
-
Right-click the second line and select the Delete contextual menu.
-
Click OK.
Transient Dynamic Response Case
Open the sample57.CATAnalysis document from the samples directory.
- Insert a Transient Dynamic Response Analysis Case (and choose a load excitation set).
- Define a time modulation.
In this particular example, a transient dynamic response case and a modulation set have been already inserted.
-
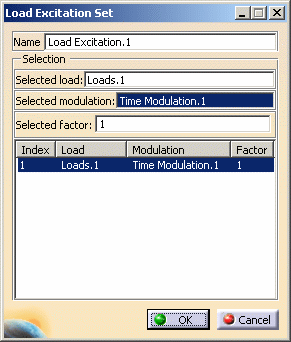
Double-click the load excitation set from the specification tree.
In this particular case, double-click Load Excitation.1.
The Load Excitation Set dialog box appears.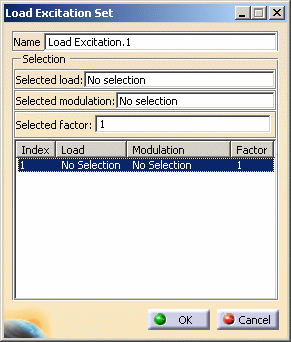
- Name: gives the name of the excitation set. You can modify it.
- Selection:
- Selected load: lets you select the load you want
to excite.
You cannot reference load set belonging to a preprocessing case.
- Selected modulation: lets you select a time
modulation.
You cannot select a frequency modulation.
- Selected factor: lets you select the factor that will multiply the modulation.
- Selected load: lets you select the load you want
to excite.
-
Select the load you want to excite in the specification tree.
In this particular example:
- Select Pressure.1 as Selected load.
- Select Time Modulation.1 as Selected modulation.
- Enter 1 as Selected factor value.
-
Press Enter to update the Load Excitation Set dialog box.
The Load Excitation Set dialog box appears as shown below:
You can add or delete load excitation parameters using contextual menus in the Load Excitation Set dialog box.
-
Click OK.
![]()