This task shows how to group using a box and how to generate images from this group.
Grouping elements allows you to apply pre-processing specifications to a pre-defined group of elements and to generate images from this group.
Available if one of three following products is installed: Elfini Structural Analysis (EST), FEM Surface (FMS) or FEM Solid (FMD).
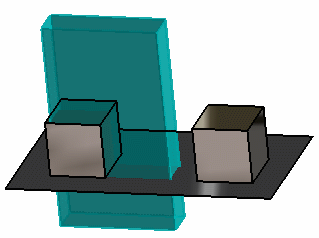
Open the sample49.CATAnalysis document from the samples directory.
-
Go to View > Render Style > Customize View and make sure the Shading, Outlines and Materials options are active in the Custom View Modes dialog box.
-
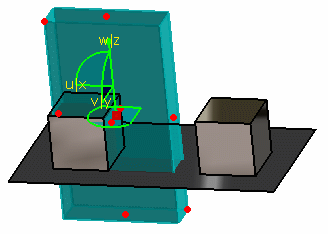
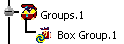
Click Box Group
 in the Groups toolbar.
A box and the Box Group dialog box appear.
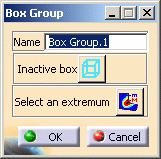
- Name: lets you change the name of the box group.
- Inactive/Active box: lets you respectively use a pre-defined box or position and resize manually a box using the compass and the manipulators.
- Select an extremum: lets you choose to position the box round an existing extremum.
-
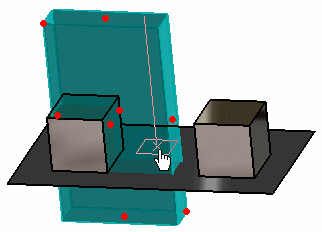
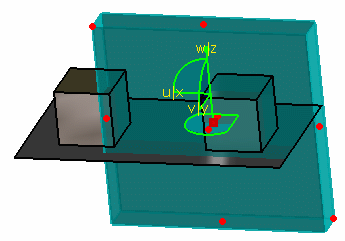
Activate the box.
To do this, select the button as shown below:
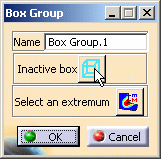
The status of the box position and dimension can now be edited.
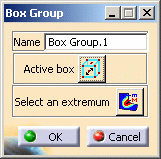
The compass and manipulators (red points) are now available to let you position and resize the box.
-
Change the position of the box.
To do this, select the compass, drag and drop it to the desired position.
-
Resize the box.
To do this, select a manipulator, drag and drop it to the desired position.
-
Click OK in the Box Group dialog box.
A Box Group.1 object appears in the specification tree under the Groups.1 set.
-
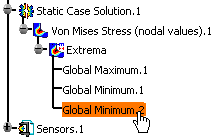
Activate the Von Mises Stress (nodal values).1 image.
-
Right-click Extrema and select the Local update contextual menu.
-
Double-click the Box Group.1 group in the specification tree.
The Box Group dialog box appears.
-
Click the Select an extremum button in the Box Group dialog box.
-
Select an existing extremum in the specification tree.
In this particular example, select the Global Minimum.2 object.
-
Click OK in the Box Group dialog box.
-
Update the Box Group.1 object.
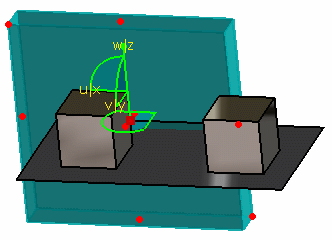
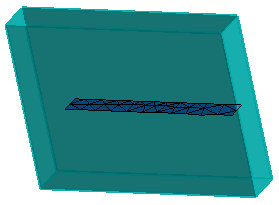
You can now visualize Deformation, Von Mises Stresses, Displacements, Principal Stresses and Precisions images, either for all the geometry or only for the box group. The scenario is the same for the five images.
In this particular case, you will visualize the Von Mises Stresses image that has been previously created.
-
Double-click the Von Mises Stress (nodal value) image in the specification tree to edit it.
The Image Edition dialog box appears.
For more details about this dialog box, refer to Image Edition. -
Select the Box Group.1 object in the Selections tab and click OK in the Image Edition dialog box.
You can visualize the result only around the box group.
For more details about Images, refer to Results Visualization (Image Creation, Generate Images and Editing Images).
You can manually edit or delete a group.
To do this, right-click the group object in the specification tree and
select the desired contextual menu.
![]()