- Ensure that the dedicated bundle segment create option (Work with one multi-branchable per geometrical bundle) is selected.
- Select the Allow system to use a smaller bend radius value option. Selecting this option optimizes the bend radius in order to keep the flexible curve.
-
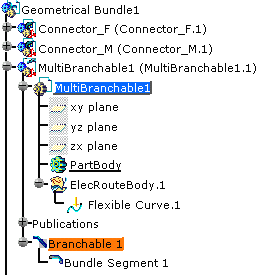
Double-click to activate the desired product: GeometricalBundle1
-
Click Multi-Branchable Document
 .
. -
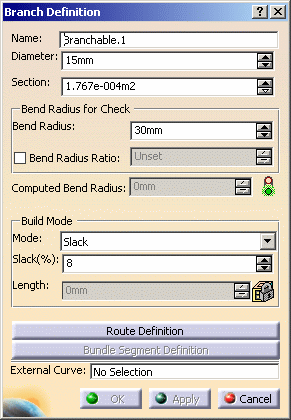
Enter a value in the Diameter field. The Section is automatically computed.
As an alternative, you can enter the Section, the Diameter will be computed.
A message warns you that the bend radius must be at least equal to the Diameter value to insure the correct bundle segment route computation. -
Enter a value for the Bend Radius.
The Bend Radius is the minimum bend radius allowed for the whole bundle segment.
The Bend Radius value must be at least equal to the Diameter value to ensure the correct bundle segment route computation.
As an alternative, you can select the Bend Radius Ratio option and set the ratio: the Bend Radius is automatically computed. -
Select the Mode: Slack for example and give a percentage of slack.
The different options are the following: - Slack(%):
The bundle segment length is increased by the percentage indicated in the Slack(%) field. The Length field is unavailable. - Length:
The bundle segment length is indicated in the Length field. The Slack(%) field is unavailable. - Bend:
The bundle segment length corresponds to the minimum distance between the points defining its route. The Slack(%) and Length fields are unavailable. 
At this stage, the bundle segment parameters are defined.
Now you need to route the bundle segment to complete the definition and create the geometrical representation of the Flexible Curve.
Note that OK and Apply are deactivated.The following steps illustrate a simple scenario. For more detailed information on routing, see Defining the Segment Route.
- Slack(%):
-
Click Route Definition .
The Route Definition dialog box opens: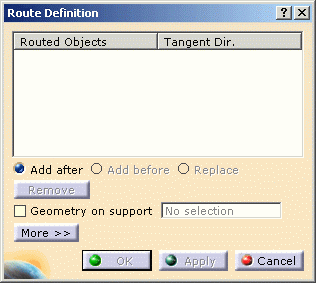
-
Click successively:
-
The connector on the left - you can reverse the tangent using the red arrow.
-
The connector on the right.
CATIA finds the closest bundle connection point or section on supports, according to the selection point. 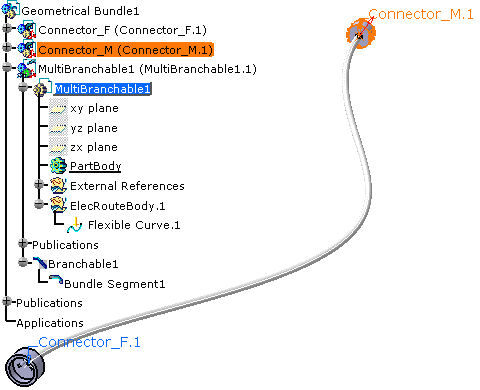
Note that when you select the points used to route the bundle segment, annotations display:
- The selection of the construction points in the geometry
highlights the point/label and select the routed objects in the
Route Definition dialog box:


- The selection in the Route Definition dialog box
highlights the point and the label in the geometry area:


You can also define more options using More >>, see Routing Options
-
-
Click OK to validate. The bundle segment appears.
-
Click Apply in the Branch Definition dialog box to compute the bend radius.
The bend radius is computed and displayed. 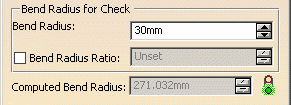
Status lights show whether or not the computed bend radius satisfies the minimum bend radius entered.
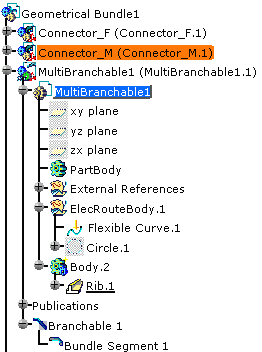
The geometry contains: - A new body: Body.2 containing the rib
- The External References container
- The ElecRouteBody geometry: Circle.1
Bundle Segment Definition is now available. To create other segments, see Creating/Modifying Segments within a Branch.
- Canceling the branch definition before routing the segment creates
Multi-Branchable1 and Branchable1. Note that no
geometry is defined.
Clicking Branch Definition
again lets you edit Branchable1. - If the segment route is defined, clicking Branch Definition again creates a new branch.