Routing Bundle Segments

aprereq.gif (1223 bytes) This section explains how to define the bundle segment route and create the Flexible Curve representation.
See also Getting Information from the Specification Tree Icons
aprereq.gif (1223 bytes) The Bundle Segment parameters have been defined in the previous task.
  1. Click Route Definition in the Branch Definition dialog box.
    The Route Definition dialog box opens:
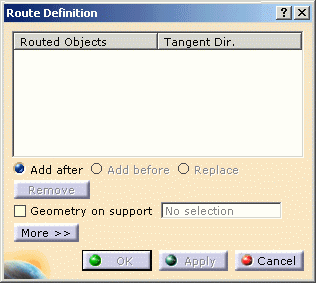
  2. Click successively the connectors and/or supports:

    CATIA finds the closest bundle connection point or section on supports, according to the selection point.
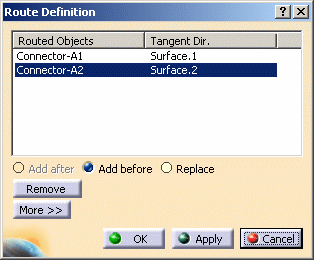
    The Flexible Curve spline is displayed:
  3. Click OK to validate.

    The Route Definition dialog box closes and the Branch Definition dialog box is re-displayed.
    Note that OK and Apply are now activated.
  4. Click OK to validate the bundle segment definition.

    The bundle segment is created
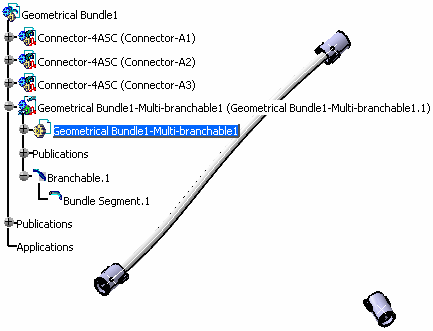
You can take advantage of the Related Objects viewer to focus on an object and see how it was constructed via its related objects. The related objects command identifies the parent, any children or connected objects and the relationship between objects.

Getting Information from the Specification Tree Icons

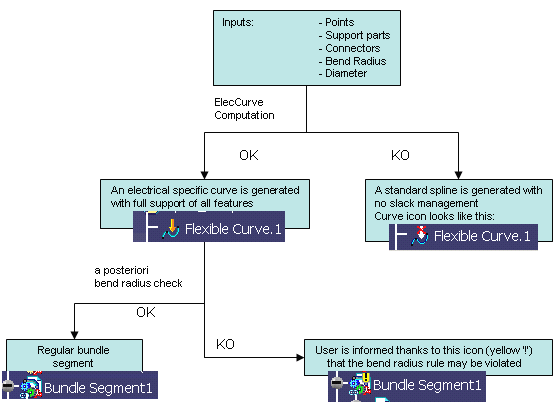
Each time you click Apply or OK during the definition phase, or if you update the bundle segment after any parameter modification, the following algorithm is launched to compute the best possible shape. Depending on the result, the specification tree is updated according to the following chart:

Note that working in Cache mode, the bundle segment does not display the icon.