 |
This task will show you how to align clouds of points using the compass.
This "rough" alignment offers:
- a manual alignment using the compass,
- a better control of the initial move when aligning inertia axes.
It can thus be considered as a pre-processor for the "best fit alignment"
actions. |
 |
See the glossary for the
definition of cloud to align, reference, constraint and constraint element. |
 |
Open the
Reposition1.CATPart model the from the samples directory. |
 |
-
Select the Geometrical Set where you want to create the
output cloud, if any, and select Define In Work Object.
-
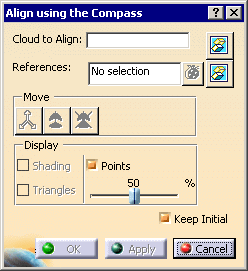
Click Align using the Compass
 in the Reposit toolbar.

-
Select a
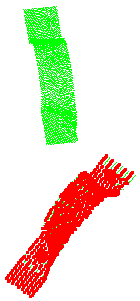
Cloud to Align (we have selected CloudImport.1).
Its name is displayed in the
dialog box and it is highlighted in the 3D Viewer.

-
Select the
References (we have selected
CloudImport.2):
|
and click OK .
or click OK without selecting References:
-
Selecting References starts the computation of a
transformation based on the inertia axes.
-
If you click OK without selecting References, this
transformation is not computed, therefore it will not be available.
|
|
 |
|
| |
-
For better display performances, the following
display modes are
available (select the required check box):
-
Shading or
Triangles for
meshes,
-
Points for clouds of points. Use the
slider to select the percentage of points to be displayed.
|
-
The Move
icons are now available:
 |
Active only if you have selected References. Offers
an alignment by inertia axes.
There are 4 possible solutions. Click
the icon repeatedly to visualize them successively. |
| |
 |
 |
 |
 |
 |
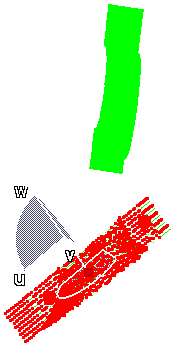
Places the compass on the gravity center of the cloud
to align.
Move the compass as you want to position the cloud. |
| |
 |
 |
Reverts to the last movement before validation by
Apply. |
|
 |
In the compass mode ( ),
by default you move the cloud with the gravity center of the cloud as the
origin. ),
by default you move the cloud with the gravity center of the cloud as the
origin.
However, you may want to take another point as the origin of the move,
e.g. to perform a rotation.
To do so, drag the compass while pressing the Shift key and drop it to the
point you want to take as the origin.
Then perform the move as usual.
|
| |
-
|
|
|
 |
|
-
Validate a move by Apply.
You can them initiate another move if necessary, or validate the alignment
by OK and exit the dialog box.
-
Once you
are satisfied with the alignment computed, click OK to validate
and exit the action.
-
-
-
In both cases, an Axis Systems is created with:
- AxisRef.x (system axis computed on the cloud to
align) and
- AxisTrs.x (axis system created on the output cloud).

Those Axis Systems can be used with the
Axis
to Axis action on other elements to align.
Align with previous transformation is
also available.
|
|
|
 |