This task shows you how to re-use a 2D component. In this particular case, we will instantiate a 2D component previously created on a detail sheet. Select a task:
- Creating a 2D Component instance
- Positioning a 2D Component instance during creation
- Adding a leader to a 2D Component
- Replacing the reference of a 2D Component instance
Creating a 2D Component instance
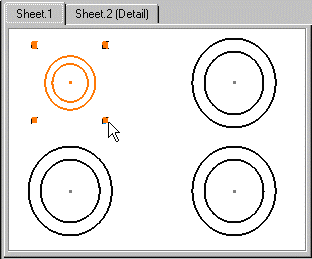
Double-click the view in which you want to instantiate the 2D component.
This view is now active.Click Instantiate 2D Component
 .
.
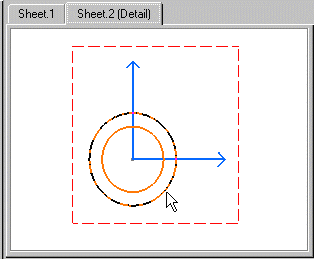
Note that to position several 2D components on the sheet and keep the scale and angle properties for all these components, you need to double-click Instantiate 2D Component.Go to the detail sheet Sheet2 (Detail) and click the component.

You can select the 2D component from the design tree. You can also select a component that already exists on the drawing sheet.
The drawing sheet automatically displays the sheet containing the starting view.
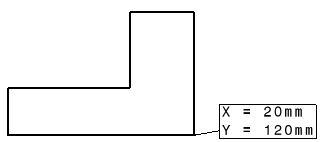
Position the component using smartpick then click.
The Tools Palette toolbar is displayed and proposes the following commands: Link with detail: instantiate a 2D component.
The component instance is linked with its reference in a detail sheet.
Link with detail: instantiate a 2D component.
The component instance is linked with its reference in a detail sheet.  By default, this icon is activated.
 Explode: instantiate and explode a 2D
component. The component instance is not linked to its reference, so behaves as independent geometry and annotations.
Explode: instantiate and explode a 2D
component. The component instance is not linked to its reference, so behaves as independent geometry and annotations. Fixed together:
instantiate and explode a 2D component, and apply a fixed together constraint to the geometry elements.
Fixed together:
instantiate and explode a 2D component, and apply a fixed together constraint to the geometry elements.The fix together constraint is not applied to annotations, dimensions nor dress-up elements.  Change component origin: define another
point in the view.
Change component origin: define another
point in the view. Change component angle: define the angle in the view.
 Flip component horizontally: rotate
horizontally the 2D component instance.
Flip component horizontally: rotate
horizontally the 2D component instance. Flip component vertically: rotate vertically
the 2D component instance.
Flip component vertically: rotate vertically
the 2D component instance.Angle: define a value for the angle.
Scale: define a value for the scale.
In the Tools Palette toolbar, choose your instance type. For the purpose of this scenario, check that the Link with detail
icon is activated.
You can also position the 2D component.Click the view: the 2D component instance is created.
If needed, select the component and use the displayed manipulators to modify the component.

Remember that if you selected Prevent direct manipulation and/or Prevent direct scaling from Tools > Options > Mechanical Design> Drafting > Annotation and Dress-up tab, you will not be able to move and/or scale the component.
You can also modify a group of objects including a 2D component. For this, multi-select the group of object and perform the desired modification(s).
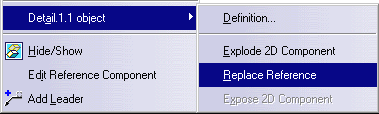
To easily find and edit the reference 2D Component, double-click the 2D component you have instantiated, or select the Edit Reference component option in the contextual menu.
Positioning a 2D Component instance during creation
-
Instantiate a component and define its position.
-
After you have defined its position, you can modify its origin and orientation using the following four icons in the Tools Palette toolbar.
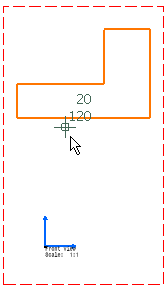
Click Change Component Origin
in the Tools Palette toolbar.
Click a point on the component, which you want to use as the component origin.
-
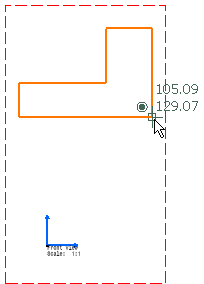
This new origin will move to fit into the position you indicated for the component.
You can see that the component origin has moved to the defined position.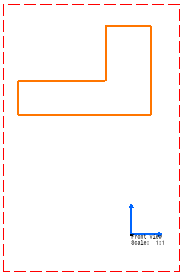
-
Click Change Component Angle
in the Tools Palette toolbar. -
Click in the view once the component angle axis corresponds to the position you want to assign to the component
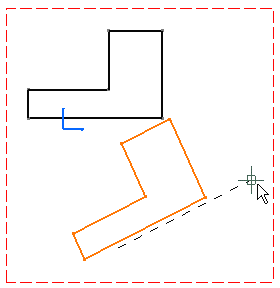
You can also flip the component according to either the x or y axis. If you click Flip component horizontally
, the
component flips on the horizontal axis of the detail. If you click
the Flip component vertically option
,
the component
flips on
the vertical axis of its reference.Click in the view to validate your position.
Adding a Leader to a 2D Component Instance
Right-click the 2D component and select Add Leader.
Select the element you want to associate to the 2D component, or click in empty space.
Replacing the Reference of a 2D Component Instance
Right-click on an instance, and from the contextual menu, select Replace Reference for this instance.
Select another instance (this instance reference will be taken into account) or a 2D component in a local sheet of detail.
The 2D component instance reference is replaced.
You cannot use a catalog to replace a 2D component instance reference. To bypass this, use an instance created with this catalog.
When replacing the reference of a 2D component instance, any existing text in the original 2D component instance is also replaced, even if this existing text had been previously modified (see Modifying text in 2D Component instances for more information on this point).
![]()