- invoking the dedicated toolbar
- creating the desired annotations
- exiting the dedicated toolbar
-
In the DMU 2D Tools toolbar, click the Create an Annotated View icon
") .
.
The DMU 2D Marker toolbar appears.

-
To create a line annotation, click the Draw Line icon
") and
drag a straight line in the 2D document from one endpoint to the other of
the line you wish to create.
and
drag a straight line in the 2D document from one endpoint to the other of
the line you wish to create. -
To create a free-line annotation, click the Draw Free Line icon
") and
drag freely in the 2D document along the path of the line you wish to
create.
and
drag freely in the 2D document along the path of the line you wish to
create. -
To create a circle annotation, click the Circle icon
") and drag a straight line in the 2D document from the point that will be
the center of the circle you wish to create to a point that will be on
the circle's circumference.
and drag a straight line in the 2D document from the point that will be
the center of the circle you wish to create to a point that will be on
the circle's circumference. -
To create an arrow annotation, click the Arrow icon
") and
drag a straight line in the 2D document from one endpoint to the other of
the arrow you wish to create (the arrow's head will appear at the
terminal point of the line you drag).
and
drag a straight line in the 2D document from one endpoint to the other of
the arrow you wish to create (the arrow's head will appear at the
terminal point of the line you drag). -
To create a rectangle annotation, click the Rectangle icon
") and
drag a straight line in the 2D document whose endpoints will
designate the diagonal of the rectangle you wish to create.
and
drag a straight line in the 2D document whose endpoints will
designate the diagonal of the rectangle you wish to create. -
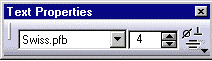
To create a text annotation, click the Text icon
") and
click in the 2D document at the point at which you wish to insert the
text.
and
click in the 2D document at the point at which you wish to insert the
text.
The Annotation Text dialog box and the Text Properties toolbar appear:
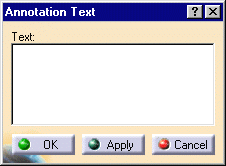
- Enter the desired text in the 2D text box and click Apply.
- Change the size and style of annotation text if desired and click Apply.
- When done click OK.
The text is added at the designated point.
-
To insert a picture annotation, click the Picture icon
") and
click in the 2D document at the point at which you wish to insert the
picture.
and
click in the 2D document at the point at which you wish to insert the
picture.
The Select Picture File dialog box appears.
- Browse to the desired images folder.
- Select the desired document from the images folder and click OK.
The picture is inserted at the designated point.
For more details, see Adding Pictures.
-
To create an audio annotation, click the Audio icon
") .
.
The Select audio File dialog box is displayed.
- Browse to the desired folder.
- Give a meaningful name to the to-be recorded file and click Open.
The Audio attributes dialog box and Audio Recorder dialog boxes appear.- Select the audio quality and click OK.
- To start recording, in the Audio Recorder dialog box , click the red button.
- To stop recording, click the stop button.
- When done recording, click OK.
- To replay the audio annotation, click the Audio icon and click the Play button in the Audio Recorder dialog box.
For more details, see Adding Audio Markers.
-
To erase all annotations, click the Erase icon
") .
.
-
To exit your annotated view, click the Exit Annotated View icon
") .
.
An new annotated view is created.
You can access all previously created annotated views by hitting the Manage Annotated Views icon. See Managing Annotated Views.
![]()