Insert the following cgr files:
ATOMIZER.cgr
BODY_1_2.cgr
BODY_2_2.cgr
LOCK.cgr
NOZZLE_1_2.cgr
NOZZLE_2_2.cgr
REGULATION_COMMAND.cgr
REGULATOR.cgr
TRIGGER.cgr
VALVE.cgr
You can also add 2D annotations in active views in the Section viewer for example. Annotations are no longer visible if you change viewer.
-
Click the Create an Annotated View
 from the DMU Review Creation toolbar.
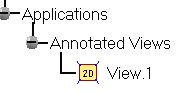
The 2D view is created and identified in the specification tree.
The DMU 2D Marker toolbar is activated. You can now annotate your view.

-
Click the Create an Audio marker icon
 in the DMU 2D Marker toolbar.
The Select audio file dialog is displayed. -
Select the location.

-
Give a meaningful name to the to-be recorded file and click Open.
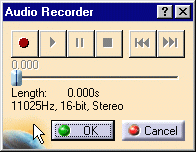
The Audio attributes dialog box and Audio Recorder dialog boxes appear:

-
Select the audio quality and click OK, e.g. select 22050Hz, 16-bit, Mono
-
Start recording using the red button from the Audio Recorder dialog box.
-
When done, click OK.
The sound is identified in the specification tree. -
Double-click sound in the specification tree to play your audio recording (using the play button) or to edit it.