Inverse Kinematics Behaviors

ascenari.gif (1364 bytes) The Inverse Kinematics (IK) mode gives you the capability to manipulate the manikin's Inverse Kinematics with designed behaviors. This function is principally for moving the upper body in relationship to the manipulation of the arms and legs.

This manipulation will eventually induce spine and/or hip motion in order to translate and orient the manikin toward the target. In other words, these behaviors will modify the Inverse Kinematics chain, making it local (limbs only) or global (limbs and spine and pelvis).

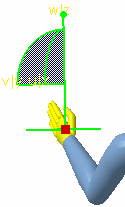
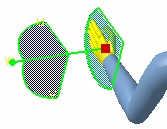
Two commands are available in Inverse Kinematics mode and either may be used depending on the need or the operation to be performed (making a new posture or fine-tuning an existing posture). Both commands provide easy access to manikin Inverse Kinematics capabilities. The only difference between the two is in the compass orientation (as illustrated below). These commands are mutually exclusive; activating one automatically deactivates the other. For more information, see Using the Inverse Kinematics Modes.

This example uses the Inverse Kinematics Worker Frame Mode and covers the following topics:


Inverse Kinematics Worker Frame Mode Command

From the samples directory, open the Manikin_on_Floor.CATProduct file.
  1. Select Inverse Kinematics Worker Frame Mode in the Manikin Posture toolbar and select the manikin's left hand. Move the manikin's left hand and observe the Inverse Kinematics behavior.

  The manikin's Inverse Kinematics behavior is currently the default Limb Inverse Kinematics chain. If no other behavior option is selected, the Inverse Kinematics manipulators, i.e., Inverse Kinematics Mode, Reach Mode, will drive the arms and legs in order to simulate natural motion.

Note that all the options are not mutually exclusive; more than one item can be activated at the same time. For example, activating both the Thoracic and Lumbar options will initiate motion of the entire spine if the target cannot be reached by extending the arms.

If multiple Pelvis options are selected, the manikin's pelvis will move (translate, rotate, or laterally orient, depending on the option selected) with or without preliminary spine motion, depending on the selection status of the Spine option.


Segment Twins

This functionality is available only for the Inverse Kinematics and Position Orientation Reach commands.

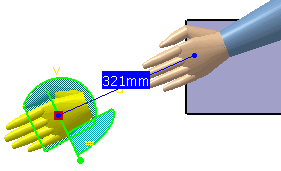
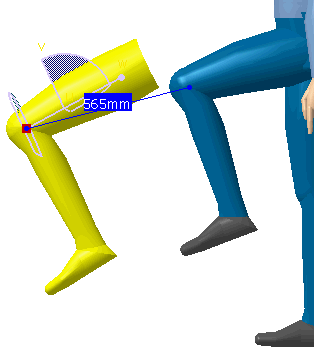
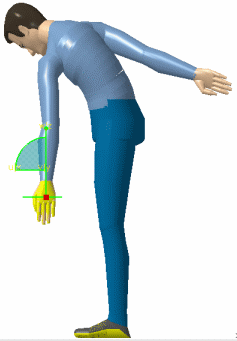
When the compass is snapped on a hand or foot in Inverse Kinematics and Reach Mode, an image of the entire hand or foot in its current posture will follow the compass. The image will stay there until the Inverse Kinematics or Reach mode is exited.

Setting the Twin options

From the main menu, select Tools > Options > Ergonomics Design & Analysis > Human Builder > Display. In the Twin field choose the desired color and transparency level.


Accessing Inverse Kinematics Behaviors options

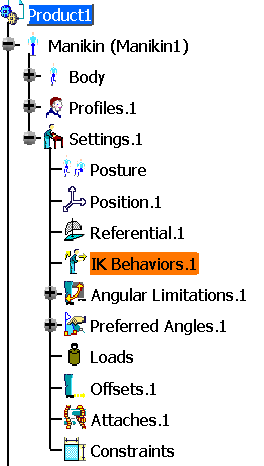
Inverse Kinematics Behaviors options can be accessed through the Inverse Kinematics Behaviors command or by right-clicking the Inverse Kinematics Behaviors mode in the PPR tree.

Using the Inverse Kinematics Behaviors Command

 
  1. Select a manikin and, in the Manikin Tools toolbar, select the IK Behaviors .

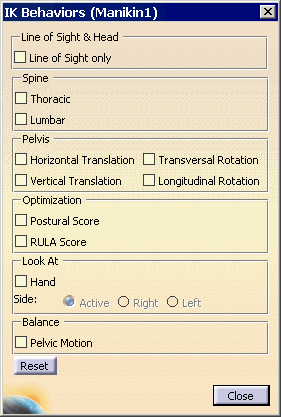
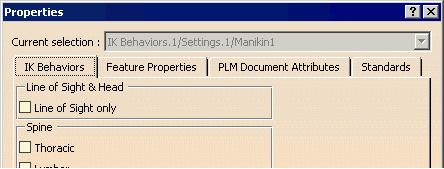
  2. The IK Behaviors dialog box for the selected manikin appears.

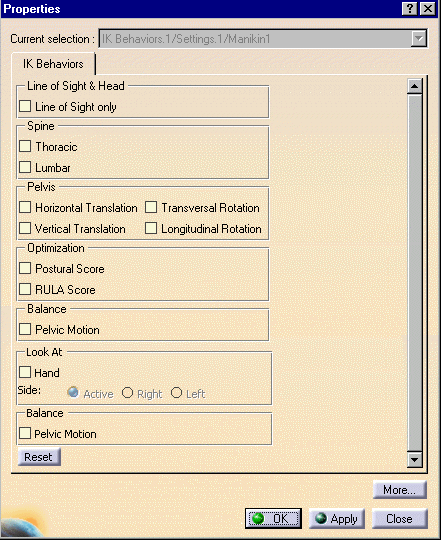
  3. In this dialog box, you can select various options under these headings:


Using the Line of Sight & Head options

When selected, the Manikin's vision's line of sight will be directed at what the manikin's hands are reaching.  In other words, its like the line of sight will follow the movement of the compass in the Reach or Inverse Kinematics mod when involving the hands. The head will stay stationary. Deactivating this function, and setting the tools > options, the head will also follow the line of sight.

This option will be enabled in the Tools > Options menu.  See The Manikin eyes follow the 3D compass with Reach and Inverse Kinematics Mode

Using the Spine options

 
  1. Select both the Thoracic and Lumbar spine options and OK. You should still be in Inverse Kinematics Mode.

  2. Again move the left hand. The behaviors of the moving sections of the spine are evident.

  3. Return the manikin to a standard standing pose.

Using the Optimization options

In this IK Behavior panel, the Optimize Criteria allows you to choose to optimize the posture according to either Postural Score or RULA Analysis.  This will be in effect when Inverse Kinematics mode or Reach mode is used, as well as when the Inverse Kinematics solver is called to resolve a constraints update.

When the Postural Score is activated, then the Inverse Kinematics will always internally refer to the Postural Score and try to find the best score for each segment involved in the Inverse Kinematics chain being manipulated. This would have required you to apply preferred angles to these segments, before using the optimize capability.  If no Preferred Angles are applied to the manikin, then the Postural Score option would be grayed and made unavailable.

When RULA is selected, then the Inverse Kinematics would use the RULA internal preferred angles calculation (that lead to a global score when RULA is used inside the appropriate Human Activity Analysis command) to lead to an optimized posture of the involved segments during manipulation involving the Inverse Kinematics solver.  Here you do not need to explicitly apply Preferred Angles to the segments of the Manikin. However, a Human Activity Analysis license must be present in this current configuration. If this is not the case, the option for RULA would be grayed and made unavailable.

Note: This originates from the current flexibility in manipulating manikin segments and posture this manikin in different contexts and situations, especially when using Inverse Kinematics and Reach mode commands.  While using those commands, you are dragging along a specific Inverse Kinematics chain of the manikin, and the Inverse Kinematics engine is therefore computing a resulting posture of this chain, that might also affect other segments positions. Due to the nature of the Inverse Kinematics solver, it might happen that for the same targeted segment position or constraints, the resulting overall posture is different from one time to another. Also, there is no way for you to understand or assess that the resulting posture is better than the previous one, considering some analysis such as RULA or Postural Score.
Finally, it is not always easy to find postures that seem natural, or to find such a posture again after some trials.
Therefore, this attempts to integrate other criteria than the pure Inverse Kinematics results based on constraints. We intend to help you find better postures according to criteria such as postural score or RULA.

The Postural Score Optimization criteria can only work if the user has put Preferred Angles to some segments, at least, of the manikin on which this optimization needs to apply.

The RULA Analysis Optimization criteria can only be available to users that have a configuration with the Human Activity Analysis product.  The Postural Score Optimization criteria can only be available to users that have a configuration with the Human Posture Analysis product.

Using the Pelvis options

  1. Re-open the Properties dialog box and de-activate the Spine options.

Horizontal Translation
 
  1. Activate Horizontal Translation, select both manikin's feet to fix them in place, then select the manikin's left hand.

  2. Move the manikin's left hand upward and to the front; observe the Inverse Kinematics behavior. When Horizontal Translation is active, the manikin's hip will move forward as the compass is dragged.

  3. Return the manikin to a standard standing pose.

Vertical Translation

 
  1. In the Properties dialog box, de-activate Horizontal Translation and activate Vertical Translation.

  2. Select both manikin's feet to fix them in place then select the manikin's left hand.

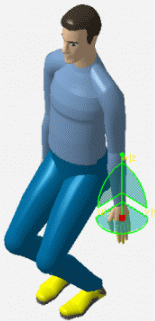
  3. Drag the compass downward and observe the Inverse Kinematics behavior. When Vertical Translation is active, the manikin's hip will move down (the manikin will squat) as the compass is dragged.

  4. Return the manikin to a standard standing pose.

Transversal Rotation

 
  1. In the Properties dialog box, de-activate Vertical Translation and activate Transversal Rotation.

  2. Select both manikin's feet to fix them in place, then select the manikin's left hand.

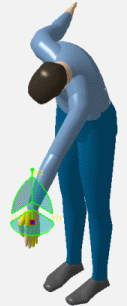
  3. Drag the compass forward and observe the Inverse Kinematics behavior. When Transversal Rotation is active, the pelvis will rotate forward causing a stoop pose.

  4. Return the manikin to a standard standing pose.

Longitudinal Rotation

 
  1. In the Properties dialog box, de-activate Transversal Rotation and activate Longitudinal Rotation.

  2. Select both manikin's feet fix them in place, then select the manikin's left hand.

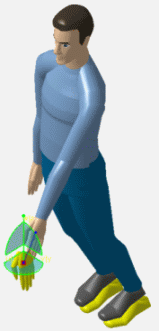
  3. Drag the compass to the side and observe the Inverse Kinematics behavior. When Longitudinal Rotation is active, the manikin's hip will twist.

  4.  Return the manikin to a standard standing pose.

Using the Balance options

This option enables you to manipulate the manikin with inverse kinematics while keeping the manikin in balance.

When these options are selected (only one may be chosen at a time), the balance is checked, in real-time, every time the posture of the manikin changes.

Pelvis Motion
 
  1. In the Properties dialog box, retain all the settings under the Spine and Pelvis headings.

  2. Under the Balance heading, activate Pelvis Motion.

  3. Select the manikin's left hand.

  4. Drag the compass forward and down.

  5. With the Pelvis Motion option activated, when the manikin loses balance, the pelvis tips in order to keep the balance (keep the center of gravity inside the base of support).

  6. Repeat this procedure using the Inverse Kinematics Segment Frame mode to get a feel for how this command differs from the Inverse Kinematics Worker Frame mode.

Accessing Inverse Kinematics Behaviors Properties

 
  1. Right-click on IK Behaviors, located under the Settings node.

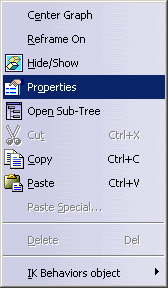
  2. From the contextual menu that appears, select Properties.

  3. The Properties dialog box for IK Behaviors appears displaying the available options.


  4. By default, the None button would be selected. Only one of the three options can be available at the same time.

  5. In the Properties dialog box, select the button to access additional tab information.