This task explains how to create a 3D curve on a scan:
-
either before entering the 3D curve action. In that case, you can select only one scan,
-
or after entering the 3D curve action. In that case, you can select one or more scans.
-
either graphically. In that case, use the contextual menu Select all points to create a 3D curve on all the points of the scan,
-
or from the specification tree. In that case all points of the scan are taken into account even if you do not activate the Select all points menu.
Open the FreeStyle_04.CATPart document.
-
Click the 3D Curve icon
 .
.
The 3D curve dialog box is displayed. -
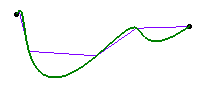
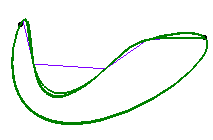
Choose the curve creation type.
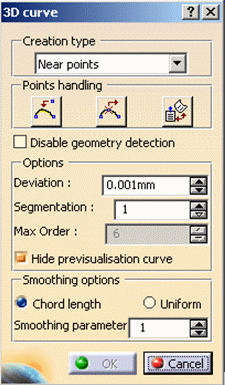
- Through points: the resulting curve is a multi-arc curve passing through each selected point.
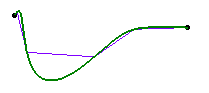
- Control points: the points you click are the control points of the resulting curve.
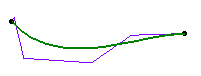
- Near points: the resulting curve is a single-arc, with a set degree and smoothed through the selected points.
-
Click OK to create the curve.
A 3DCurve.xxx appears in the specification tree.
For further information on the options of the dialog box, please refer to the Creating Associative 3D Curves chapter.
Selecting all points in a scan of cloud
The Select all points contextual menu is available within the 3D curve action only, i.e. it appears when the 3D Curve dialog box is open.
- Right-click the Scan on Cloud.xxx in the specification tree and select Select all points in the scan.
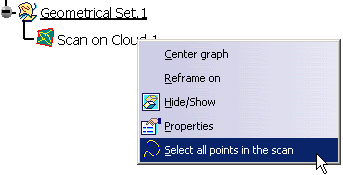
- Right-click the cloud and select Select all points in the scan.

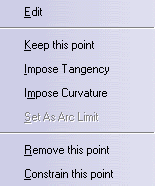
Contextual Options
Double-click your curve, right-click on the manipulator to display the contextual menu.
Please refer to the Creating Associative 3D Curves to get the corresponding information.
-
Use the F5 key to move the manipulators into a different plane of the compass. See Managing the Compass.
-
Use the standard shortcuts (Ctrl and Shift keys) to select, multi-select, and unselect any combination of control points on these curves.
-
You cannot add a point past the end points. To do this, you need to add a point before the end point, move the new point where the end point lies, then move the end point to a new location.
-
The creation plane for each free point is defined according to the current plane/compass orientation on the previous point. Therefore you can change creation planes within the same curve, by setting a new current plane/compass orientation on several points.