The Multi-Result Management dialog box only appears after clicking OK in a command that gave a non-connex result.
Keeping all sub-elements
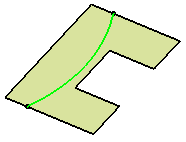
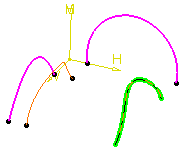
A parallel curve of the spline is to be created.
-
Click Parallel Curve
 .
.The Parallel Curve Definition dialog box is displayed. -
Select the spline as the Curve.
-
Select the surface as the Support.
-
Click OK.
The Multi-Result Management dialog box appears. 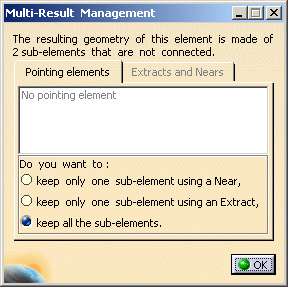
-
Check keep all the sub-elements to keep a non connex result.
-
Click OK.
The curve (identified as Parallel.xxx) is added to the specification tree.
Keeping one sub-element using the Near command
The multi-result feature has no children
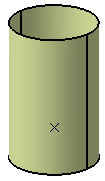
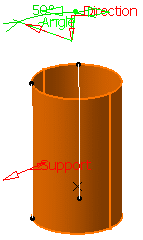
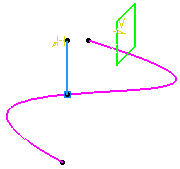
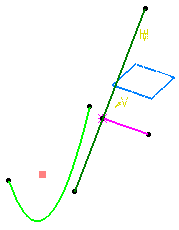
Reflect lines on this cylinder are to be created.
-
Click Reflect Lines
 .
.The Reflect Line Definition dialog box is displayed. -
Select the cylinder as the Support.
-
Select a direction.
-
Define 50 as the Angle value.
-
Click OK.
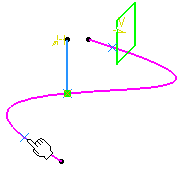
The Multi-Result Management dialog box appears. 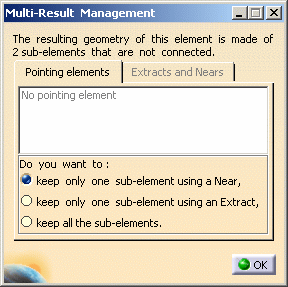
-
Check keep only one sub-element using a Near to create a nearest entity of the multiple element, that is the reflect lines.
-
Click OK.
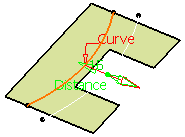
The Near Definition dialog box appears and the reflect line is automatically filled in the Multiple Element field. -
Select a plane as the Reference Element.
-
Click OK.
The line (identified as Reflect Line.xxx) and the nearest element (identified as Near.xxx) are added to the specification tree. The reflect line is put in no show (providing you are in a geometrical set environment). 
The multi-result feature has several children
-
Double-click the Fillet.1 in the specification tree.
The Fillet Definition dialog box opens. -
Modify the radius value: set it to 15mm.
-
Click OK.
The Multi-Result Management dialog box appears.
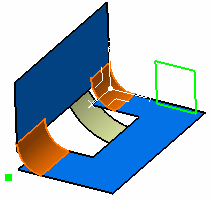
The multi-result feature contains a near that is displayed in the Extracts and Nears tab.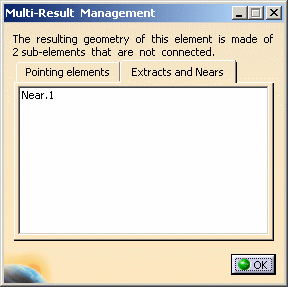
-
Double-click Near.1.
The Near Definition dialog box appears and the fillet is automatically filled in the Multiple Element field. -
Select Point.1 as the Reference Element.
-
Click OK.
-
Click OK in the Multi-Result Management dialog box.
The Offset element, that uses the Near element as the surface to be offset, is modified accordingly. 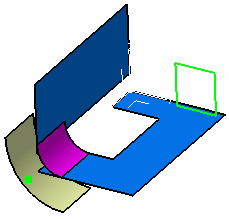
For further information about the Near command, refer to the Creating the Nearest Entity of a Multiple Element chapter in the Generative Shape Design documentation.
Keeping one sub-element using the Extract command
The multi-result feature has no children
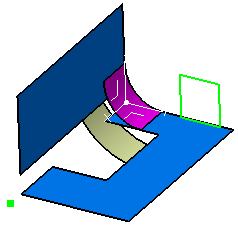
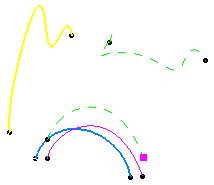
A combine curve is to be created between them.
-
Click Combine
 .
.The Combine Definition dialog box is displayed. -
Select the Normal type.
-
Successively select the two curves to be combined.
-
Uncheck the Nearest solution option.
-
Click OK.

The Multi-Result Management dialog box appears. 
-
Check keep only one sub-element using an Extract to create an extract of the multiple element, that is the combine curves.
-
Click OK.
The Extract Definition dialog box appears. -
Select one of the combine curves in the 3D geometry as the Element to extract.
The selected element is highlighted. -
Click OK.
The curve (identified as Combine.xxx) and the extracted element (identified as Extract.xxx) are added to the specification tree. The combine curve is put in no show. 
The multi-result feature has several children
-
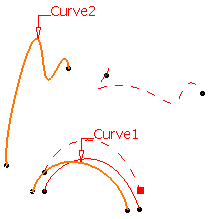
Double-click Intersect.1.
The Intersection Definition dialog box appears. -
Click OK.
The Multi-Result Management dialog box appears.
The multi-result feature contains an extract that is displayed in the Extracts and Nears tab.
-
Double-click Extract.1.
The Extract Definition dialog box opens. -
Select another vertex as the Element to extract, as shown besides.
-
Click OK.
-
Click OK in the Multi-Result Management dialog box.
The line, that uses the Extract element as the point, is modified accordingly. 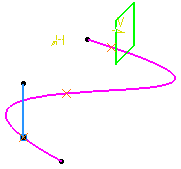
For further information about the Extract command, refer to the Extracting Geometry chapter in the Generative Shape Design documentation.
Using pointing element and select a sub-element to keep
Using a Near
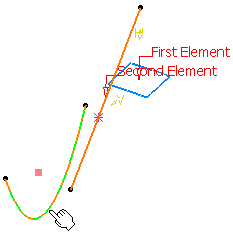
-
Double-click Intersect.1.
The Intersection Definition dialog box appears. -
Replace Line.1 by Spline.1 as the Second element by selecting it in the 3D geometry.
-
Click OK.
The Multi-Result Management dialog box appears. 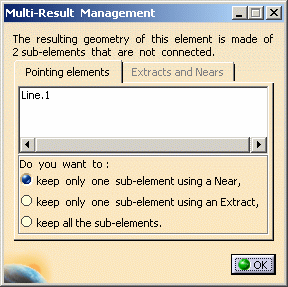
-
Double-click Line.1 to modify its specifications.
The Line Definition dialog box opens. -
Replace Intersect.1 by Point.1 as the Point.
-
Click OK.
In the Multi-Result Management dialog box, there is no pointing element any more. -
Check the keep only one sub-element using a Near option to create a nearest entity of the multiple element, that is Intersect.1.
-
Click OK.
The Near Definition dialog box appears and the intersect element is automatically filled in the Multiple Element field. -
Select the axis system as the Reference Element.
-
Click OK.
The nearest element (identified as Near.xxx) is added to the specification tree before the line and is set as current. 
The line, that now uses Point.1, is modified accordingly. 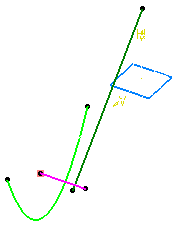
Using an Extract
-
Double-click Combine.1.
The Combine Definition dialog box appears. -
Click OK.
The Multi-Result Management dialog box appears. 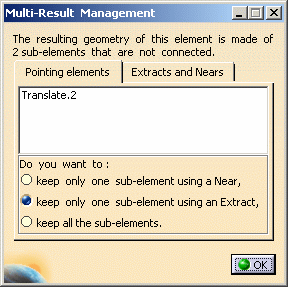
-
Check keep only one sub-element using an Extract to create an extract of the multiple element, that is the combine curves.
-
Click OK.
The Extract Definition dialog box appears. -
Select one of the combine curves in the 3D geometry as the Element to extract.
The selected element is highlighted. -
Click OK.
The extracted element (identified as Extract.xxx) is added to the specification tree. 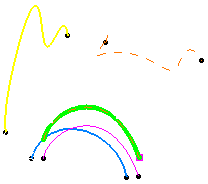
- Several multi-result features can be contained within a multi-output.
- If you exit, and then return to the Multi-Result Management function, the options set in the Multi-Result Management dialog box are retained.
![]()