- the View toolbar cannot be customized
- you cannot drag and drop local commands onto global toolbars (for
instance, you cannot drag and drop the Pad command onto the
Standard toolbar). If you try to do so, the symbol
 is displayed to indicate
that this action is forbidden.
-
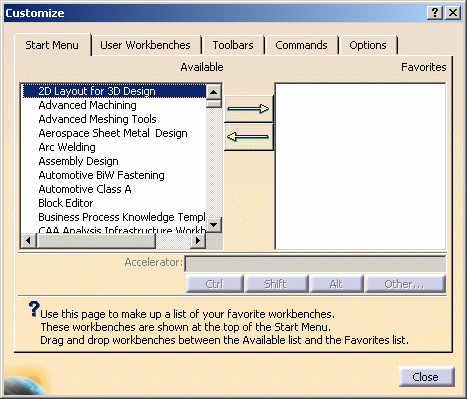
Select Tools > Customize or right-click any icon in any toolbar then select Customize to open the Customize dialog box:

The dialog box contains the following tabs: - Start Menu: customizes the Start menu and workbench access icons (as described in Accessing the Navigation Tools)
- User Workbenches: lets you create your own workbenches
- Toolbars: lists the currently visible toolbars (default)
- Commands: lists the commands you can drag and drop onto a toolbar
- Options: contains general customization options.

- With the Toolbars tab open,
double-clicking any icon highlights, in the toolbars list, the
toolbar the icon belongs to.
Double-clicking a toolbar also highlights the toolbar name, allowing you to identify it. However, for toolbars displayed in the bottom part of the workbench (such as the Standard toolbar), you must double-click the bottom of the toolbar and for toolbars displayed on the right side of the workbench, you must double-click the right part of the toolbar. Otherwise, double-clicking the toolbar undocks it but does not highlight its name in the list. - Double-clicking an undocked toolbar redocks it at the place where it has been previously docked (if relevant).
- Toolbars that have never been redocked using drag and drop are displayed in a docking bar in their creation order.
-
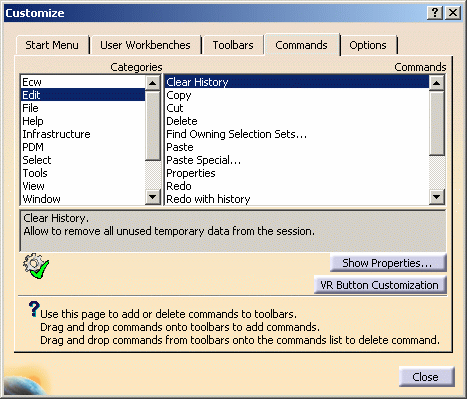
Click the Commands tab to list the commands available.
The Categories list allows you to filter the listed commands by category: the category is the name of the menu in the menu bar. For example, selecting the Edit category in the Categories list displays in the commands list all the commands likely to appear on the Edit menu.

The category All Commands lists all commands available for the workshop you are working in as well as global commands (e.g. Open, Save, etc.). If you created macros, the macro names are also listed. You can then add macros to a toolbar.
-
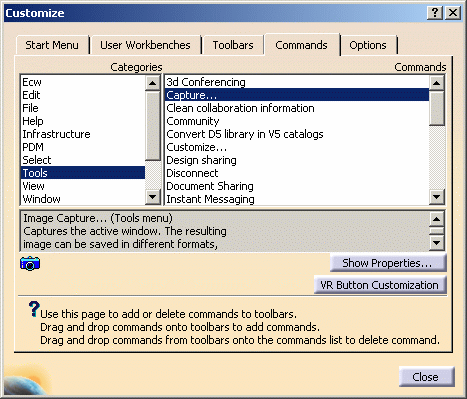
Select a command from the command list.
In this example, the Capture... command has been selected. Note that the icon for the command is displayed at the bottom of the dialog box, along with a short help message explaining the role of the icon. 
-
Drag the command from the command list to the toolbar to which you want to add the command.
-
Drop the command onto the desired toolbar.
In our example, the icon for the Image Capture... command has been added to the Standard toolbar: 

Note that this does not apply to icon boxes which cannot be customized. -
To delete a command from a toolbar using the drag-and-drop mechanism, drag the command and drop it back inside the list of commands in the Customize dialog box.
You can also drag and drop commands which do not have icons: in this case, the command name appears in the toolbar. Your customization is stored automatically in the FrameConfig.CATSettings file: you recover it if you exit then restart. For more information about settings, refer to About Settings.
If you intend to acquire or remove licenses using Tools > Options > General > Shareable Products, do not forget to first exit then restart your Version 5 session before accessing this tab in order to recover your customization.
Acquiring or releasing shareable products implies that all the toolbars and menus are regenerated. The user interface is recomputed using the last settings saved and therefore, if your customization has not been previously saved, it will be lost.
More about dragging and dropping icons
It is not recommended to drag and drop a Version 5 icon onto another application (such as Microsoft PowerPoint, Microsoft Word, etc.): in that case, the dropped icon disappears from your Version 5 session and the only way to restore it is to select Tools > Customize then follow the steps detailed in this scenario.
Working with ENOVIA LCA: Optimal CATIA PLM Usability
The Safe Save mode prevents the user from creating or
editing data in CATIA that cannot be correctly saved in ENOVIA V5.
Working in this mode means that certain commands are unavailable (i.e.
grayed out) as you enter the workbench.
However, these unavailable commands are not grayed out when displaying the list of commands using Tools > Customize. As a consequence, if you drag and drop one of these commands onto a toolbar then use it, bear in mind that the created data will not be saved in ENOVIA V5.
For detailed information on the interoperability between CATIA and ENOVIA, refer to the Version 5 - ENOVIA-CATIA Interoperability User's Guide.
![]()