Understanding the Navigation Assistant
The product structure contains a specification tree. The easiest way to navigate in the tree is by simply clicking on a branch. Double-click an object in the tree to activate the object-specific workbench.
The navigation assistant manages transitions between different workbenches. Three situations are possible when navigating from one workbench to another. Depending on:
- which workbench you come from
- to which workbench you want to go
- and what you selected before navigating
the navigation assistant will:
- create a new workbench document in the current product structure
- activate a different workbench in the product structure
- or create a new document for a different workbench.
The navigation assistant will always privilege the creation of a new document in the current product structure. Note that activating the Analysis or Generative Drafting workbenches creates new documents in a new window, not in the Product Structure.
-
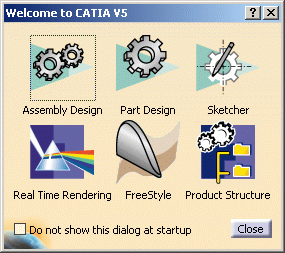
You can navigate from one workbench to another using the Welcome to CATIA V5 dialog box, which appears when you start a session or when you click the icon representing the current workbench.

This contains the icons for the workbenches belonging to the configurations and/or products you installed. In our example, the workbenches illustrated are the result from installing the Mechanical Design configuration.

If you do not want to display this dialog box at the start of each session, clear the appropriate check box Do not show this dialog at startup. -
You can also access the workbench icons by right-clicking the current workbench icon:

-
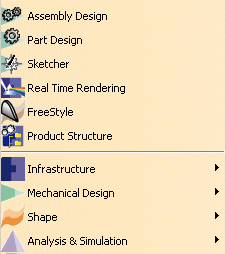
Select the Start menu to access the same icons:
- the workbench names and the associated icons are displayed at the top of the menu
- the second area in the menu contains the list of the solutions containing the configurations/products you installed. These entries in turn provide yet another means of accessing the same product workbenches
- a check list lets you switch between document windows
- the User Galaxy lets you access the Dassault Systemes Galaxy online information package accessible via html browser (refer to Accessing the Dassault Systèmes User Galaxy for more information).

-
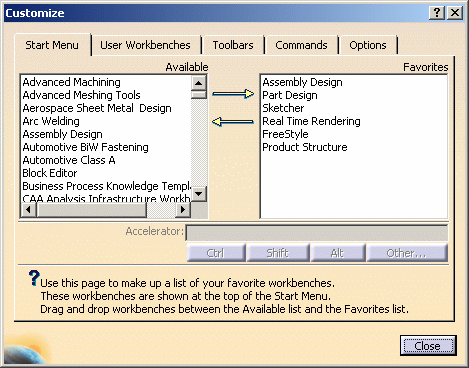
To customize the list of workbench icons available, right-click any icon in any toolbar to display the Customize dialog box, or select Tools > Customize.

The Favorites list contains the workbenches available on the Start menu, the Welcome dialog box and by right-clicking the current workbench icon. To remove icons from these locations, drag the icon name from the Favorites list and drop it on the Available list, or select the icon and click the
 arrow.
To add icons, do the reverse: drag them from the Available list and drop them onto the Favorites list, or select the icon and click the
 arrow.
 -
Then click Close to confirm.
Note that the Available list remains the same because it contains all available workbenches. The list varies according to the configurations and/or products installed.
![]()