The rendering styles you can apply in the graphic properties are:
- Shading: faces are displayed
- Shading with Edges: faces and edges are displayed
- Transparent: makes the object invisible but you can still
select it by picking. This means that you cannot see the object but if
you move your mouse over it, the prehighlight is displayed and if you
select the object, the highlight is displayed as well.
This rendering style does not mean that the object becomes transparent in terms of opacity - Wireframe: only edges are displayed.
When V5 elements have been assigned one of the above-mentioned rendering styles, this style supersedes the one of the 3D window.
| Rendering styles are taken into account in the following order: first, the rendering style of the parent document and then, the rendering style of the child document. For instance, if you apply the Wireframe rendering style to a product and the Transparent rendering style to its part, activating Rendering style per object displays the whole object in Wireframe. But if you select the product then set it to No Specific Rendering, then the object is displayed as Transparent. This is also true for geometrical sets. |
 |
 |
|
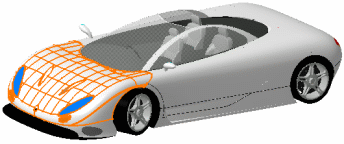
Surface 1: |
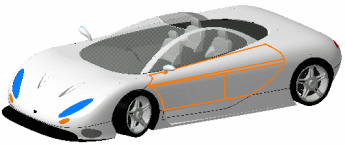
Surface 2: |
-
Select View > Render Style > Customize View Parameters.
The View Mode Customization dialog box appears: 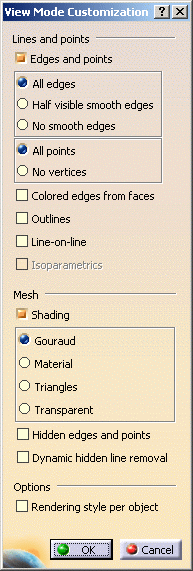
-
Check that Shading is selected and see the result in the geometry area:

The whole object is displayed in Shading mode even though some elements have been assigned a different rendering style. -
Now, activate Rendering style per object in the Options area. This displays each element with its specific rendering style.
In our example, Surface 1 is displayed in Wireframe mode and Surface 2 in Shading with Edges mode: 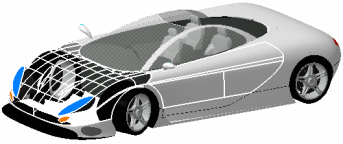
For detailed information on the various rendering styles available in the Custom View Modes dialog box, refer to Customizing the View Mode. -
When finished, click OK to validate and close the dialog box.
![]()