-
Click Customize View Parameters
 in the View toolbar.
Note that you can also select View > Render Style > Customize View Parameters. The View Mode Customization dialog box appears. If this is the first time you are using the command, the view settings for the current document are selected in the dialog box:
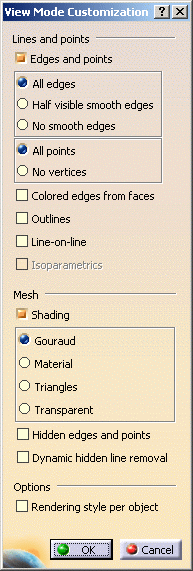
In our example, the Shading check box is selected: this means that the view mode for the current document is Shading. -
Customize your own view parameters by selecting or clearing the appropriate options.
In certain cases, selecting one option may also select other options. Each time you select or clear an option, the current view is updated
dynamically to take your settings into account.Lines and points
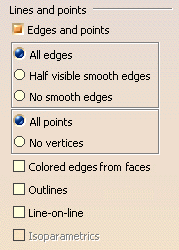
Edges and points
This area lets you display objects in shading mode with points and edges. You can choose among the following visualization modes (do not
forget to activate Edges and points to be able to activate the visualization modes available in this area):All edges
Displays objects with all edges, whatever their type (smooth or not). You can also use the Shading with Edges command.
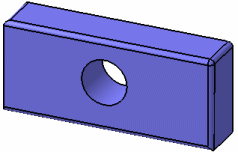
All edges When All edges is activated, you can deactivate Shading to display the object in Wireframe (NHR). In this mode, only the object's edges
are visible.
Note that you can also use Wireframe (NHR).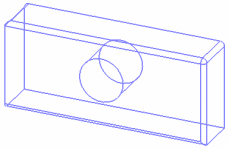
Wireframe (NHR) Half visible smooth edges
Displays partially smooth edges. The color applied to edges is the color defined in the part body's graphic properties (right-click the part
body then select Properties and access the Graphic tab):
All edges
Half visible smooth edges
Note that: - if Shading is cleared, Half visible smooth edges has no impact (all edges are displayed)
- selecting Material has no impact on the color
applied to edges. The color used is still the one defined in the
part body's graphic
properties.
No smooth edges
Hides smooth edges on your objects. You can also use the Shading with Edges without Smooth Edges command:
All edges
No smooth edges
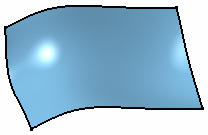
All points
Displays edges and all their points, including vertices. By default, this mode is activated:
No vertices
Deactivates the display of vertices for edges. Only free points are displayed and can be selected.
This enhances the overall readibility when working with complex models because it can be confusing when all the vertices are displayed.
Clicking this option has a positive impact on performance since some elements in the model are not visible:
Note that this option, as any other customizable option (e.g. Outlines), does not alter the behavior of predefined rendering styles (Wireframe, Shading With Edges, etc.). For instance, if you activate No vertices then select Shading in the View toolbar, vertices reappear. Colored edges from faces
Colors edges (border edges, internal smooth or sharp edges) according to the color applied to the object's faces.

Colored edges from faces has no effect: - if you are working with CATPart and CGR files created earlier
than V5R15.
To make this visualization mode effective on .CATPart documents earlier than V5R15, you need to upgrade them by running the
CATAsmUpgrade batch with the--force-new-visuoption. For more information on how to run this batch, refer to the Version 5 -
Assembly Design User's Guide - "Data Upgrade for Large Assemblies Performance".
CGR files earlier than V5R15 cannot be upgraded - if the Optimize cgr for large assembly visualization option is activated in Tools > Options > Infrastructure > Product Structure > Cgr Management.
When the option is selected, each edge color is identical to the one of its adjacent faces.
Regarding internal edges, if the two adjacent faces have a different color each, the edge is colored according to the color of the face whose bounding sphere's radius is the smallest. The real surface is not taken into account.
The bounding sphere of a face is a virtual sphere-shaped bounding volume surrounding the face and whose center and radius are such that the
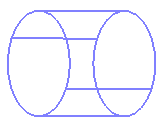
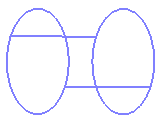
face is completely within the sphere. Depending on the underlying feature, there are two possibilities. This is illustrated by the pictures below
showing two different bounding spheres for the same object.In most cases, the Version 5 bounding
sphere of a face is the smallest sphere that includes the face:But in some cases, the Version 5 bounding
sphere may also be larger than the smallest surrounding sphere:
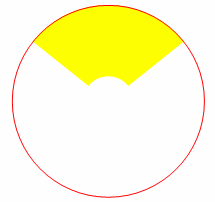
Example 1:
Edges between the green and grey faces of the trapezoid turn grey when set to Colored edges from faces because "grey" is the color of the
face with the smallest bounding sphere: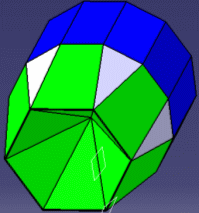
Example 2:
The small square in the center turns red when set to Colored edges from faces because the bounding sphere of the red face is smaller than the
one of the green face: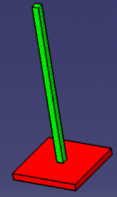
More about Colored edges from faces
- If you are working with V4 models, internal smooth edges are not drawn.
- This option increases the amount of memory used in order to compute the color for each edge in the model.
- Selecting this option automatically activates Edges and points
- You cannot activate both Colored edges from faces and Outlines, these options are mutually exclusive.
- Colored edges from faces cannot be used in
conjunction with the options available in the Mesh area:
selecting one of these options
automatically clears the Colored edges from faces check box, and inversely.
Outlines
This option is useful if you always want to display outlines for parts created from surfaces of revolution, for example, shafts, and cylinders. This setting determines whether you see outlines or not.
Outlines selected
(with no shading)Outlines cleared
(with no shading)Whereas edge display is computed by your workstation's graphic adapter, outline display is computed by the display software.
Note that there is a price to pay in memory usage and, in large assemblies, displaying outlines might affect display performance. You may want to switch outline display off in this case.Line-on-line
This option enables you to visualize superimposed lines by displaying them in a different color. It is recommended to set a dark color
background for better visibility.
Let's have a look at the example below:Example 1
Line-on-line activated with light color background: superimposed lines cannot be distinguished:
Example 2
Line-on-line activated with dark color background: superimposed lines can be distinguished (identified by the red arrows in our example):
Note that when this option is activated, you cannot select the Shading check box Isoparametrics
This option is used in conjunction with Enable isoparametrics generation available in the Performance tab.
No isoparametrics
Isoparametrics are displayed
Mesh
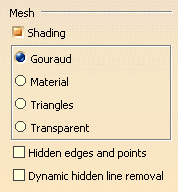
Shading
This area lets you define the type of shading to be used when displaying objects. You can choose among the following modes:
Gouraud
Displays objects in Gouraud shading. This surface-shading technique interpolates linearly a color or a shade across a polygon in order to
make the object appear smoother.
This shading mode is the default visualization mode: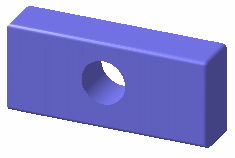
Gouraud shading Material
Lets you visualize materials that have been applied onto your objects. You can also use the Shading with Material command.
Refer to "Applying Materials" in the Version 5 - Real Time Rendering User's Guide for detailed information on how to use materials.
Gouraud shading
Material shading
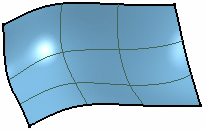
(with Roughcast material)Triangles
Displays the triangles on the object's faces as shown below:
Gouraud shading
Triangles shading
Transparent
Enables you to display the whole object in transparency mode provided that Shading is activated.

Gouraud shading
Transparent shading
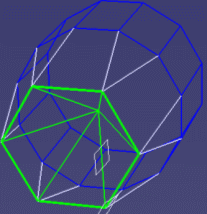
Hidden edges and points
This option displays objects in shading mode with points and edges, whether they are hidden or not. You can also use the Shading with Edges
and Hidden Edges command.
Gouraud shading
Hidden edges and points
Dynamic hidden line removal
This option displays objects in quick hidden line removal mode. In this mode, 3D faces visually blank out any element located behind them,
including 1D elements (such as wireframe elements).
Selecting the Dynamic hidden line removal check box has the following effect:
Gouraud shading
Dynamic hidden line removal
Options
Rendering style per object
This option lets you take into account the rendering style of V5 elements when visualizing them in a 3D window.
Refer to Rendering Style per Object for detailed information. -
Select OK if you want to save your customized view parameters, or Cancel to exit without saving them.
When you click OK, your view parameters are stored with your settings.
You can then apply these settings to the current document by clicking Customize View Parameters
![]()