 View figure.
IBM Virtual Shared Disk Perspective is the graphical user interface of PSSP that helps you perform shared disk management tasks without you having to remember the commands and their syntax. You can view, set, or change attributes and status, and you can control and monitor the operation of the shared disk management components. The IBM Virtual Shared Disk Perspective graphical user interface has the basic actions that let you do most of your shared disk management work from within the graphical session.
Each action correlates to one or more virtual shared disk commands. You can run virtual shared disk, other PSSP, and AIX commands from within this interface as well. SMIT is also available to you for managing shared disks. Appendix A, Interface cross-reference has a cross-reference chart including basic functions and how to perform them using each of the interfaces. It also includes a summary of the virtual shared disk commands, showing the command name and its purpose. The full path for all commands involved with managing virtual shared disks is /usr/lpp/csd/bin/ and the path for other PSSP commands is /usr/lpp/ssp/bin/. The syntax and complete descriptions of all commands in PSSP are in the book PSSP: Command and Technical Reference.
Explanation of the IBM Virtual Shared Disk Perspective graphical user interface is limited in this book to the brief introduction in this chapter. In other chapters, you will find only references intended as task guidance and quick-start direction. This book uses an arrow (>) as a shorthand notation for what to click on next, which will be either in the same window or in the next window that appears.
Begin using the interface with either of two PSSP commands:
Click on Help>Tasks at the top right-hand corner of the primary window to see an online help system that explains all that you can do and how you can use the IBM Virtual Shared Disk Perspective interface. There is information about every pane and every field. The book PSSP: Administration Guide also has some information about the SP Perspectives graphical user interface.
The following sections serve as an introduction and highlight the key features of only the IBM Virtual Shared Disk Perspective though most of the interface is common to all the SP Perspective interfaces.
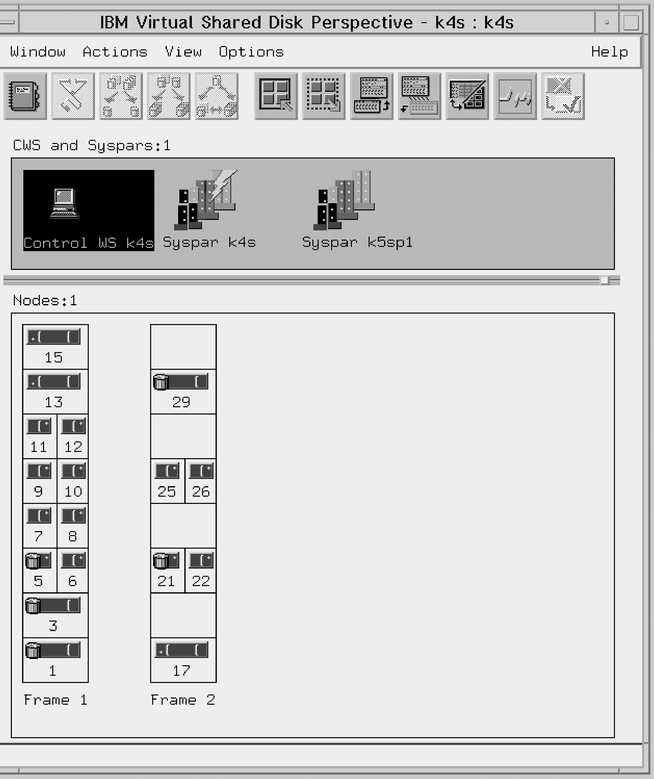
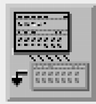
Figure 7 shows what the primary window might look like by default, the first time you use the IBM Virtual Shared Disk Perspective.
Figure 7. The IBM Virtual Shared Disk Perspective Primary Window
View figure.
By default, the primary window contains:
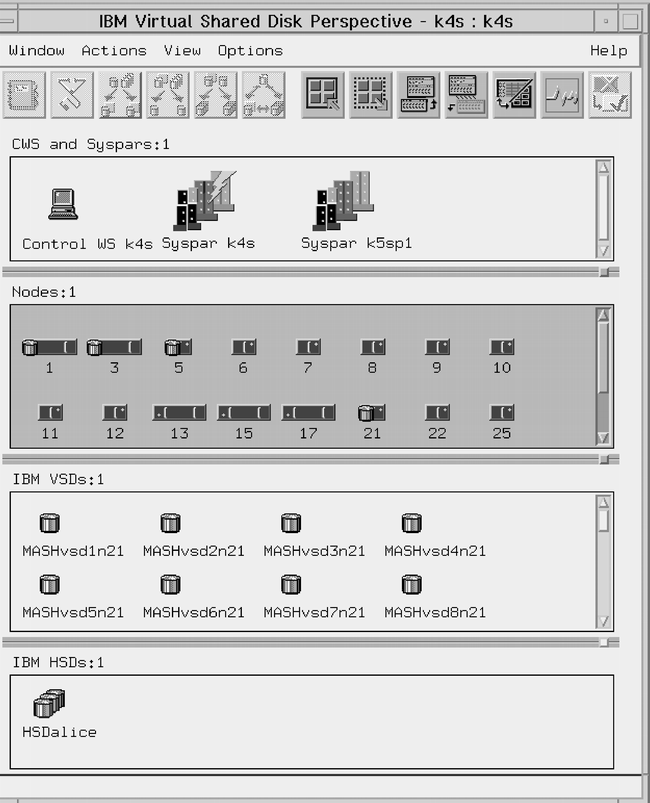
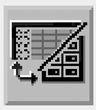
When you expect to work with virtual shared disks, you need to add the IBM VSDs pane and you might want to set the Nodes pane to the icon view to see more nodes in less space. If you want to work with hashed shared disks, you will have to add the IBM HSDs pane also. If you want, you can even remove the CWS and Syspars pane from the window and bring it back only when you need it. Figure 8 shows what the primary window might look like after you change the Nodes view, add an IBM VSDs pane, and add an IBM HSDs pane.
Figure 8. A Customized IBM Virtual Shared Disk Perspective Primary Window
 View figure.
This customized primary window contains:
In general, the actions that are selectable vary based on which pane is current and what object is selected. In other words, this is an object-action oriented interface. First you select what objects you want to work with, then you select what you want to do with, to or for that object.
In this area, in addition to the Help action, there are four menu choices: Window, Actions, View, and Options.
Figure 9. The IBM Virtual Shared Disk Perspective Menu Bar
 View figure.
If you are experienced with the command line interface or SMIT, you might feel more comfortable with the IBM Virtual Shared Disk Perspective interface by keeping in mind that there is often a correlation between an action, such as the Create action from the IBM VSDs pane, and a command, such as createvsd. The dialog for the action tends to contain all the same informational and data entry fields as are defined for the related command. An advantage of the graphical user interface is that most of the fields are already set to default values and you can see what they are. Also, it is so much easier and less error prone to select nodes or virtual shared disks from a pane or a selection list than to type long command line strings.
If you do not see all the actions on your menu, you might not have authorization. See Establishing authorization.
For other SP Perspectives menu choices, see the chapter on SP Perspectives in the book PSSP: Administration Guide. However, you will find detailed information only when you start the graphical user interface and look at the online help.
The tool bar is displayed just below the menu bar in the primary window. The tool bar consists of icons that represent the most frequently used actions from the Actions and View menus. At any given time, an icon is selectable or not, depending on what pane is current and what object is selected.
Figure 10. The IBM Virtual Shared Disk Perspective Tool Bar
 View figure.
For the IBM Virtual Shared Disk Perspective, the icons in the tool bar are
the following:
| Icon | Title and Purpose |
|---|---|
 View figure. View figure. | Properties lets you view and modify attributes of each type of object shown in the panes: control workstation, system partitions, nodes, virtual shared disks, and hashed shared disks. This is how you see what is in the System Data Repository (SDR). Depending on the selected object, you can set or change certain values. |
 View figure. View figure. | Run diagnostics displays information about the status of virtual shared disks. |
 View figure. View figure. | Filter to show related nodes in a new pane opens a new Nodes pane with the nodes that are related to the selected virtual shared disks or hashed shared disks. |
 View figure. View figure. | Filter to show related IBM VSDs in a new pane opens a new IBM VSDs pane with the virtual shared disks that are related to the selected virtual shared disk nodes or hashed shared disks. |
 View figure. View figure. | Filter to show related IBM HSDs in a new pane opens a new IBM HSDs pane with the hashed shared disks that are related to the selected virtual shared disk nodes or virtual shared disks. |
 View figure. View figure. | Bring up the Filter to Show Related Objects dialog brings up a
dialog that lets you filter another pane based on objects selected in the
current pane. For example:
|
 View figure. View figure. | Select all objects selects all the objects that are in the current pane. |
 View figure. View figure. | Deselect all selected objects deselects all of the currently selected objects. |
 View figure. View figure. | Add a pane lets you add a new pane to the current window or to a new window. |
 View figure. View figure. | Delete the current pane from this window lets you remove the current pane from the window. |
 View figure. View figure. | Show objects in the table view or the icon view is a toggle between icon view and table view in the current pane. |
 View figure. View figure. | Set up and begin monitoring lets you monitor conditions associated with nodes, the control workstation, or system partitions. |
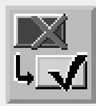 View figure. View figure. | Acknowledge triggered or unknown monitoring state of selected nodes lets you mark an object to acknowledge that you are aware of the nodes triggered or unknown monitoring state. The mark will remain until the state of the node changes. |
The objects that you can work with are displayed in the panes. Some panes can be seen in any of several arrangements or views, depending on which is the current pane. Some of your view options are pointed out in the discussion of the Nodes pane.
You can add and delete panes. For example, if you want to concentrate on your virtual shared disk nodes, you might delete the CWS and Syspars pane after selecting the current system partition to make more room for the nodes and virtual shared disk panes. You can always add the pane again if you need it later.
The panes available are:
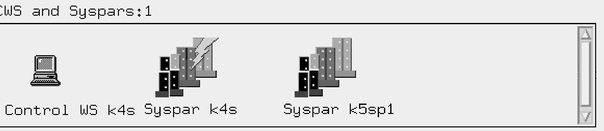
You can set the current system partition, which is indicated by a lightning bolt, in the CWS and Syspars pane. The other panes display the set of nodes, virtual shared disks, and hashed shared disks associated with the current system partition. You can set a different system partition to work with by selecting another Syspar object and then selecting Actions>Set Current System Partition.
Figure 11. The CWS and Syspars Pane
 View figure.
This pane contains node icons with and without virtual shared disk icons. Those without virtual shared disk icons are nodes that have not been designated as virtual shared disk nodes. You can choose to see the nodes in any of several available views.
As you might have already noticed in Figure 7, you can see the nodes in a frame view where the nodes are arranged in their positions with respect to the SP frames that are in the current system partition. If there is an SP-attached server node, it appears outside of the SP frames but still in its position relative to the SP frames.
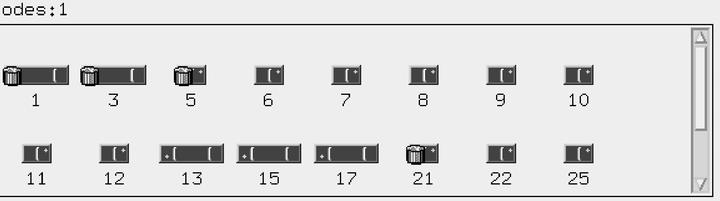
Another way to see the nodes is in icon view as shown in Figure 12.
Figure 12. The Nodes Pane in Icon View
 View figure.
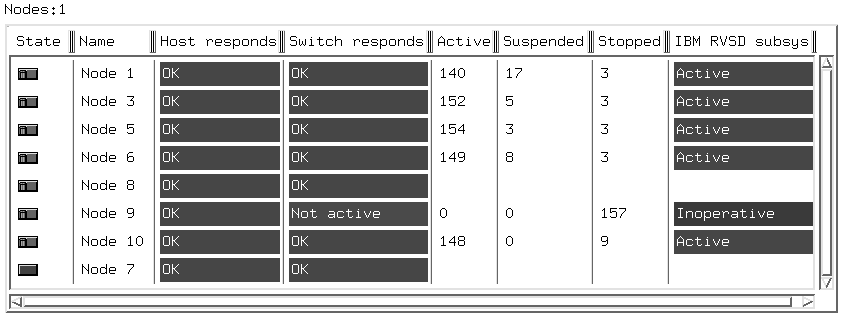
Another way to see the nodes is in table view. Table view is typically used as an alternative to looking at attributes in the Properties notebook. With the Nodes pane current, you can click on View>Show Objects in Table View. For example, Figure 13 shows the attributes:
Figure 13. The Nodes Pane in Table View
 View figure.
The table view is visually more meaningful when you see it in color. Green is used for normal operation and red is used to alert you. For example, Switch responds is red for Node 9 and indicates Not active, and IBM RVSD subsystem is red and indicates Inoperative. Also notice that for Nodes 7 and 8 there are no counts of Active, Suspended, and Stopped IBM VSDs and IBM RVSD subsystem is also blank. Node 7 has blanks because, as you can tell from the node icon, it is not designated as a virtual shared disk node. Node 8 has blanks either because there are no virtual shared disks configured on the node or because the node is not running PSSP 3.2 or later and the attributes are not available.
The first column for the table view is labeled State because you can also set up monitoring while in table view by selecting View>Set Monitoring.... The node icons are shown in their normal state when monitoring has not been started, but after monitoring is started the icons change when necessary. For instance, if you had been monitoring for the condition switchResponds, there would be a red X on the Node 9 icon while the rest of the node icons would still be green.
The actions available when the Nodes pane is current are:
When you use Run Command..., you must type the command with its full path name unless you set your DSHPATH environment variable to include /usr/lpp/ssp/bin/ and /usr/lpp/csd/bin/.
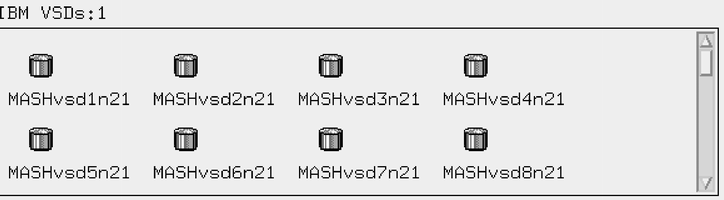
You can create and select virtual shared disks in the IBM VSDs pane.
Figure 14. The IBM VSDs Pane
 View figure.
The actions available when this pane is current are:
You can create and select hashed shared disks in the IBM HSDs pane.
Figure 15. The IBM HSDs Pane
 View figure.
The actions available when this pane is current are:
The information area is at the bottom of the window. The information changes as you move the cursor to different areas. Also, a pop-up or bubble area appears when you place your cursor over a tool bar icon or a pane title.