![]()
|
|
This task explains how to export the Clash results in Second XML format using data coming from ENOVIA database To do so, perform the following operations: |
|||||||||
|
|
Have a DMU V5 session and an ENOVIA LCA session running | |||||||||
Establishing
the DMU V5 / ENOVIA LCA Connection from DMU V5
|
||||||||||
|
|
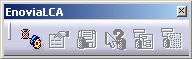
Click the Connect to ENOVIA LCA icon.
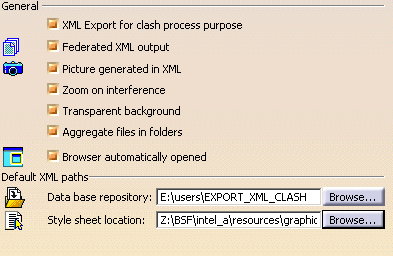
In your CATIA session, select Tools > Options > Digital Mockup > DMU Space Analysis
Clear the XML Export for clash process purpose check box in the DMU Clash - Process tab page.
In the Data base repository filed, select an absolute
path, for instance
(E:\users\Export_XML_Clash\XML)
In the Style sheet location path, select an absolute path
(E:\BXX\intel_a\resources\graphic\clash.xsl)
Set the remaining XML Export options accordingly, refer to DMU Clash - Process tab page (Tools > Options > Digital Mockup > DMU Space Analysis)
 |
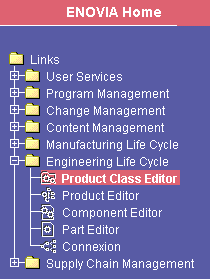
In ENOVIA Home panel, select the Engineering Life Cycle folder and double-click the Product Class Editor bookmark. The Product Class View panel is displayed.
 |
|
|
|
To create a PRC, please refer to the appropriate ENOVIA LCA documentation. |
Right-click a Product Class Root (PRC) and select Open from the contextual menu.The PRC is opened in the Product Editor panel.
Right the PRC and select Expand from the contextual menu to expand the product. All instances are displayed.
Right-click the instance of your choice and select Send To > CATIA V5 from the contextual menu. The document is displayed in your DMU V5 session.
In DMU V5, switch to the DMU Space Analysis workbench (Start > Digital Mockup > DMU Space Analysis)
Select Insert > Clash from the menu bar or
click Clash
![]() in the DMU Space Analysis toolbar and run an interference check.
in the DMU Space Analysis toolbar and run an interference check.
|
The Check Clash dialog box expands to show the results. |
|
The dialog box identifies the number of interferences detected along with the type. By default, results are organized by conflict in the List by Conflict tab. Additional information is provided in the Check Clash dialog box to help you compare clash results with those already stored in ENOVIA LCA. |
Click Export As
![]() in the Check Clash dialog box to generate the XML file.
in the Check Clash dialog box to generate the XML file.
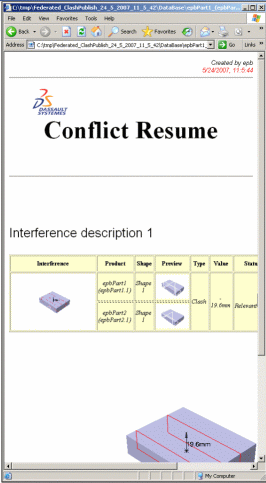
Open your XML files:
  |
![]()