Creating and Modifying Standards
|
|
This task shows you how to create or modify standards. This task uses a piping standard as an example - the procedure is the same for other types of standard too. Substitute the appropriate application or directory. | |
|
|
The simplest
explanation of a standard is that it is a collection of specifications. How
detailed these specifications are, or which areas they apply to, can vary
from standard to standard, and on users, who can modify the standards. You
use a standard because it ensures that all the parts you place, and the
manner in which you place them, will meet certain minimum requirements or
be within a certain range. The specifications themselves apply to many
different properties, such as material or pressure ranges, maximum bend
angles, maximum or minimum length, etc.
A standard works by providing the ability to define values for attributes that are discrete. The values of the attributes are used during various operations in the setup or design process. Example: Anytime the user is trying to define a value for "Nominal Size" the user will be prompted to select from a predefined list that comes from a standard. Standards are not used for part selection. When you decide to use a certain standard, such as ASTL, which is supplied with this application as a sample, you will only have access to specifications that meet that standard. You set the standard in the Project Resource Management file. Almost all users will be creating their own standards. You can use a different directory location as long as you specify it in the project resource management file, but it is recommended that you keep the same directory structure as the samples. The samples are located in the ... intel_a\Startup\EquipmentAndSystems\Piping\Standards directory. A standard basically consists of design rules and attributes. You can change the values in design rules tables, but you cannot add new rules or remove any existing ones. In earlier releases the design rules in a standards catalog pointed to CATProduct files, which in turn pointed to text tables. From Release 13 the design rules can point directly to the text files, rather than to CATProduct files only. You should, therefore, tailor the procedure described below to suit your catalog. For instance, if you do not intend to point to CATProduct files then Step 4 will not be necessary. |
|
|
|
1. | The first step in creating a new standard should be to create the specifications that the new standard will contain. To do this, make a directory, say MAR, under the Standards directory and at the same level as the ASTL standard supplied with this application. Enter the directory name in upper case, even though Windows will display it in upper/lower case. |
| 2. | Copy all the files under ASTL into the new directory. | |
| 3. | Edit all the text files - those of
file type .txt - using a text editor like Notepad to reflect the values you
want to define for your standard. The CATProduct file types should not be
modified except as noted below. You should change the words ASTL in the
file name to reflect your new standard, MAR, but do not change the rest
of the file name. The table structure and column headings must not be
modified. Use the tab key to move between columns, and do not add
leading or trailing spaces to your entries.
This is also the step you follow when you need to modify the tables in an existing standard. |
|
| 4. | If the design rules will point to CATProduct files: Change the prefix - ASTL - in the CATProduct-type files to reflect your new standard. Change the CATProduct file's prefix in Windows Explorer. You also need to rename the file within the application. To do this open it in the application (see Step 12), right click on it in the specifications tree, and change the name in the Properties dialog box that displays. You also need to change the CATProduct files so that they point to the renamed table. And you need to change a reference in the catalog so that it points to the renamed CATProduct file. This is explained below. But first create the standard using the Catalog Editor as explained here. | |
| 5.
|
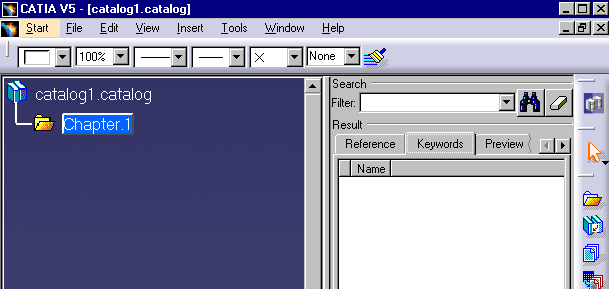
Click Start - Infrastructure
- Catalog Editor to start the Catalog Editor. The Catalog Editor will
display.
|
|
| 6. | Open the CATfct file associated
with your application. To do this, click the Open User Dictionary button
|
|
| 7. | Click the Add Catalog
Template button
|
|
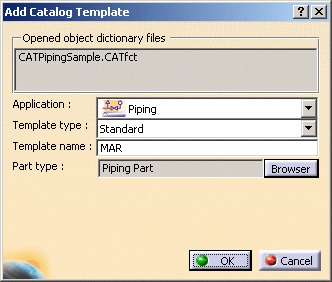
| 8. | Select the application
and click on the down arrow in the Template Type field to make your
selection, in this case Standard. Enter a name for the standard.
Click on the Browser button next to the Part Type field to
display the Class Browser. Select the line Piping Part and click
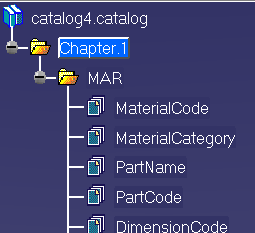
OK. Click OK on the Add Catalog Template dialog box, which should add the
standard MAR to the specifications tree with the attributes displayed, as
shown in the image below.
|
|
| 9. | You now need to make sure the
attributes that display in the application point to the text files (tables)
you just created. Double click on an attribute, say MaterialCode, and click
on the Add Component button
|
|
| 10. | Click the Select Document
button. In the File Selection box that displays navigate to the MAR
directory you created in Step 1 and select the file that corresponds to the
attribute that you double-clicked, in this case MaterialCode. Click Open on
the File Selection box and OK on the Description Definition box. The table
will be associated with the attribute. Do this for all the attributes as
well as the design rules that appear at the end of the list. You can link the design rules to corresponding text files using the method described above. If you do so you do not need to follow the steps given below. If you want to link design rules to a CATProduct then take the following steps. |
|
| 11. | You now need to point the
CATProduct files in the MAR directory to the corresponding text file
(table). And you need to change references in the new standard so that they
point to the renamed CATProduct files.
To make these changes you need to change a setting in your Options. Click Tools - Options - Infrastructure, select Product Structure and click the Tree Customization tab. Under Specification Tree Order click on Relations so that Yes appears in the Activated column. |
|
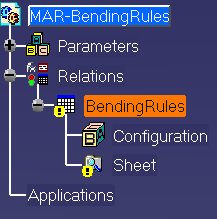
| 12. | To point the .CATProduct files to
the renamed text files, begin by opening the .CATProduct file in the
application - one way is to drag the file from Windows Explorer onto the
workbench. It will display in the specifications tree. In this example the
file BendingRules will be changed - in the illustration below it has been
opened.
|
|
| 13. | Double click on the entry Bending Rules - make sure to click on the entry beneath Relations as shown above - to enter the Knowledge Advisor workbench. | |
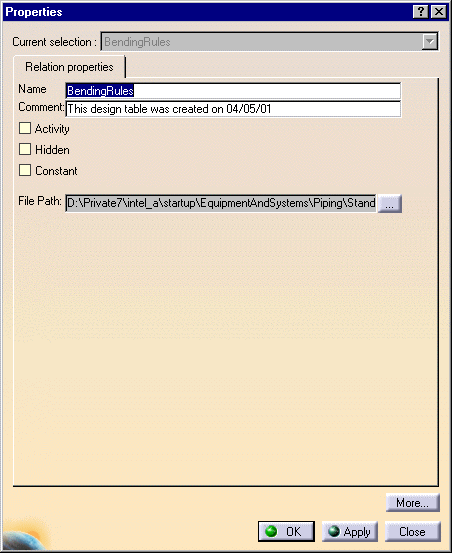
| 14. | Right click on BendingRules to
bring up a menu and select Properties. The Properties dialog box
will display.
|
|
| 15. | Click on the button next to the
File Path field, navigate to the renamed text file and select it. Click
Open. Save your change.
You need to do this for each .CATProduct file. |
|
| 16. | You now need to change the references in your new standard (MAR) so that they point to the CATProduct files. To do this open MAR.catalog in the application by dragging it onto the workbench from Windows Explorer. The catalog can be found in the Standards directory. | |
| 17. | The catalog will display in the
Catalog Editor. Double click on the .CATProduct file - in this case
BendingRules - to make it active and then click the Add Component button
|
|
| 18. | Click the Select Document button. In the File Selection box that displays navigate to the MAR directory you created in Step 1 and select the CATProduct file that corresponds to the CATProduct that you double-clicked, in this case BendingRules. Click Open on the File Selection box and OK on the Description Definition box. The file will be associated with the CATProduct. Do this for all the CATProducts. | |
| 19. | Click File - Save to save the changes once you are done. | |
|
The General Design Catalog is used to store attributes whose values are the same in all standards. For instance, the pipe specification CS150R has the same value in all standards, because it is referring to a carbon steel pipe with a 150-pound rating. Another example: the attribute "okay to cut" has only two possible values, Yes or No, in all standards. The General Design Catalog was created so that you do not have to enter such attributes in all the standards you create, but instead enter them one time in this directory. The application will first check the standard to see if the attribute is located there and, if it does not find it, will refer to the General Design Catalog. |
||
|
|
If you create a new standard, you need to incorporate it in the design rules or the new standard will be ignored by the rules. To incorporate it you must add the new standard in the appropriate column in the rules tables. | |
|
|
||
