This section provides operational instructions for updating the CATIA-SmarTeam system when used with Oracle databases on Windows machines. It covers migrations from releases that are still supported by the vendors to the newest ones or intermediate ones, ranging today from SmarTeam V4.0.5.5/CATIA V5R9 to CATIA/SmarTeam V5R13 or R14.
Compatibility Matrix
This simplified compatibility matrix corresponds to recommended configurations. It assumes that for each release, the last service pack is used.
|
|
2002 |
2002 |
2003 |
2003 |
|
CATIA |
V5R9 |
V5R10 |
V5R11 |
V5R12 |
|
SmarTeam |
V4.05.5 |
V5R10 |
V5R10/R11/R12/R13 |
V5R10/R11/R12/R13/R14 |
|
ORACLE |
8.1.6+ (for ST V4.05.5) |
8.1.6+ (for ST R10) |
8.1.7+ (for ST R11) |
8.1.7+ (for ST R12) |
|
OS |
WIN 2000 (for ST V4.05.5) |
WIN 2000 (for ST R10) |
WIN 2000 (for ST R11) |
WIN 2000/3 |
|
|
2004 |
2004 |
2005 |
|
CATIA |
V5R13 |
V5R14 |
V5R15 |
|
SmarTeam |
V5R11/R12/R13/R14 |
V5R12/R13/R14 |
V5R13/R14 |
|
ORACLE |
9.2 (for ST R13) |
9.2 (for ST R14) |
9.2 (for ST R14) |
|
OS |
WIN 2000/3 |
WIN 2000/3 |
WIN 2000/ |
Reference documents
The following reference documents provide more information about the different topics of the procedure described here. You can access them on the SmarTeam documentation which is available on GA CDs or in SmarTeam.
- Oracle Installation
- Oracle Fine Tuning for SmarTeam Implementers
- SmarTeam Hardware and Software requirements
- SmarTeam Releases upgrade & What's New documents
Steps to follow
Depending on
your present configuration and the targeted one for the update you will
need to apply the migration tasks related to CATIA, SmarTeam and possibly
Oracle. If so, the Oracle update is the first step to perform (See
Oracle Migration) . CATIA software update is not
so critical, we recommend to install the targeted release just after Oracle
Migration, and then to continue with SmarTeam update (See
SmarTeam Migration). If you install CATIA R12
you will have advantage to proceed to the files update to take full
benefits of this release. This is explained on the last paragraph, as the
last step to perform.
The tasks described are as the following ones:
Time critical points
These tasks are time-consuming activities and are given with typical delays: SmarTeam automatic database upgrade: about 2 hours for 10000 Db objects. Test the expected delay with your data, because this depends of the files and the database complexity. Then schedule your production migration taking these constraints into account.
Prerequisites
-
SmarTeam scripts are written using COM SmarTeam API, API functions and low-level database objects used are still supported (see appendix of upgrade documents).
-
LUM licenses for SmarTeam are available through server or node-locked.
-
Check-in all in-work files in the vault.
-
Disconnect all clients from SmarTeam Servers. CATIA should be used in local during this migration period
-
Up to date Production database, SmarTeam directory, and vaults are backup.
-
Apply first the following procedure to a test environment (including database and vaults) that is a copy of the production one.
-
Modify the test database to point to the test vaults (use Vault Server Setup utility).
Oracle Migration
The chosen update procedure consists of installing the totally new database on another directory on the server, and then migrating the data from the former database to the new one. The old database should be deleted only at the end of the migration process. This method allows us to go directly to V9.2 when coming from v8.1.6.
To migrate the data, we choose to use the standard Export and Import mechanisms of Oracle.
Export the SmarTeam database to a dump file
Oracle Setting for data management
-
First verify that Oracle Enterprise Management Tools are installed.
-
Verify the Oracle Management Server service is running under a user who is granted the Log On as a service right.
-
Run Oracle Enterprise Manager Console.
-
Set System/Preferences/Preferred Credentials user for your database or default value for Node Service Type.
The user should be the same as the one declared to run the Oracle Management Server service. It must have the right to the directory where the file you want to import resides. User information should be entered without domain information.
Export Operation
-
Right-click Database / Data Management/ Export.
-
In the Export File window, set the dump filename you want to export to.
-
In the Export Type window, select Table.
-
In the Table selection Window, click on the user that host the current SmarTeam schema, and select all tables under him.
-
In the Associated Objects window, disable Indexes on Tables.
-
In the schedule window, run the job immediately then finish.
-
Verify on the job window the status of the job. Wait for it to be completed.
For further information on exports, see the SmarTeam - Editor Administration Guide.
Create the new database
-
Install the software components of the new Oracle database engine. Refer to the instructions of the Oracle Installation Guide provided in the SmarTeam documentation. If you change the block size as recommended from 8 to 4096, do not forget to change the units too: Kbytes to bytes.
-
Create a new database following the instruction of the same guide.
-
Create a user to host the schema of the SmarTeam data (Go to the Security tab). Grant him the Resource role. Assign it the same table space as that used in the previous database.
-
Verify that you can access this newly created database by using the SmartDBExplorer utility. This database is empty at this point.
Import the SmarTeam dump file to the new database
Oracle Setting for data management
Apply the same setting that the ones explained in the export paragraph (see Oracle Setting for data management)
Import Operation
-
Right-click database>data Management>Import.
-
In the Import File window, Set Dump directory and filename.
-
Read Import File and select what objects you want to import.
-
In the Import Type window, select Table.
-
In the Tables selection window, select all tables from the shown user.
-
In the User mapping window, map old user with the new one.
-
On the Associated objects, disable indexes import.
-
On the schedule window, run job immediately, then finish.
-
Verify on the job window the status of the job. Wait it to be completed.
-
Create New Database registration for the new database using DBRegistration.exe in the bin folder of your SmarTeam directory.
-
Repair DB indexes using SmartDBRepairing. Apply Indices Repairing.
-
Open the new database with SmarTeam and verify that all is OK.
SmarTeam Migration
Each specific release upgrade procedure is not cumulative. It means that if you are running SmarTeam V4 and plan to migrate to V5R12, you have to apply R10 specific task, R11 specific tasks then R12 specific tasks. One chosen client machine will be dedicated to these migration tasks.
V5R10 + specific upgrade
We assume that your current version of the SmarTeam database is at least 4.0.3, look at the TDM_DB_UPGRADES and TDM_DB_VERSION tables to check this point with the SmartDBExplorer utility.
Product Installation
-
Install R10 GA on the identified upgrade machine (Select Editor Installation).
>What you' need to check
Case 0, you're using PartNumbers to localize documents (CATIA_TEAMPDM_UUID=NO in environment variables)
If CATIA_TEAMPDM_UUID=YES in your environment variables or does not exist at all, launch SmarTeam data model designer
-
Do File / Modify database structure and choose your database.
-
Go to Define class attributes and indexes.
-
Check the fields below CATIA class.
Case 1, Feature ID does not exist below this class.
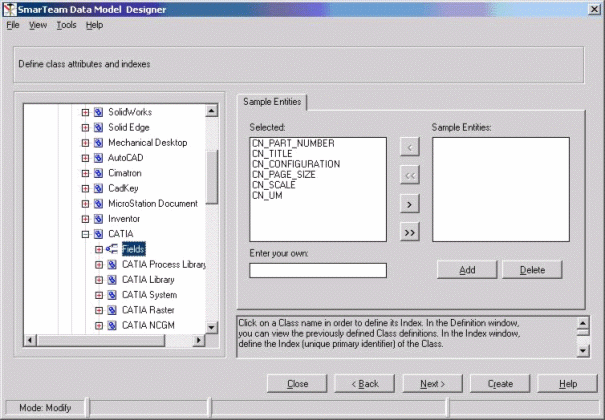 |
Case 2, the Feature ID has existed below CATIA class
or even below since you began to use the CATIA Integration (ie your database has always been designed like that):
What you' need to do
Case 0
In this part, we will delete the CATIA component unique identifier (UUID or Feature ID, named CN_FEAT_ID in the database) from all CATIA classes. And map this again to CATIA class to delete all the records to PartNumbers.
-
Launch the SmarTeam Data Model Designer.
-
From the File menu, select the Modify Database Structure option and choose your database. Then Go to the Define Class Attributes and Indexes. Identify all CATIA Classes where the Feature ID attribute appears (e.g., CATIA Product, CATIA Internal Component, CATIA Drawing, CATIA Sheet).
-
Remove now the CN_FEAT_ID attribute from any of the previously selected classes.
-
Recreate this attribute directly on the Documents super class (Name = CN_FEAT_ID, type = char, length = 127, Display Name and Description = Feature ID)
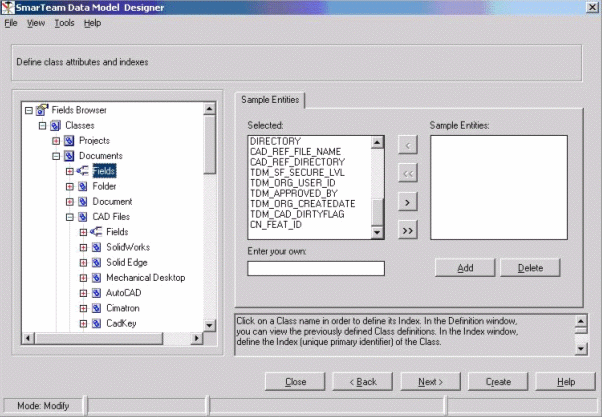
-
Click on Create to save the changes to the database.
-
Concerning the drawings, check if CATIA Sheet class exists. If not ensure that CATIA Drawing class supports CATIA Sheet class behavior and that you have the EXPOSEMODE=NO in CATIA section of SmTeam32.ini.
-
Concerning the drawings, verify the existence of the two attributes:
CN_SHEET_NAME ( type = char, length = 127, Display Name and Description = Sheet Name ) and CN_SHEET_FORMAT (type = char, length = 20, Display Name and Description = Sheet Format) under the CATIA Sheet class or under the CATIA Drawing class if the CATIA Sheet class doesn't exist. -
In the Integration Tools Setup, select CATIA / Mapping group types / Special Attributes.
-
Create or modify the following mapping: Additional Identifier with CATIA-Feature ID (Class = Catia, Attribute = Feature ID). Enable update of SmarTeam.
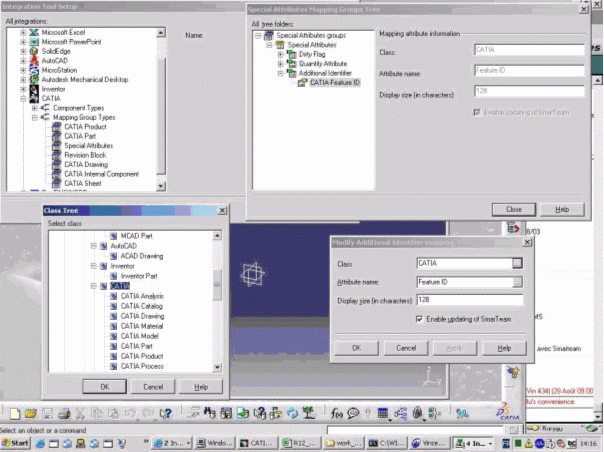
-
Modify or create now the mappings relative to the new drawing attributes:
Catia CN_SHEET_NAME with SmarTeam CN_SHEET_NAME and Catia CN_SHEET_FORMAT with SmarTeam CN_SHEET_FORMAT in CATIA / Mapping Group Types / CATIA Sheet (or CATIA Drawing if CATIA Sheet class doesn't exist). For these mappings, enable update of SmarTeam.
Case 1
In this part, we will transfer the CATIA component unique identifier (UUID or Feature ID, named CN_FEAT_ID in the database) from the CATIA leaf classes to the Documents superclass. And map this to CATIA class.
-
Launch the SmarTeam Data Model Designer.
-
From the File menu, select the Modify Database Structure option and choose your database.
-
Then go to the Define Class Attributes and Indexes.
-
Identify all CATIA Leaf Classes where the Feature ID attribute appears (e.g., CATIA Product, CATIA Internal Component, CATIA Drawing, CATIA Sheet).
-
For each of these classes note the table name (it is indicated on the right dialog box, typically, TN_CATIA_PRODUCT, TN_CATIA_DRAWING, TN_CATIA_SHEET).
-
Apply the following SQL statements for each of the selected tables (Launch your SQL command Interpreter (e.g. SQL + ), and type or copy and paste the following text , replacing table_name by the actual table name, if necessary replace also the table name of the Documents super-class here TN_DOCUMENTATION by the actual one):
ALTER TABLE TN_DOCUMENTATION ADD CN_FEAT_ID_TEMP VARCHAR(127);
CREATE VIEW MY_VIEW AS SELECT TN_DOCUMENTATION.OBJECT_ID, CN_FEAT_ID_TEMP, CN_FEAT_ID FROM TN_DOCUMENTATION LEFT OUTER JOIN table_name ON TN_DOCUMENTATION.OBJECT_ID = table_name.OBJECT_ID;
UPDATE MY_VIEW SET CN_FEAT_ID_TEMP = CN_FEAT_ID WHERE CN_FEAT_ID IS NOT NULL;
DROP VIEW MY_VIEW;
-
Coming back to the Data Model Designer, remove now the CN_FEAT_ID attribute from any of the previously selected classes.
-
Recreate this attribute directly on the Documents super class ( Name = CN_FEAT_ID, type = char, length = 127, Display Name and Description = Feature ID )
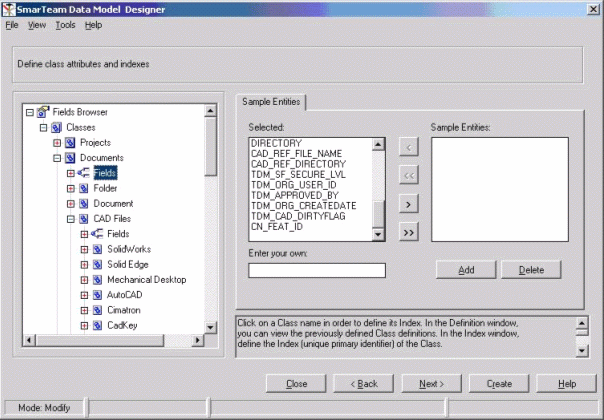
-
Click on Create to save the changes to the database.
-
To finish this UUID migration, type the following statements in SQL+
UPDATE TN_DOCUMENTATION SET CN_FEAT_ID = CN_FEAT_ID_TEMP;
ALTER TABLE TN_DOCUMENTATION DROP COLUMN CN_FEAT_ID_TEMP ;
-
Concerning the drawings, check if CATIA Sheet class exists. If not ensure that CATIA Drawing class supports CATIA Sheet class behavior and that you have the EXPOSEMODE=NO in CATIA section of SmTeam32.ini.
-
Concerning the drawings, verify the existence of the two attributes
CN_SHEET_NAME ( type = char, length = 127, Display Name and Description = Sheet Name ) and CN_SHEET_FORMAT (type = char, length = 20, Display Name and Description = Sheet Format) under the CATIA Sheet class or under the CATIA Drawing class if the CATIA Sheet class doesn't exist. -
In the Integration Tools Setup, select CATIA / Mapping group types / Special Attributes.
-
Create or modify the following mapping: Additional Identifier with CATIA-Feature ID (Class = Catia, Attribute = Feature ID). Enable update of SmarTeam.
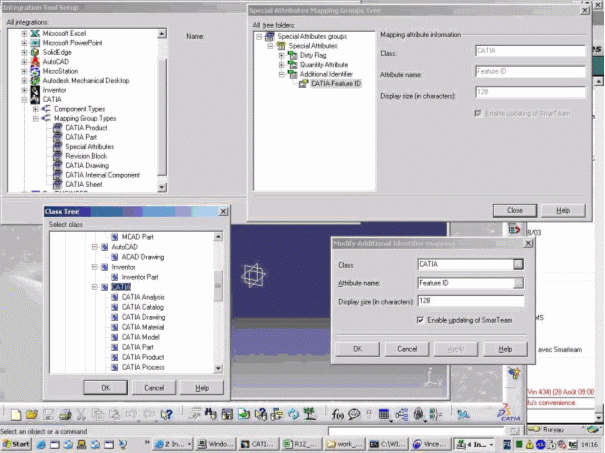
-
Modify or create now the mappings relative to the new drawing attributes:
Catia CN_SHEET_NAME with SmarTeam CN_SHEET_NAME and Catia CN_SHEET_FORMAT with SmarTeam CN_SHEET_FORMAT in CATIA / Mapping Group Types / CATIA Sheet (or CATIA Drawing if CATIA Sheet class doesn't exist). -
For these mappings, enable update of SmarTeam.
Case 2.
-
Launch the SmarTeam Data Model Designer.
-
From the File menu, select the Modify Database Structure option and choose your database.
-
Go to the Define Class Attributes and Indexes window and from the CATIA class, check if CATIA Sheet class exists. If not ensure that CATIA Drawing class supports CATIA Sheet class behavior and that you have the EXPOSEMODE=NO in CATIA section of SmTeam32.ini.
-
Concerning the drawings, verify the existence of the two attributes:
CN_SHEET_NAME ( type = char, length = 127, Display Name and Description = Sheet Name ) and CN_SHEET_FORMAT (type = char, length = 20, Display Name and Description = Sheet Format ) under the CATIA Sheet class or under the CATIA Drawing class if the CATIA Sheet class does not exist. -
In the Integration Tools Setup, select CATIA>Mapping group types>Special Attributes.
-
Modify or create now the mappings relative to the new drawing attributes: Catia CN_SHEET_NAME with SmarTeam CN_SHEET_NAME and Catia CN_SHEET_FORMAT with SmarTeam CN_SHEET_FORMAT in CATIA / Mapping Group Types / CATIA Sheet (or CATIA Drawing if CATIA Sheet class doesn't exist). For these mappings, enable update of SmarTeam.
V5R11+ Specific upgrade
If you already are running V5R11 or a more recent version, skip this paragraph and go directly to the V5R12 specific upgrade.
Product installation on the upgrade machine
-
Install R11 standalone and administrative tools (select Editor Installation)
-
Install last available service pack (at least SP8)
-
Install SmartDBUpgradeV5R11SPx from your Kits\SmartDBUpgrade folder of your service pack disk.
-
Install SmartDBRepairingV5R11SPx from your Kits\SmartDBRepairing folder of your service pack disk (at least SP8, oracle issue with previous releases)
Automatic Database upgrade
Once R11 upgraded the database schema will be compatible with R12 as well as with R13.
Prepare ini files
-
Copy the reference SMASSCLS.INI to the SmarTeam directory of the upgrade machine.
-
Copy the reference SmTeam32.ini file to the LocalConfig folder of the SmarTeam directory of your upgrade machine. This file is the relevant merge of admin and client files. Include also the [Tree-VisualSetting] section of the reference user ini file (located in the LocalConfig\[db]\[username] subfolder)
-
If you use customized integration for specific files, register these files in the [AdditionalFileTypes] section of the UpgradeSmartDatabase.ini file located in the SmarTeam LocalConfig directory by specifying corresponding CAD Component Type. Add a line under the section using this convention:
Customized File Type = CAD Component Type
NB: the list of all available component types may be found in the Integration Tool Setup, and correspond to the class behaviors of the Data Model designer, while Customized File Type is a custom entry of the SmarTeam File Type lookup table.
Oracle server temporary Tuning for upgrade
-
Check the database for compliance with the memory specifications in the Oracle Fine Tuning for SmarTeam Implementers Guide.
-
Set SORT_AREA_SIZE = 524288 (for 8.1.7) (Instance / Edit Database / General / Initialization Parameters
-
Turn ARCHIVE mode OFF.
-
Check that your SmarTeam related tablespace and SYSTEM tablespace have at least 40% free space. The TEMP tablespace must have at least 100 MB. Check you have sufficient disk space on the database server.
-
Type In SQL+ as SYSTEM ( TABLESPACE_NAME is the name of your SmarTeam related tablespace):
ALTER TABLESPACE TABLESPACE_NAME NOLOGGING
-
In SQL+ as a SmarTeam user, set the following statement:
spool c:\nologging.sql
select 'ALTER TABLE '||TABLE_NAME||' NOLOGGING;' from USER_TABLES;
spool off
@c:\nologging;
/
Automatic upgrade of the database
-
Launch UpgradeSmartDatabase.exe from the Upgrade folder of your SmarTeam directory. Warning: this step may be more than one hour long.
Oracle server tuning after upgrade
-
Type In SQL+ as SYSTEM (Where TABLESPACE_ NAME is your SmarTeam related database tablespace)
ALTER TABLESPACE TABLESPACE_NAME LOGGING;
-
In SQL+ as a SmarTeam user, set the following:
|
spool c:\nologging.sql select 'ALTER TABLE '||TABLE_NAME||' LOGGING;' from USER_TABLES; spool off
/ |
-
Turn ARCHIVE mode ON if necessary.
Indices repairing
-
Perform now SmartDBRepairing.exe from your bin folder of your SmarTeam directory, choose indices Repairing.
WizSrc Upgrade
- Run SmarTeamWizSrcUpgradeWizard.exe from the upgrade folder of your SmarTeam directory.
Registering Files out of the vault
This step is only needed if you use File control-classes that are not revision managed or if you performed the migration with remaining new or checked out files (which was not recommended)
-
In the SmTeam32.ini file located in <SmarTeam>\LocalConfig\<database>\SmTeam32.ini, add the following entry:
[Migration]
ImportStandardParts=TRUE
-
Ensure that the Administrator has read-write permissions in the area where the files of non-revision managed object reside.
-
Administrator should log into SmarTeam, the file catalog is created then once. This may take some time, depending on the number of files.
Viewer Setting and CGR generation
Change the file type to be viewed for CATIA Part and CATIA Product classes.
-
Select SmarTeam>Tools>Applications Setup.
-
From the Applications Setup window that is displayed, select CATIA class.
-
Click on Tools.
-
Click the Embedded Viewer tab.
-
Select Modify.
-
Replace .CATProduct.hcg with .CATProduct.cgr.
Setting Update Rights to SmarTeam users
Users need update rights to ensure that CATIA can upgrade TDM_COMPONENT_NAME on the fly when opening any CATIA document.
-
Launch Users Maintenance.
-
Click the Authorization icon.
-
For users likely to use CATIA documents, set update rights for all states on CATIA documents.
V5R12 + Specific Upgrade
If you are already running V5R12 skip this paragraph and go to V5R13 specific upgrade, otherwise:
Important note: if R12 is not your target release, but R13 is, the best is to apply the following with SmarTeam R13 installed rather than R12.
Product Installation
-
Install R12 core services on a server (dedicated or not) (select foundations).
-
Install last available SP (currently SP6) on this server.
-
Install R12 GA on the upgrade machine.
-
Install last available SP (currently SP6) on this machine.
-
Install SmartDBUpgradeV5R12SPx.exe from the kits\SmartDBUpgrade directory of the service pack CD (to run later Wizsrc update only)
Session Management Configuration
-
On the server Run the Authentification Manager Utility (SmarTeam \ bin \ SmarTeam.Std.AuthenticationManager.exe), choose SmarTeam Authentification protocol, check "Authentificate using the following database" and select your database in the list.
NLS Configuration
-
Verify that the reference tdmerror.err, tdmwizard.err, tdmvlsrv.msg are on the SmarTeam root directory of the upgrade machine.
-
Run the NLS Extractor Utility smartNLSextractor.exe from the upgrade machine (Note: Data will be extracted to XML files in the …\SmarTeam\NLS\<language RFC id>\CUSTOM folder. For example <language RFC id> = fr for the French language. For further information on RFC codes, and the official list of language codes, refer to: http://www.oasis-open.org.
-
Copy the NLS folder created by the NLS Extractor Utility (located under SmarTeam) to the Core Services Server.
-
Define the copied folder as Shared for Read/Write access for all users of SmarTeam products.
-
In the System Configuration Utility, update the location of the <rootPath> key for the copied NLS folder, located in: \SmarTeam\ConfigurationSettings\Data\Domain\SmarTeam.std.nls.xml to point to the NLS folder of the core services server.
WizSrc Upgrade
This step is optional if your target release is R13 and not R12.
-
Run SmarTeamWizSrcUpgradeWizard.exe from the Upgrade Folder of your SmarTeam directory.
V5R13 + specific upgrade
Product Installation
-
Install R13 core services on a server (dedicated or not) (select foundations).
-
Install last available SP on this server.
-
Install R13 GA on the upgrade machine.
-
Install last available SP on this machine.
-
Install SmartDBUpgradeV5R13SPx.exe from the kits\SmartDBUpgrade directory of the service pack CD (to run later Wizsrc update only).
System Configuration
-
Get the reference configuration files and put them on the upgrade machine:
SmTeam32.ini - genrep.ini - ServerSafeScripts.ini - SmarDESK.ini
SmartDbExplorer.ini - SmartQuickReport.ini - SmERPSyncServer.ini
Smupgsrc.ini - Smvlt32.ini - SMWIZA32.INI - SmWorkFlow.ini
Note 1 :If you are using both administrator and client SmTeam32.ini, merge the two on one single reference file.
Note 2 : The user specific configuration will be automatically migrated on first user log-on.
-
Upgrade the system configuration using the Configuration migration wizzard.
-
Verify the migration with the Configuration Manager Editor (Start \ Program Files \ SmarTeam \ Administrator Tools).
WizSrc Upgrade
-
Run the SmarTeamWizSrcUpgradeWizard.exe.program from the Upgrade folder of your SmarTeam directory.
Web Editor
The user-defined configuration in Web Editor must be redefined manually in R13
Web Viewer/Markup monitor
Uninstall then reinstall these components.
Post-activities
Deployment
-
Upgrade now all server and client machines by installing all pre-installed products of your SmarTeam target release.
-
Install on all SmarTeam machine the last available service pack.
Verifying functionality
-
Check CAD Integration existing and new objects with links, including drawings, large assemblies, parts within assembly and single parts, design tables -
-
Check Data Model Designer, browse your updated database schema.
-
Check Sequence Designer, create and test new objects that uses sequences.
-
Check user scripts functionality.
Set CAIOpen.exe in the Database
Since SmarTeam R17 Open in CATIA goes through a new executable (CAIOpen instead of CNEXT) those migrating old database and taking benefits of new the development will have to use it. This new way is not set by default, so customer will have to manually set it. To do so, please perform the following steps:
-
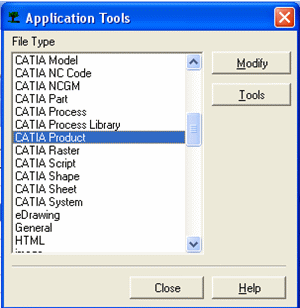
The Application Tools needs to be modified in order to open document through a particular open in CATIA. From the Application Tools dialog box, select the CATIA Product option and click the Modify button.
-
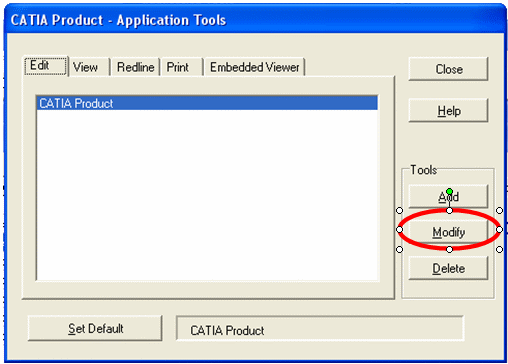
In the CATIA Product – Applications dialog box, select CATIA Product and click the Modify button.
-
The Update dialog box opens. Replace the Old command line (“CNEXT.exe”) by a new one: “CAIOpen.exe”.
-
Also insert the Command line parameter as: %1.
-
Keep the DDE part of the panel as empty.
- This modification needs to be done for each CATIA V5 document Type.
- This modification needs to be done in both “Edit” and “View” tabs.
Ensuring that Revision Blocks are Updated After Each Release Operation
What you need to do is:
-
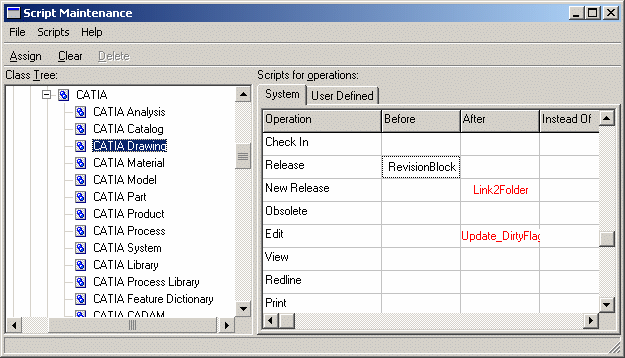
Remove the RevisionBlock script: from the SmartBasic Script Maintenance utility, select RevisionBlock and click Clear.
Recommendation
Always perform New Release operations from CATIA.
Note
For performance reasons, parameters are not cleared before update operations. For example: A Revision Block has been created with 8 rows. 7 rows are filled because 7 release operations have been done on the drawing. If 5 old Released versions are deleted in the database, the Update operation will apply only onto 2 rows (because only 2 versions of the document persist in the database). Consequently, other parameters will have obsolete values. You must clear these parameters.
